Google Ads has recently introduced a new interface for setting up conversion actions, but many users still see the older version depending on their account status or rollout phase.
Both versions allow you to create website conversion actions, but the steps and screen layouts differ slightly.
This guide provides clear, step-by-step instructions for both the old and new Google Ads panels, so you can successfully create a conversion action no matter which interface your account is using.
Creating a New Google Ads Conversion With The Old Google Ads Panel
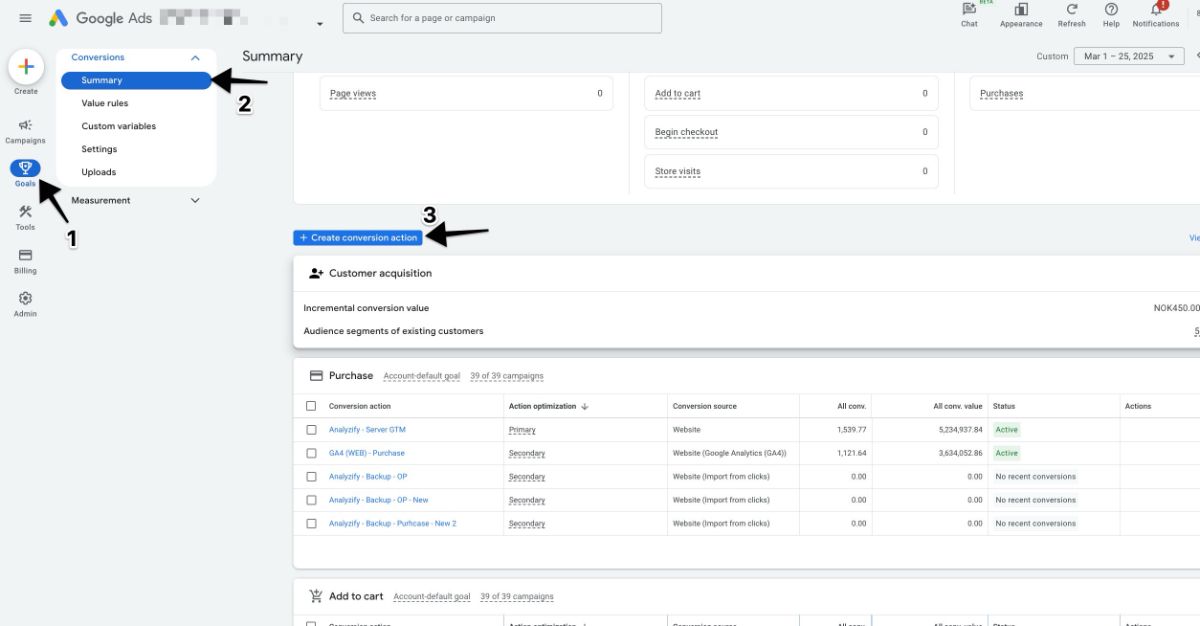
Navigate to Conversion Creation In Google Ads
Go to “Goals” > “Create conversion action”
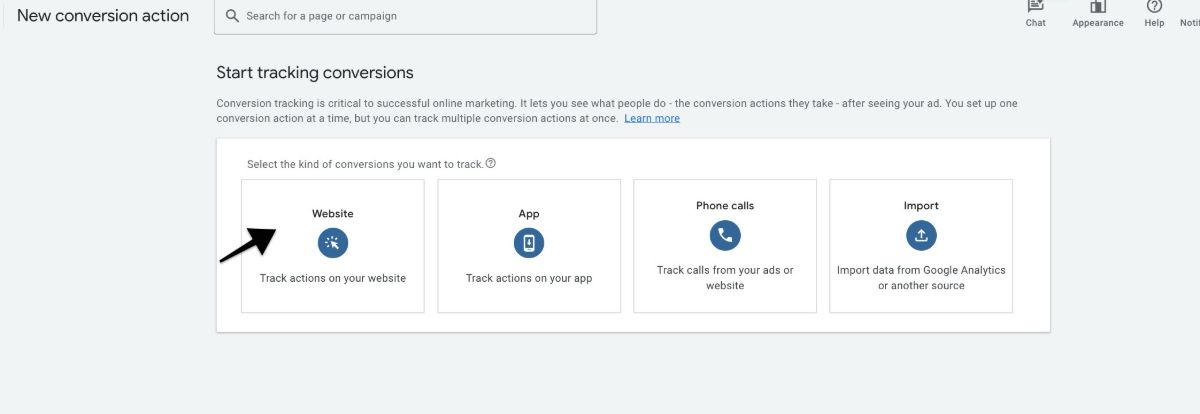
Select Website as the Conversion Type
Choose “Website” when prompted for the conversion kind.
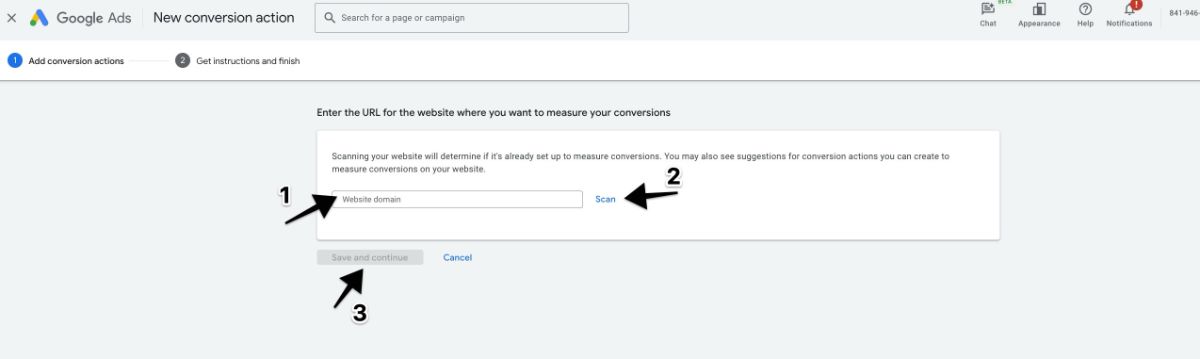
Scan Your Website
Enter your website domain and click Scan.
Adjust the Conversion Settings
Configure the conversion settings on this page.
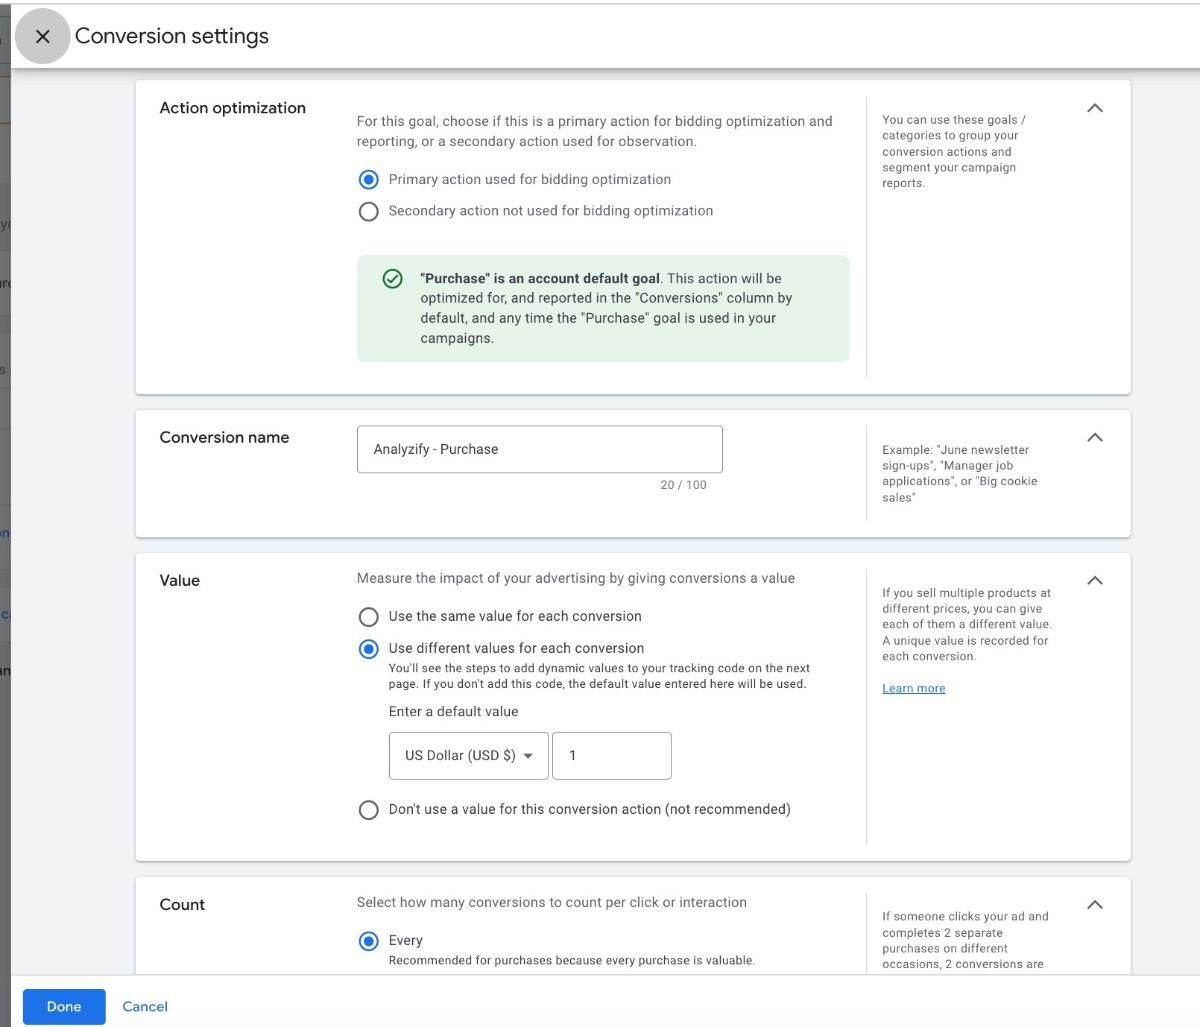
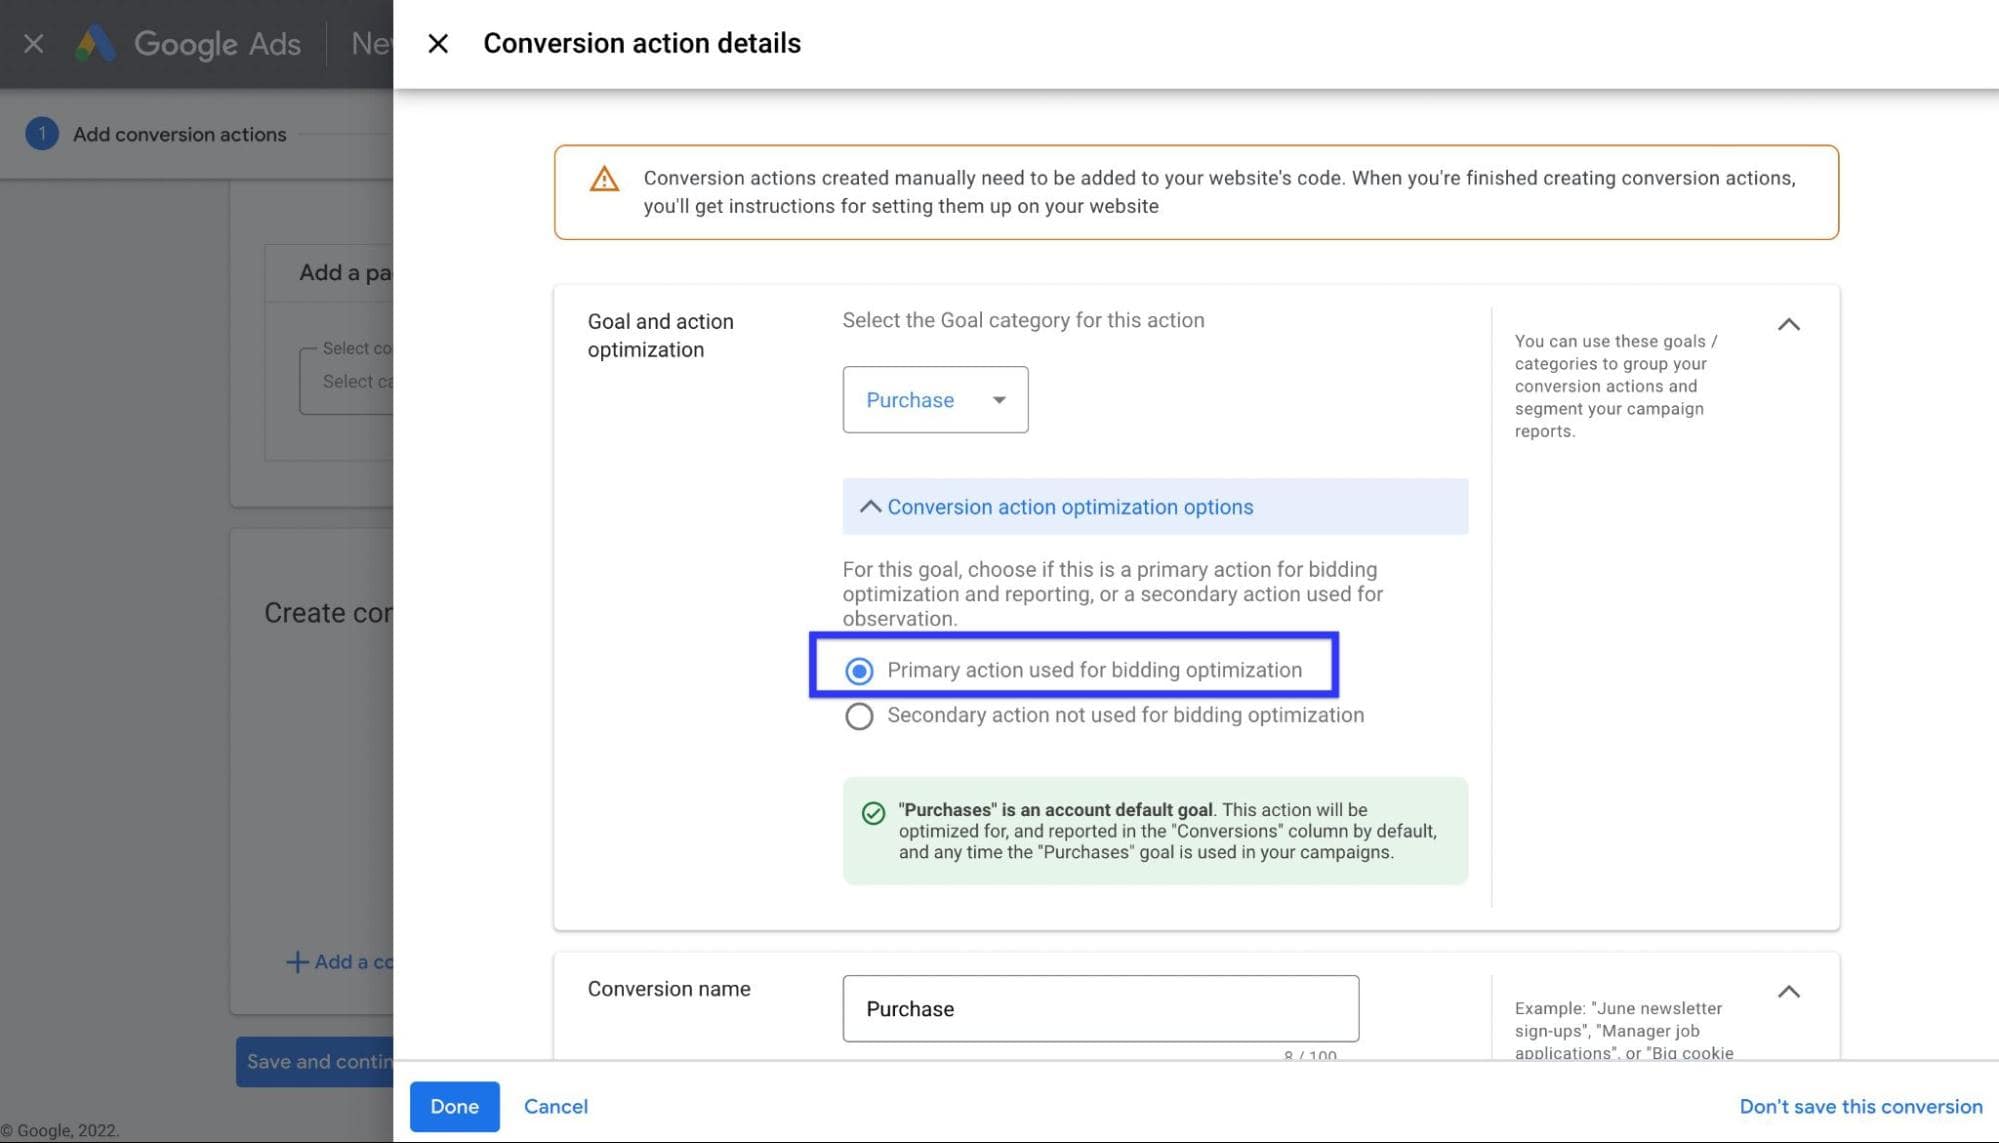
Select Conversion Goal
Choose the goal of the conversion you wish to create. In this example, "Purchase" is selected.

Choose the Type of Action
Choose "Primary" if you wish to create a main conversion, or choose "Secondary" if you don't want this conversion to play a role in the optimizations. Click here to learn more.
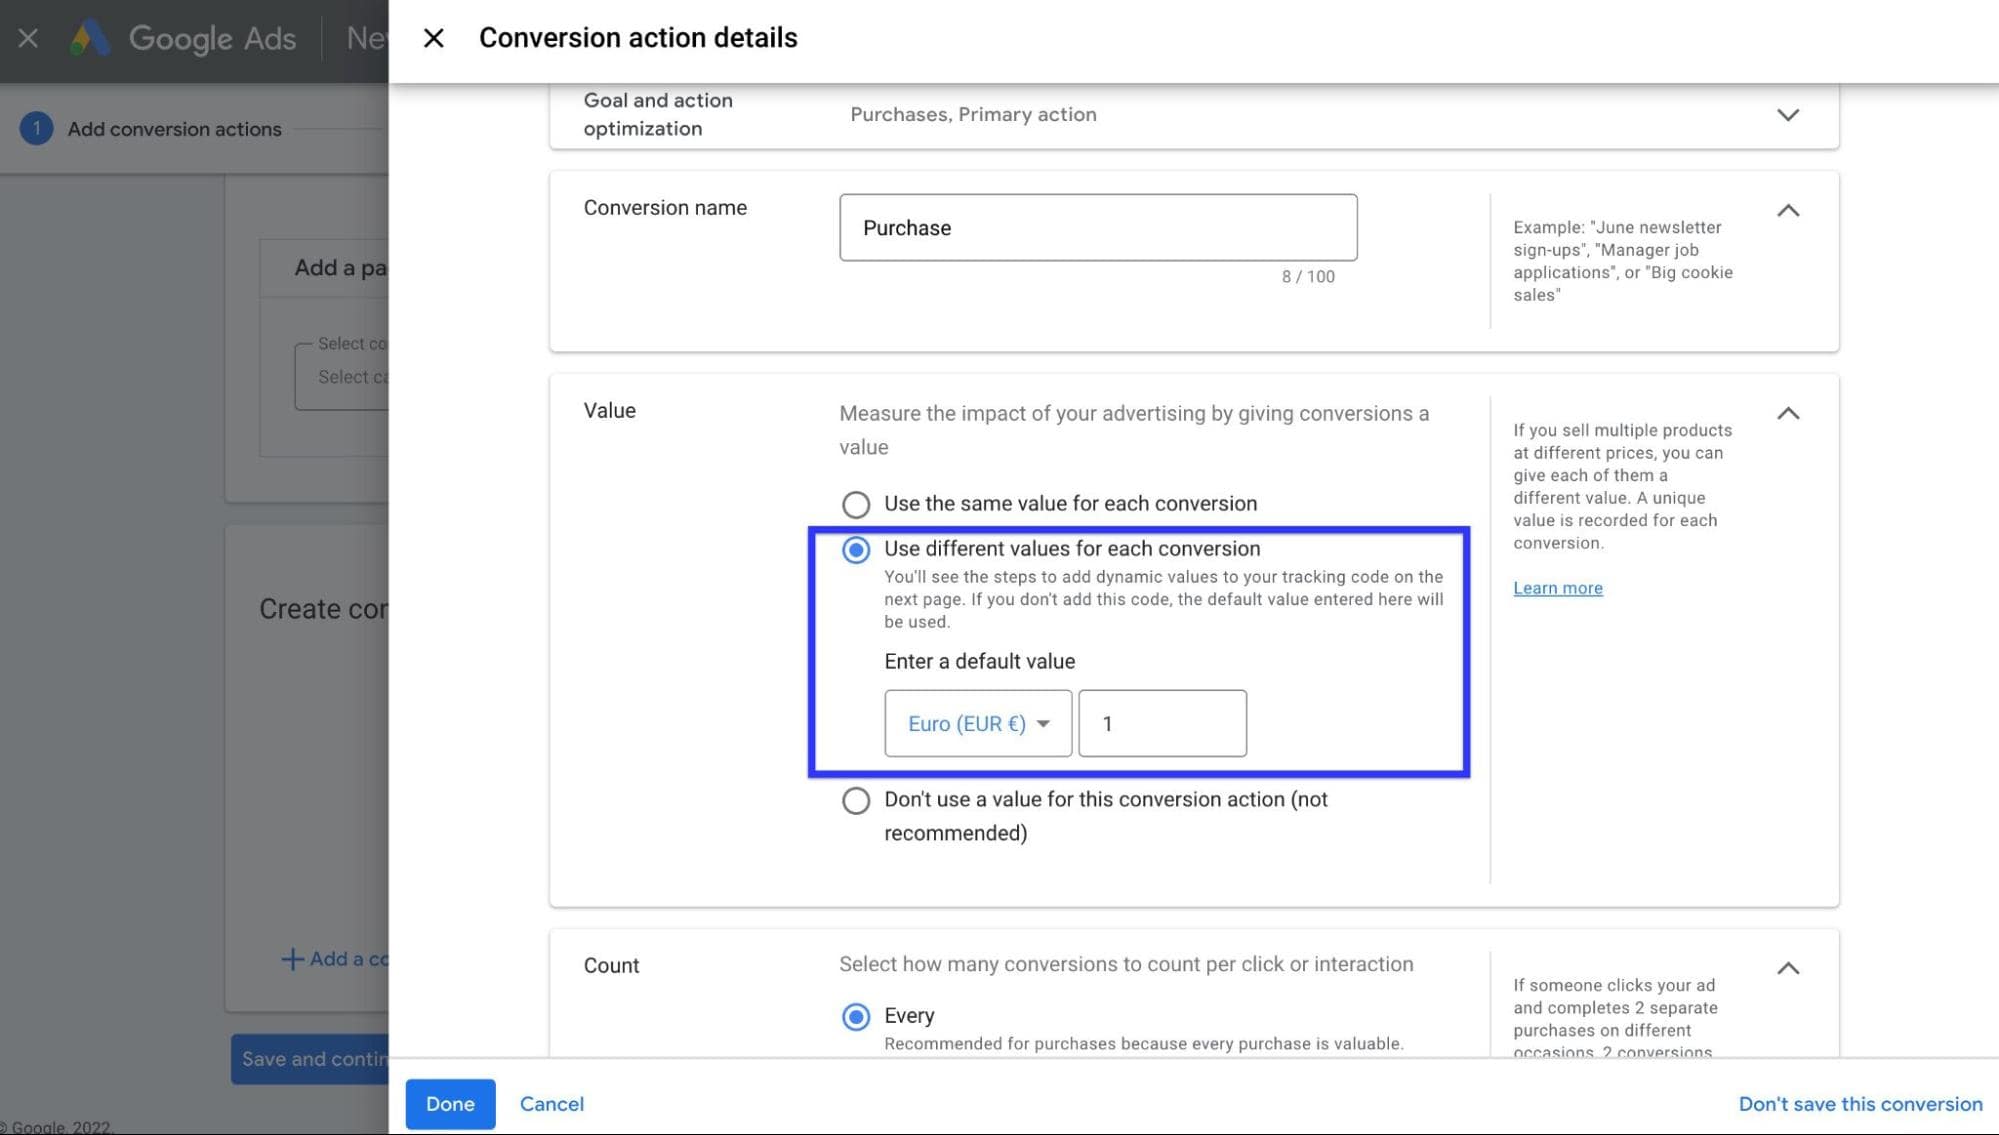
Use Different Values
Choose "Use different values for each conversion", as each purchase will have a different value.
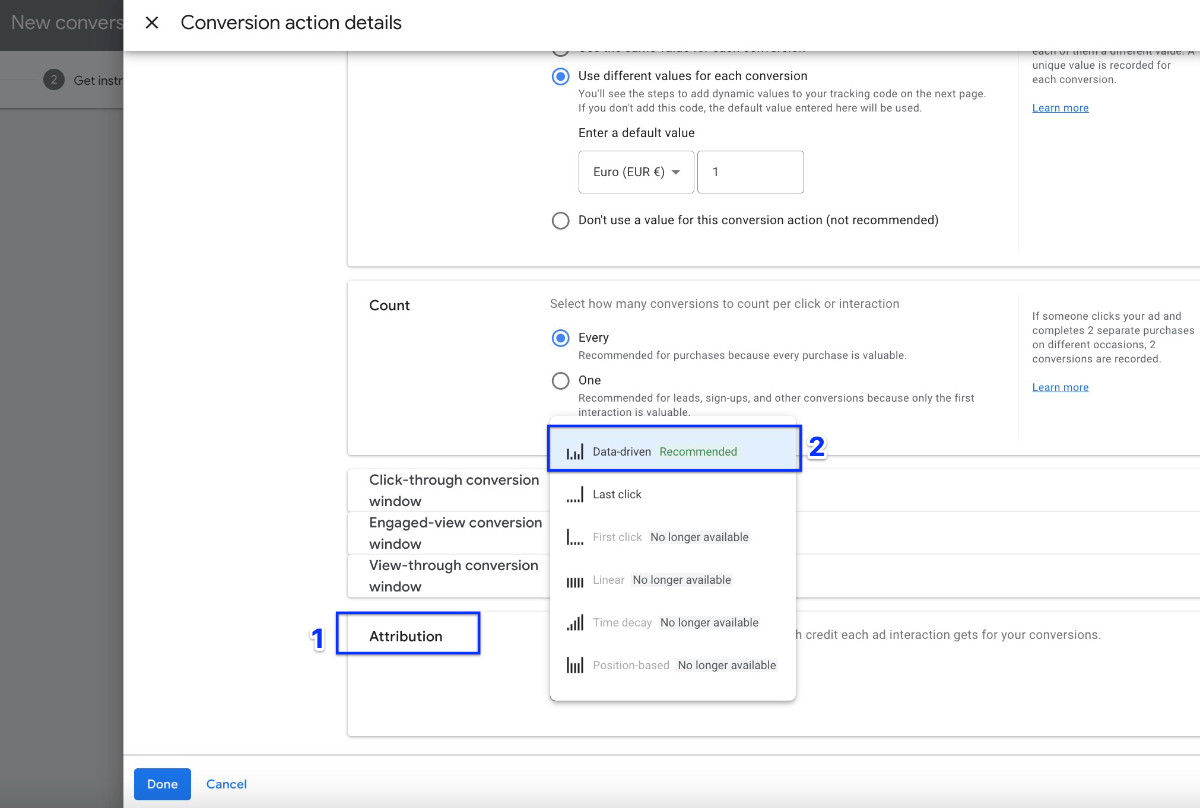
Choose Attribution Model
Google now offers only two attribution models as active options: Data-Driven and Last Click. The Last Click model completely disregards any other interactions a customer has with your marketing channels on their conversion journey. It may make sense if your company has a short sales cycle. However, if you have multiple marketing channels, opting for the Data-Driven model would be more beneficial. You can read the article we created for more information about data-driven attribution model.
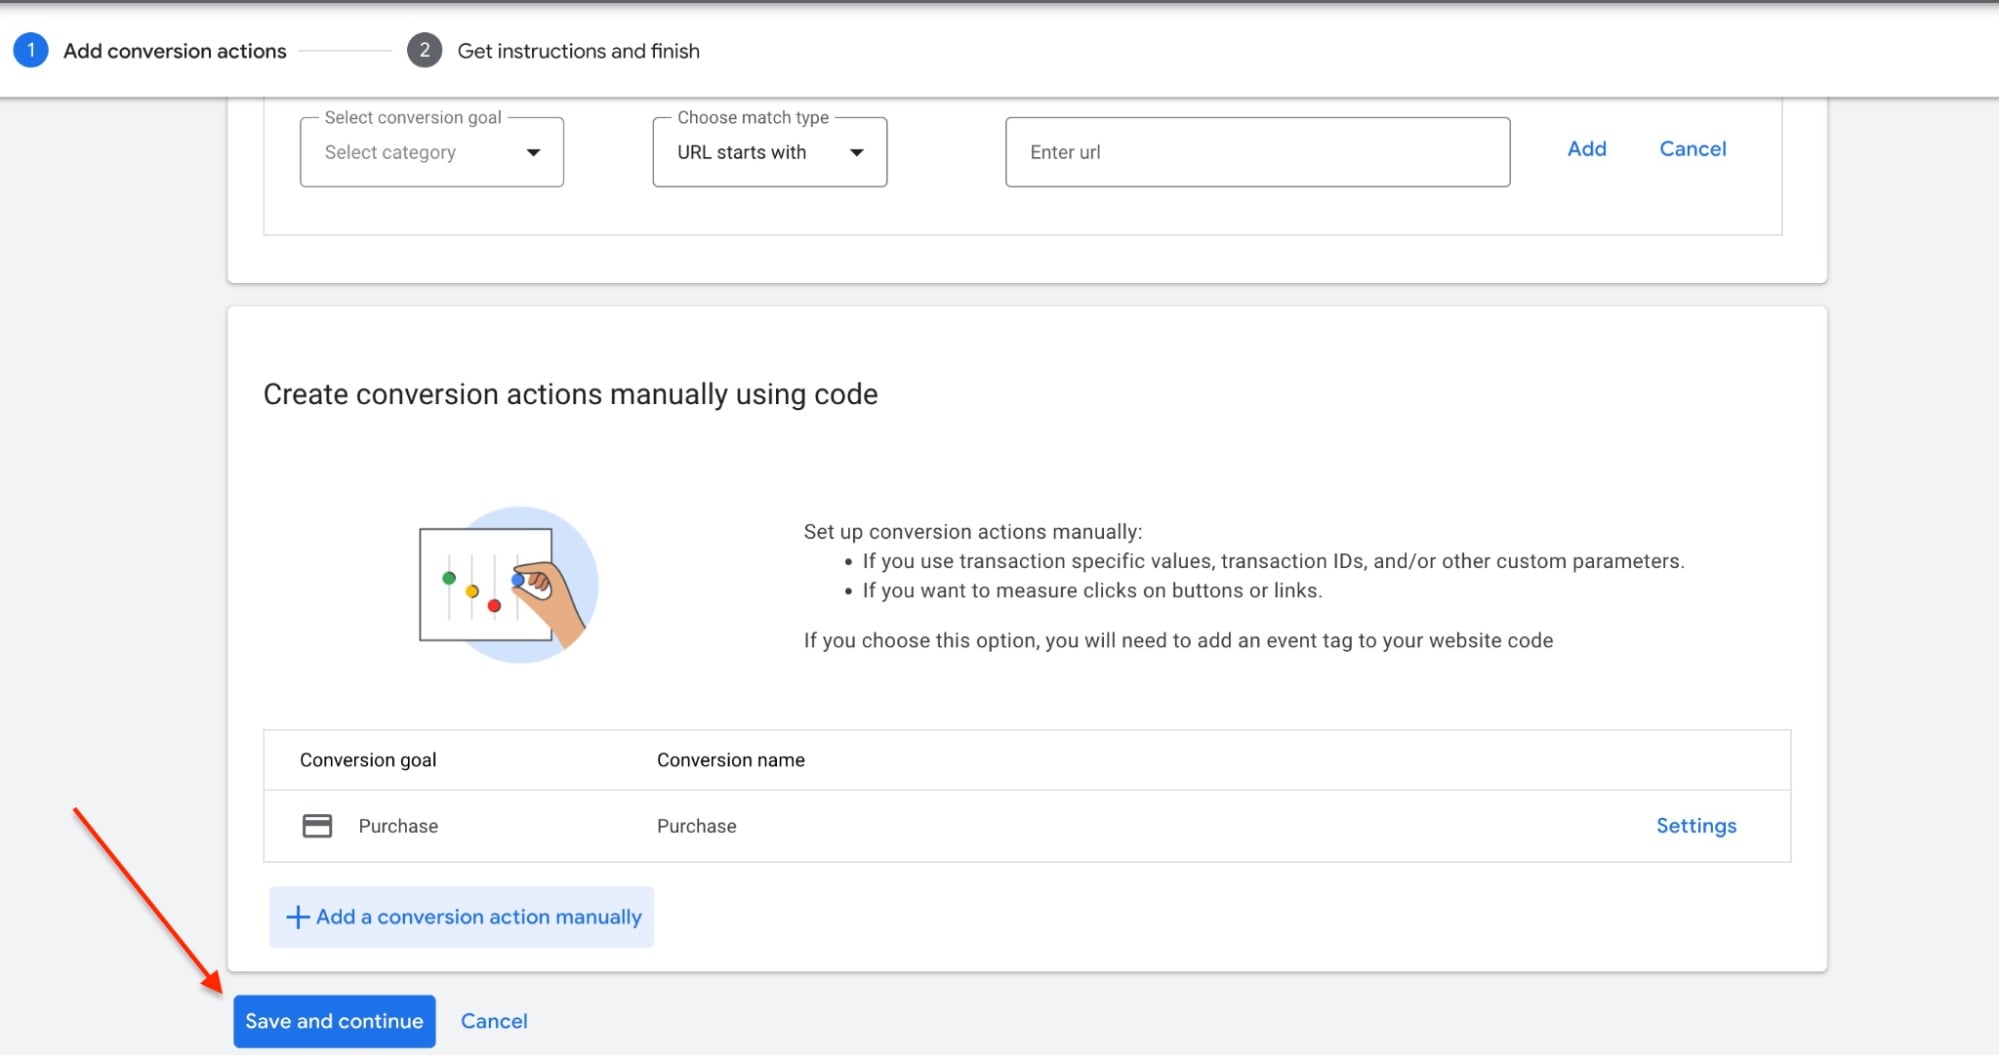
Save and Continue
Click "Save and continue".
Use Google Tag Manager
>Your conversion has now been created! Choose the "Use Google Tag Manager" method in order to see your Conversion ID and label.
You can now copy your Conversion ID and label from here. Jump “Google Ads Conversion ID & Label - Step 1” this step on this page where to put the ID and Label.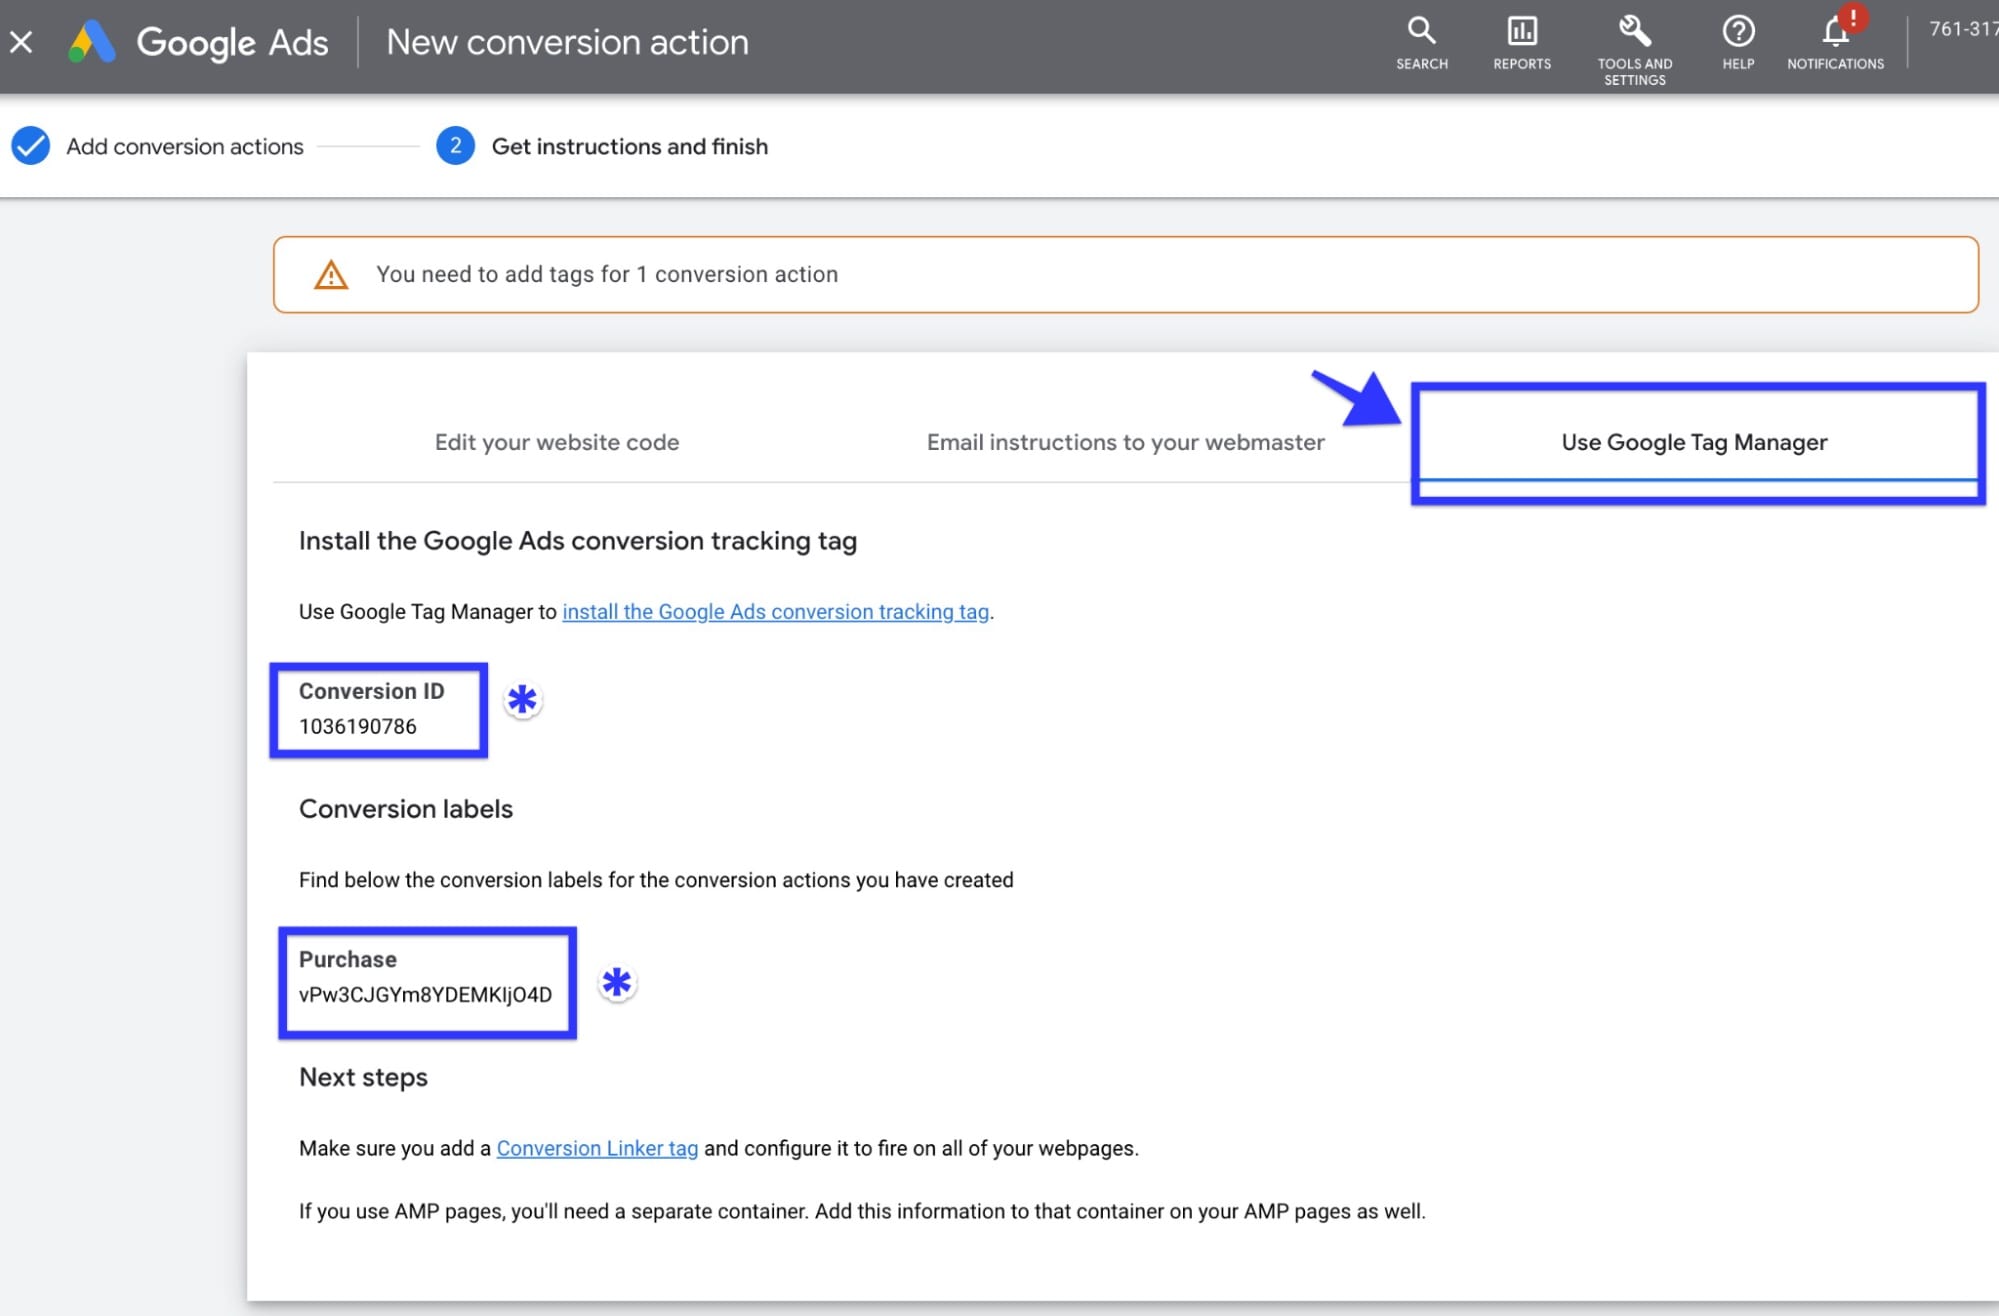
You can now copy your Conversion ID and label from here. Jump “Google Ads Conversion ID & Label - Step 1” this step on this page where to put the ID and Label.
All Done!
Click "Done" and you are good to go 🙂

Creating a New Google Ads Conversion With The New Google Ads Panel
Navigate to Conversion Creation
Log in to your Google Ads account. Go to “Goals” > “Create conversion action”
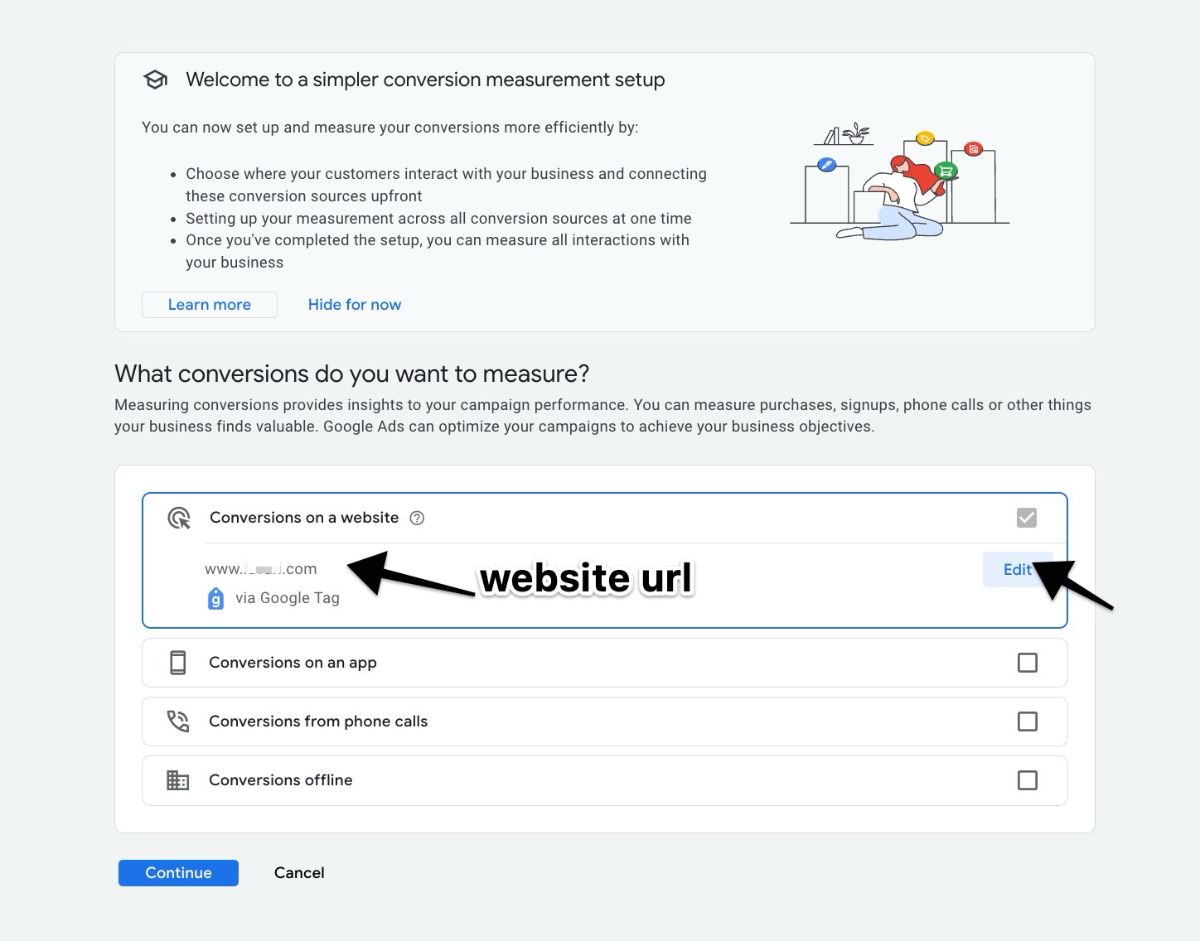
Start a Website Conversion
Click “Conversions on a website”, enter your website URL, and click Scan.
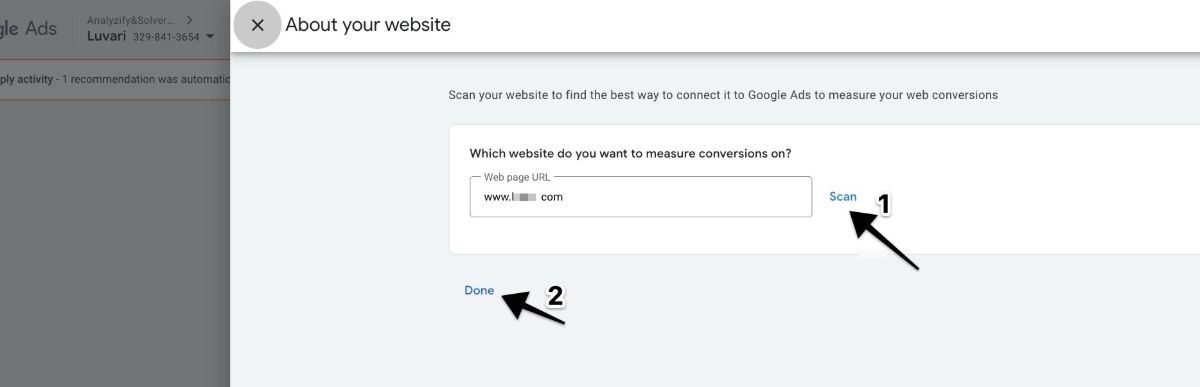
Edit or Confirm Website Scan
If the domain has been scanned before, it will appear directly. Otherwise, click Edit to modify or scan again. Click Continue to proceed.
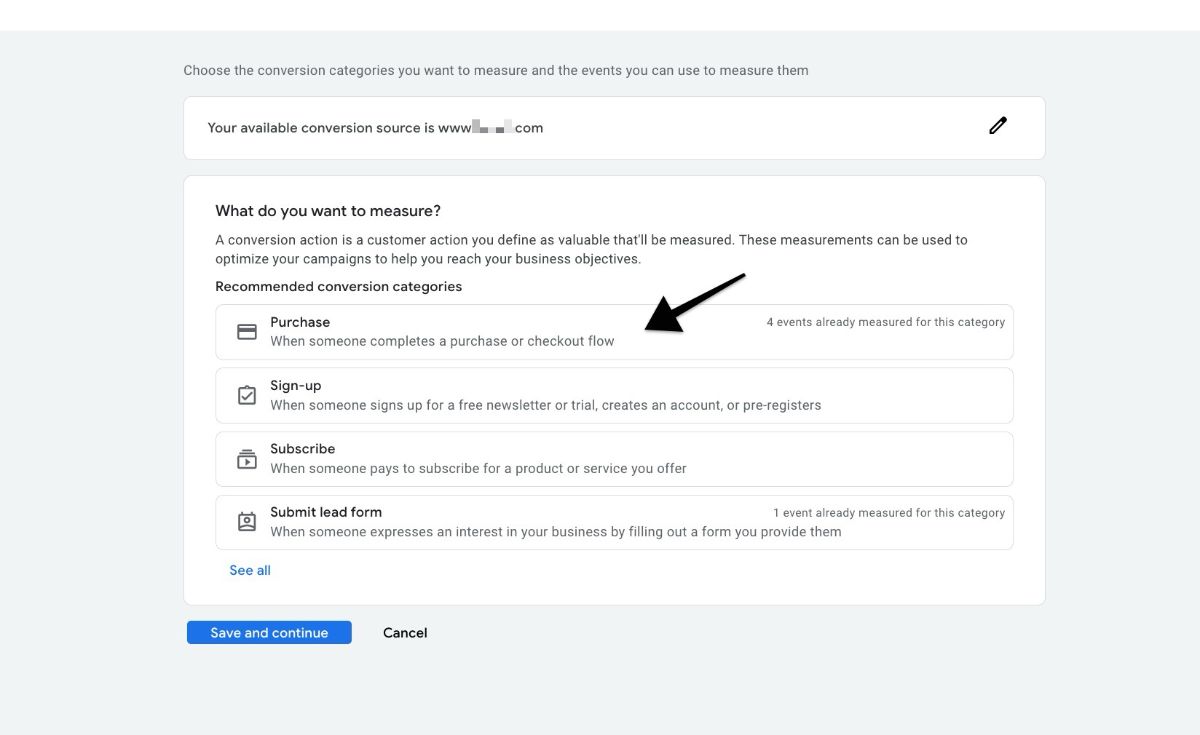
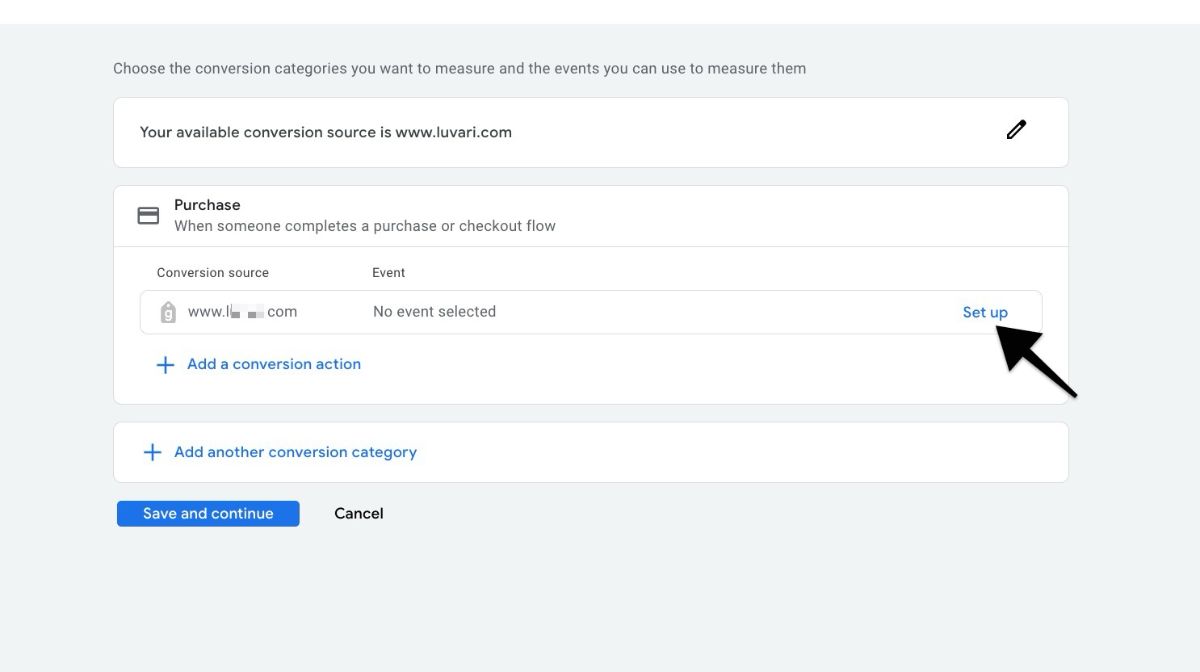
Select a Conversion Category
Choose a category like Purchase or another relevant option.
Begin Setup
Click Set up to start configuring your conversion.
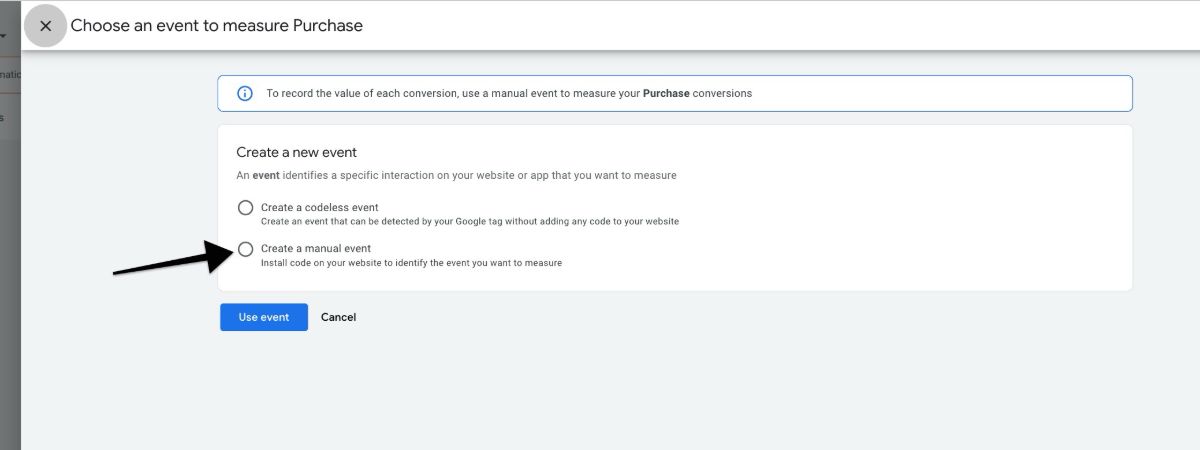
Choose Manual Event Option
Select “Create a manual event”.
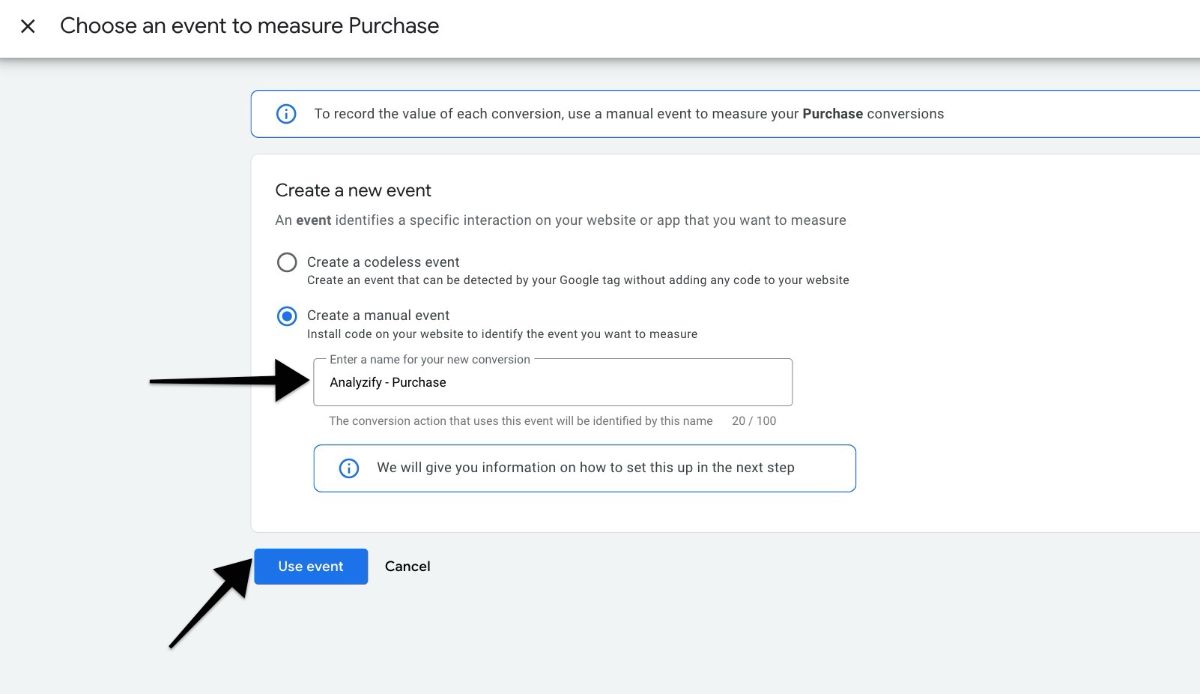
Name Your Conversion
Enter a name like "Analyzify – Purchase", then click “Use event”.
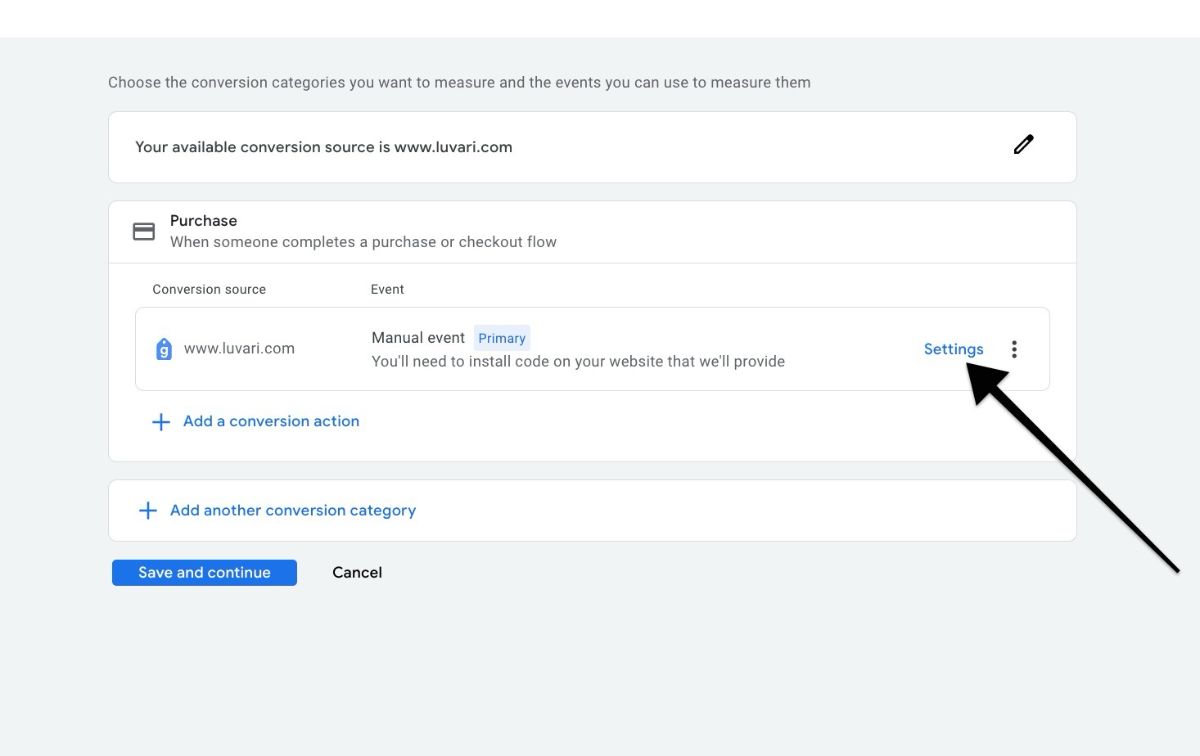
Open Conversion Settings
Click on the Settings of the newly created manual event.
Configure Conversion Settings
Adjust the settings following from the Step 4 in the tutorail above(Creating a New Google Ads Conversion With The Old Google Ads Panel - Step 4).
You Are Done!
Finalize the process by clicking Save and Continue.
