If you have completed your Analyzify setup, including the Google Ads Conversions, this tutorial is for you to test and make sure the tag is working perfectly.
At first, we will visit the Google Ads Conversions screens to see if the data is coming there as expected. Later on, we will check if everything is in place, and then we will validate the data through Google Ads.
Before continuing with the validation, please make sure you receive several orders after your setup has been completed. You should also allow Google Ads a few hours to proceed your data. If your store doesn’t receive orders regularly, then you should run a test order and again wait for a couple of hours to continue with the validation.
Validating Conversions through Google Ads
Follow the steps in this link to understand when was the last time the Google Ads conversion tracking tag had been triggered.
According to the validation steps in the link, if you aren't seeing the “Last Seen:” time correctly, then you should follow the steps below to double-check your setup. In most cases, constants in Google Ads tend to be missing in Google Tag Manager, so importing them to GTM will most likely solve your problems if you do not see any data coming from your GTM-integrated conversions.
Let’s start with making sure that constants and the related tags are working correctly.
Double-Check Your Setup
Follow the steps below if you saw a problem with your data during the conversion health check.
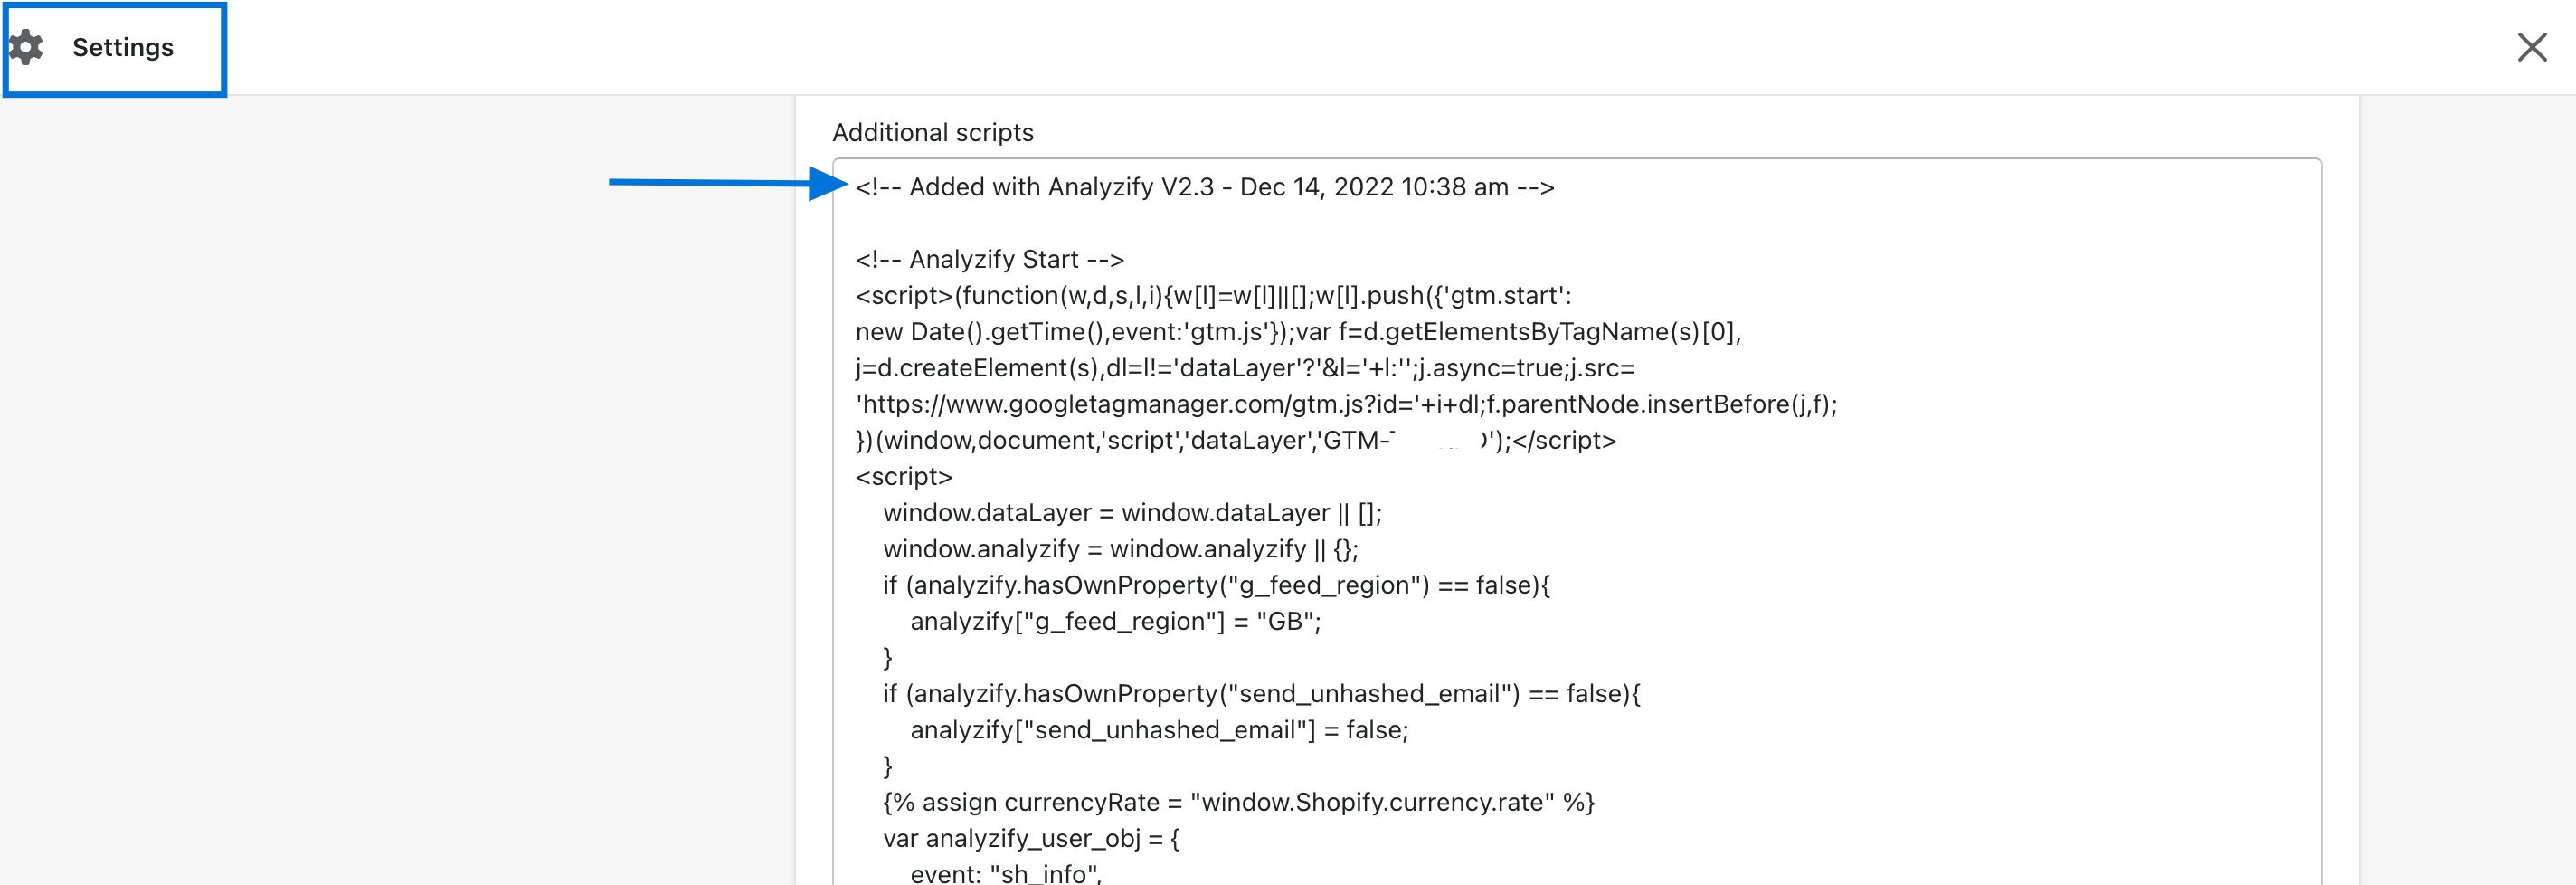
The Google Tag Manager code snippet should be placed on your "thank you" page. Go to Shopify's "Admin" page > "Settings" > "Additional Scripts" > "Order status page"
If the snippet is not there, re-process your Analyzify setup or contact our support team.
Notes:
- The code block might not be visible at the top of the scripts. Please scroll down and make sure it is there.
- For Shopify Plus stores , the code snippet can also be placed in the theme files, which could either be in the “checkout.liquid” or the “analyzify-gtm-checkout.liquid” file.
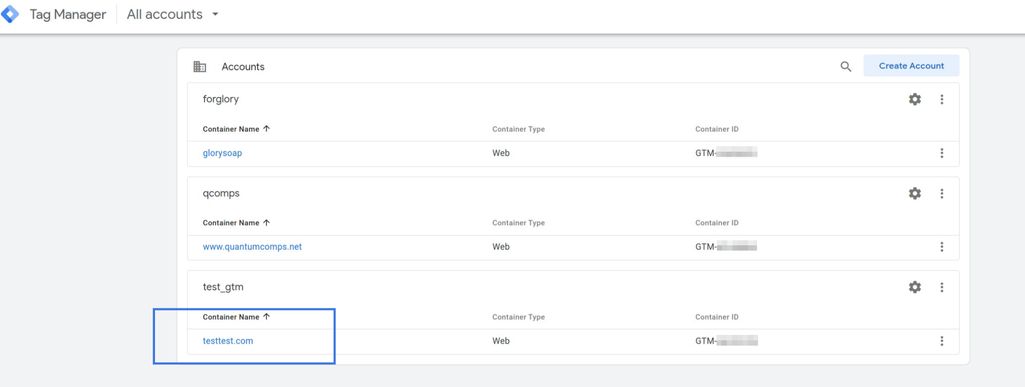
Log in to your Google Tag Manager account and select a container.
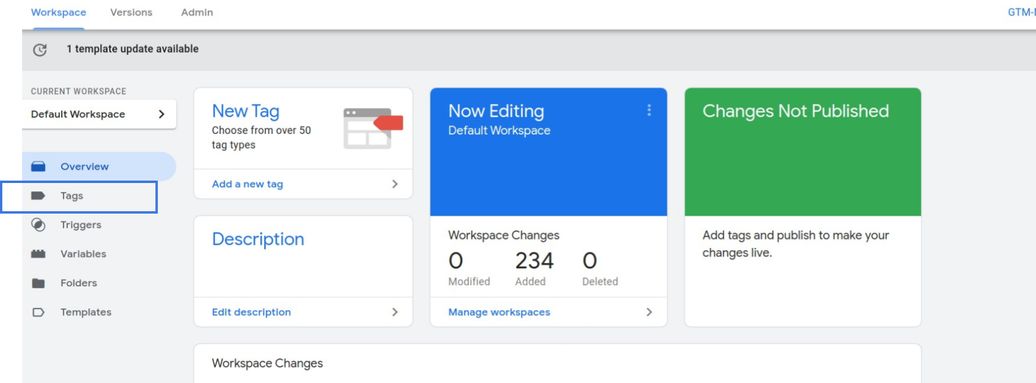
Click on "Tags" on the left-side menu.
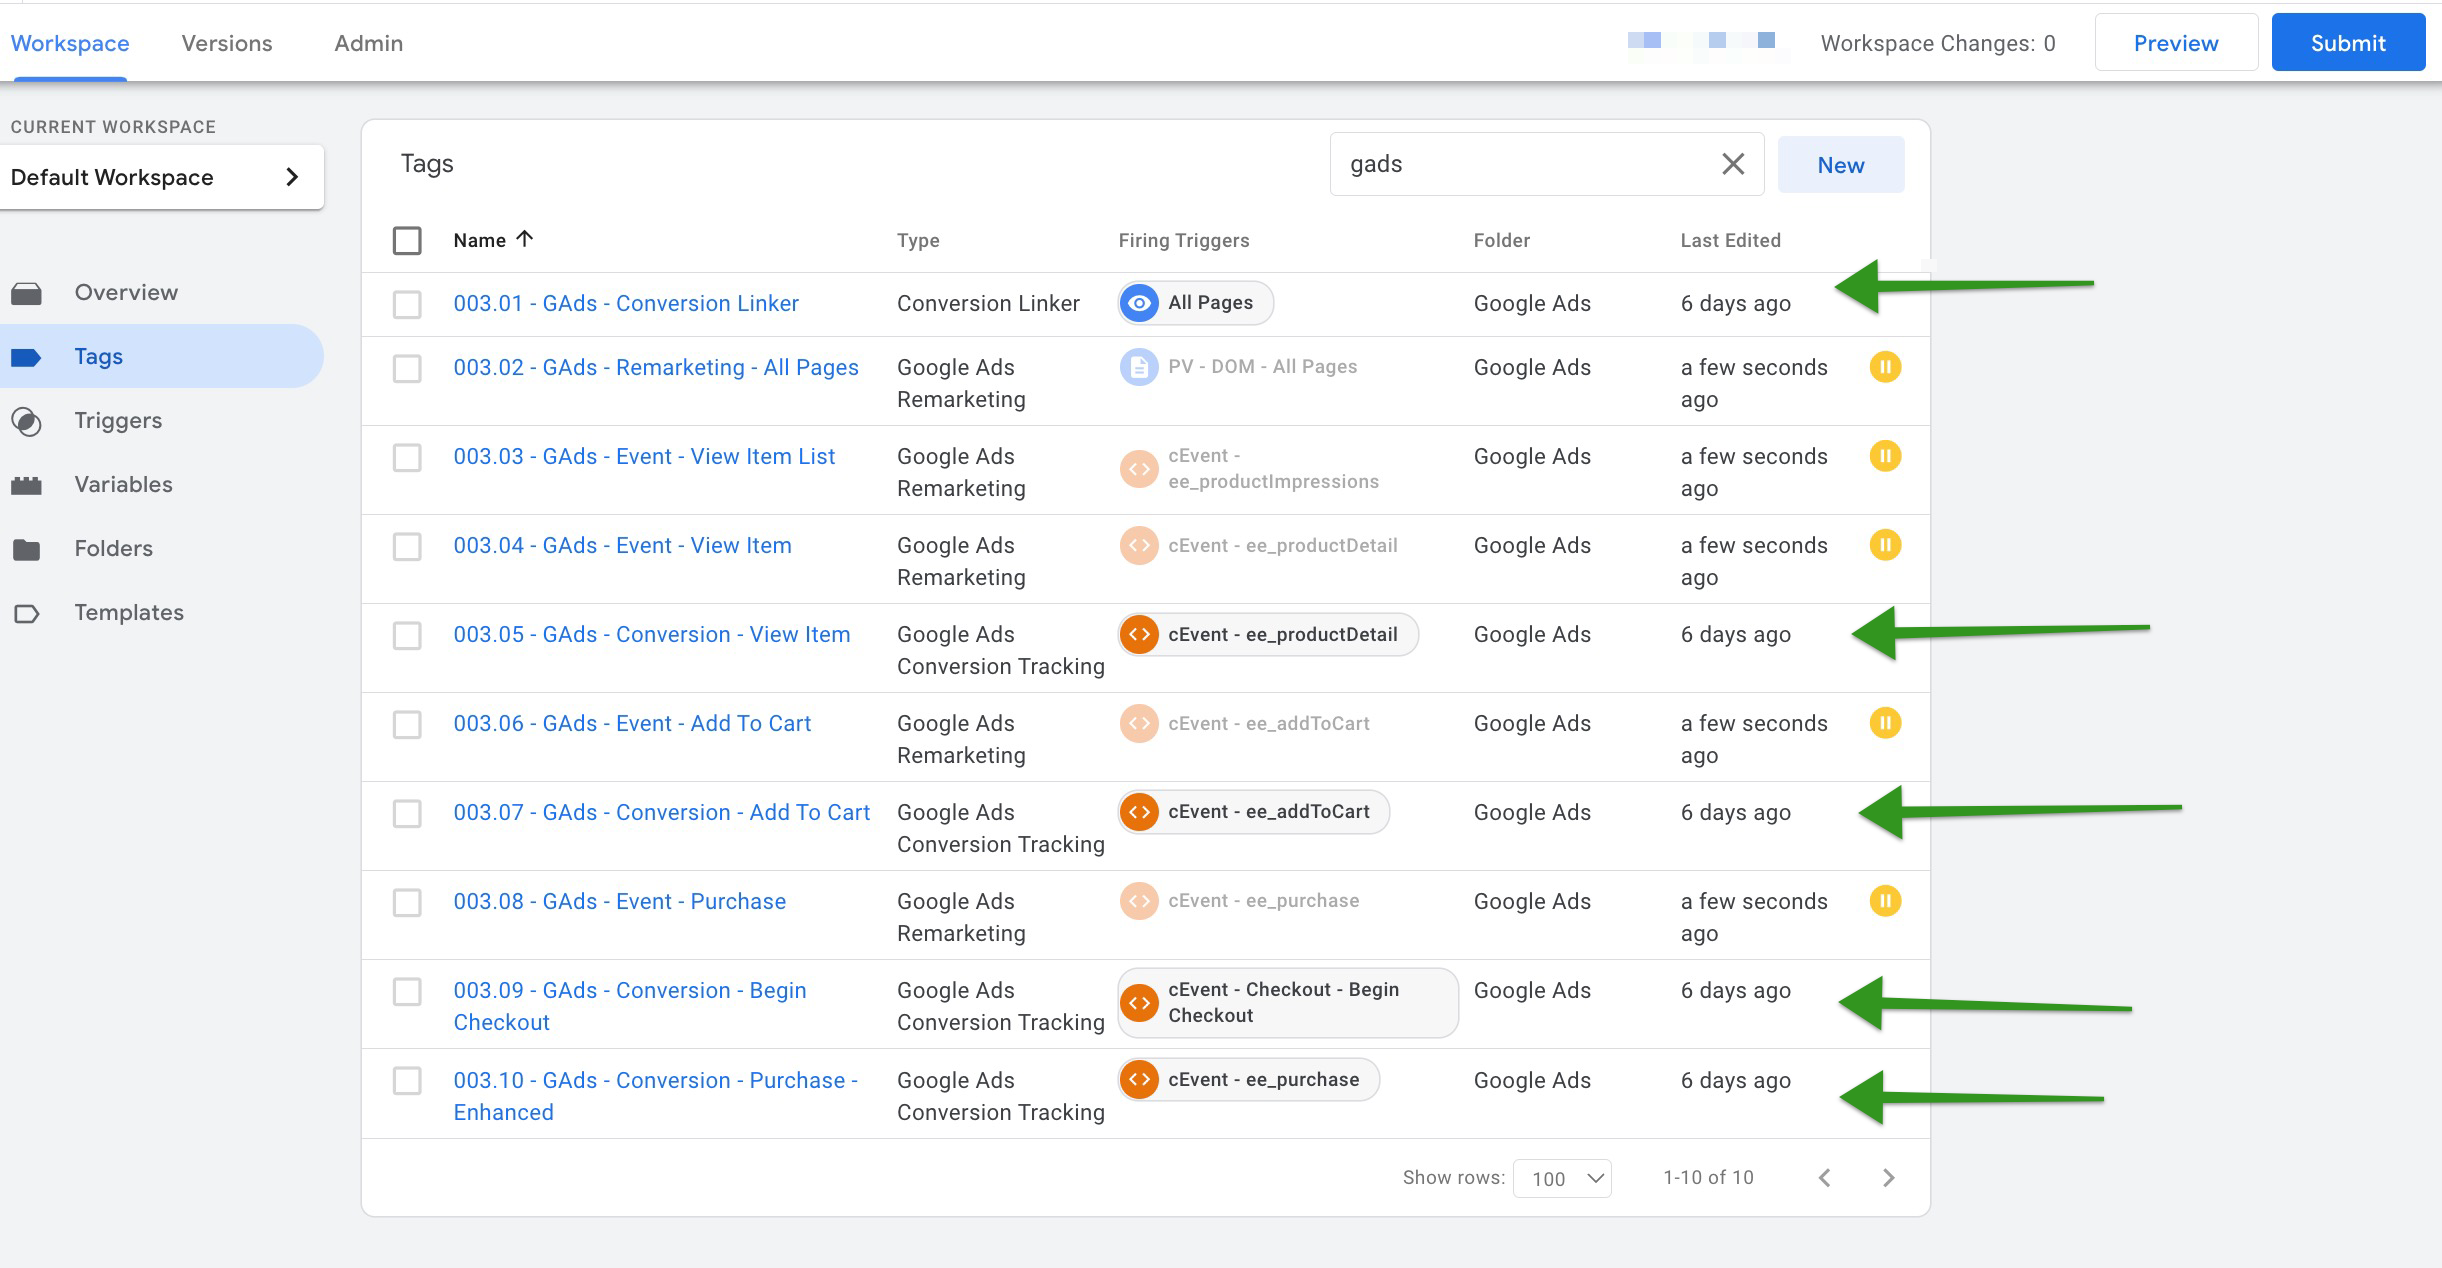
Make sure that the tags of the conversions you have forwarded/added their labels during onboarding are enabled.
If you only have conversion tracking selected, only your conversion tracking tags need to be active.
Make sure the GTM container is PUBLISHED and ACTIVE.

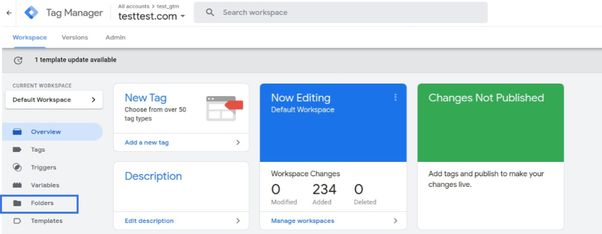
Click on “Folders” on the left-side menu.
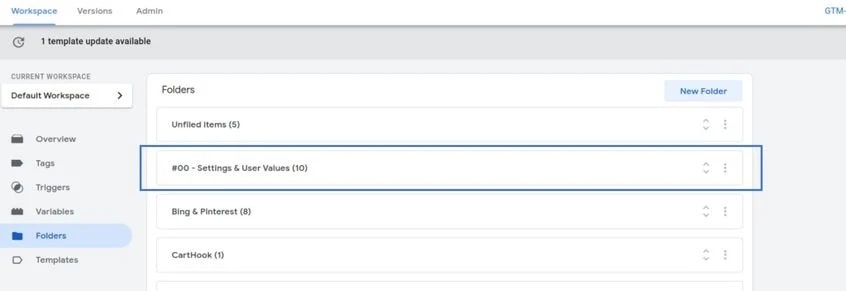
Click on "#00 - Setting and User Values."
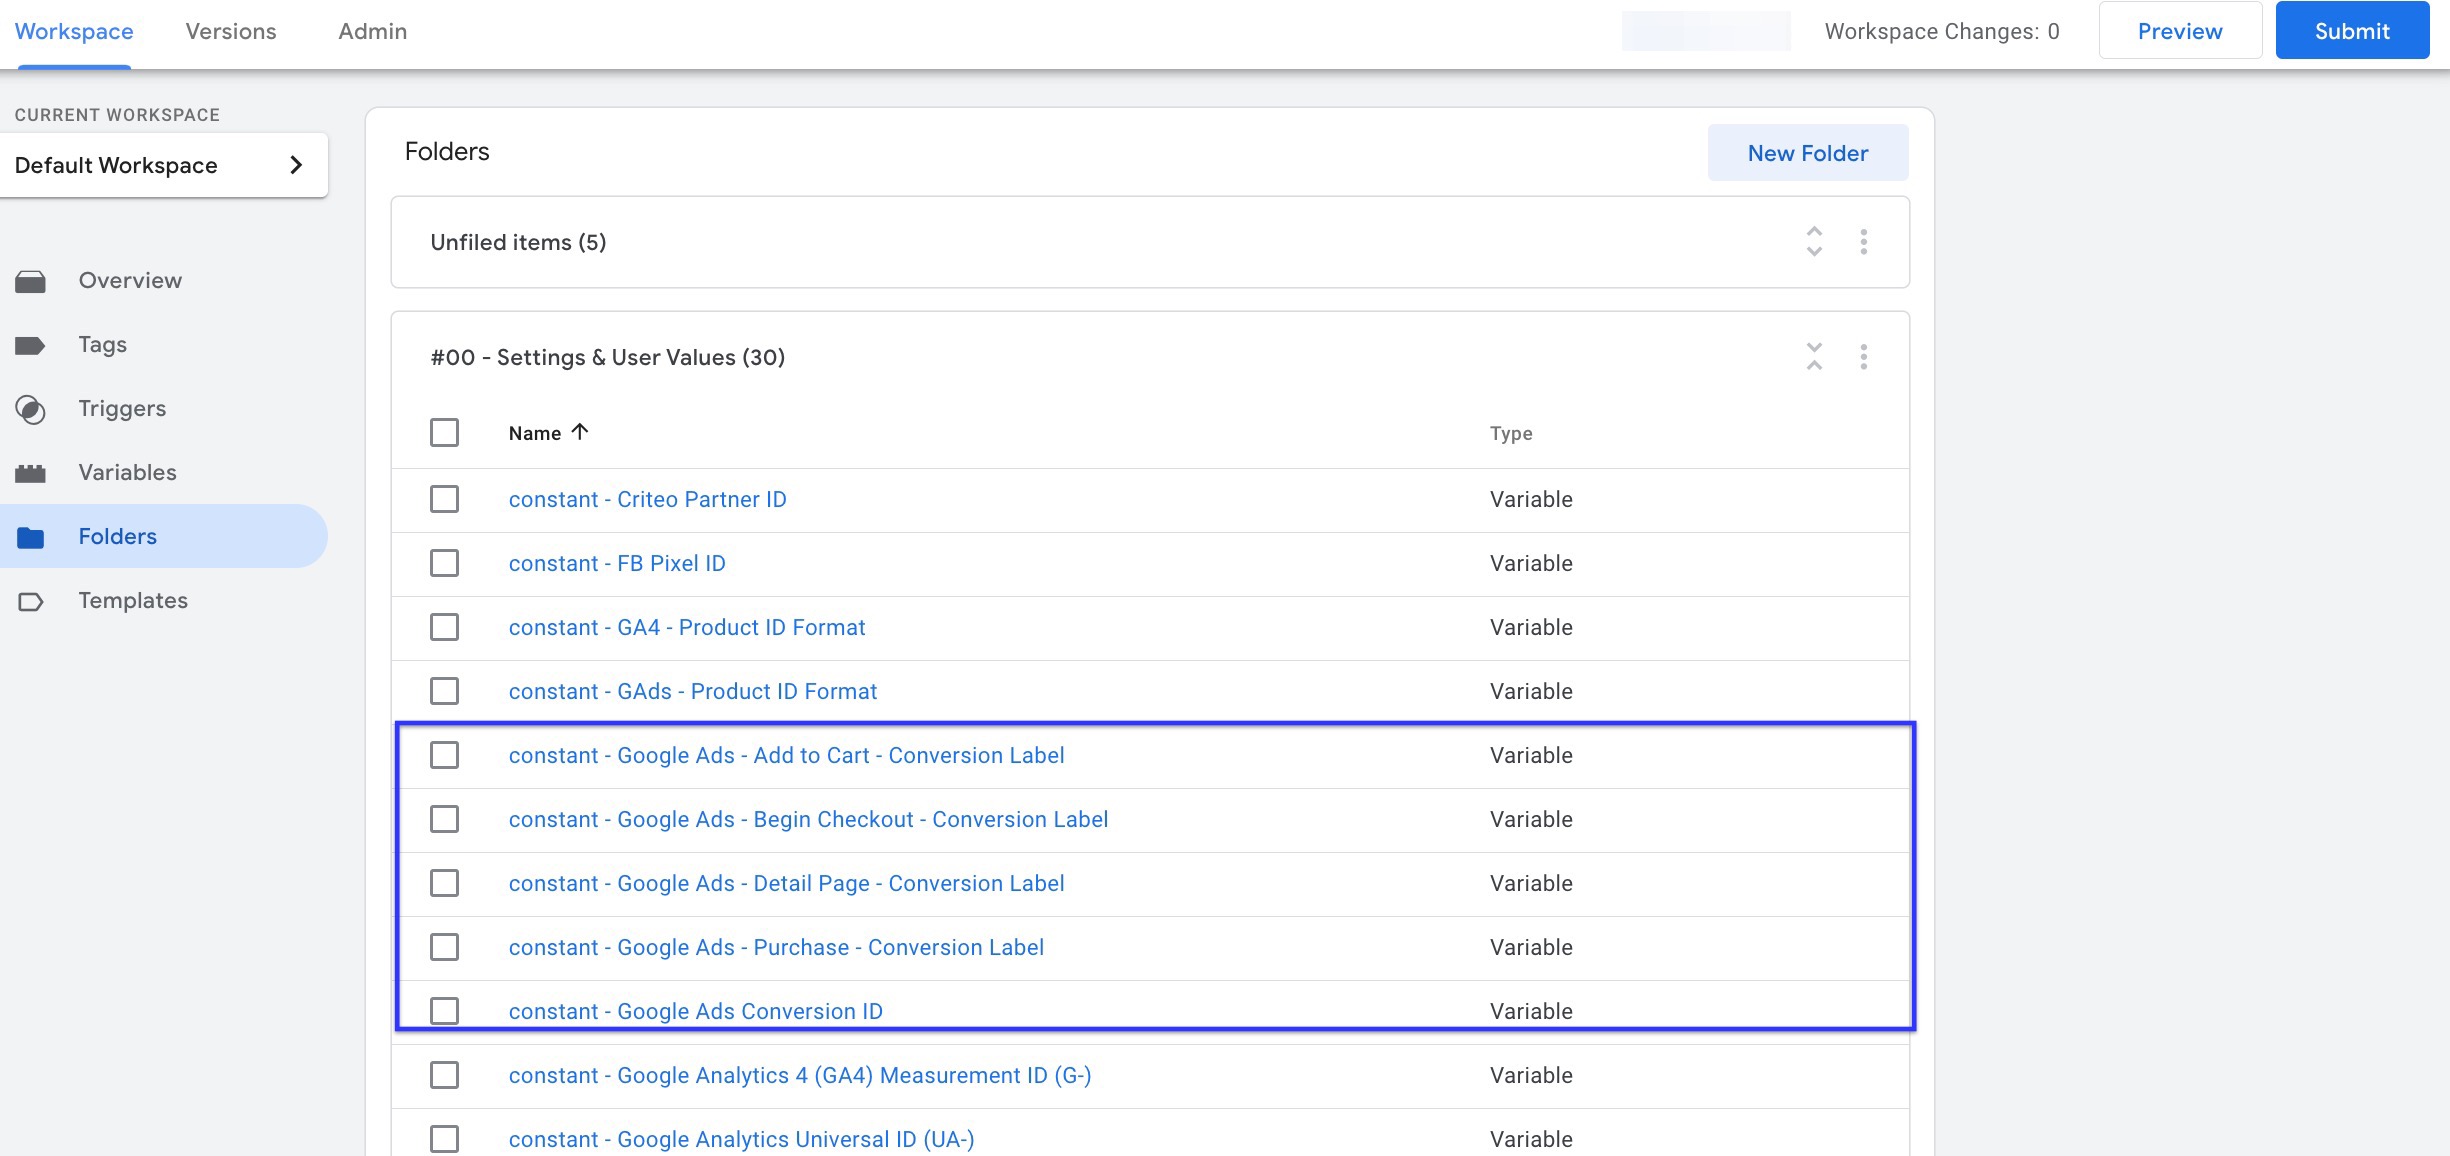
Find the constants that include your Google Ads conversion ID and label.
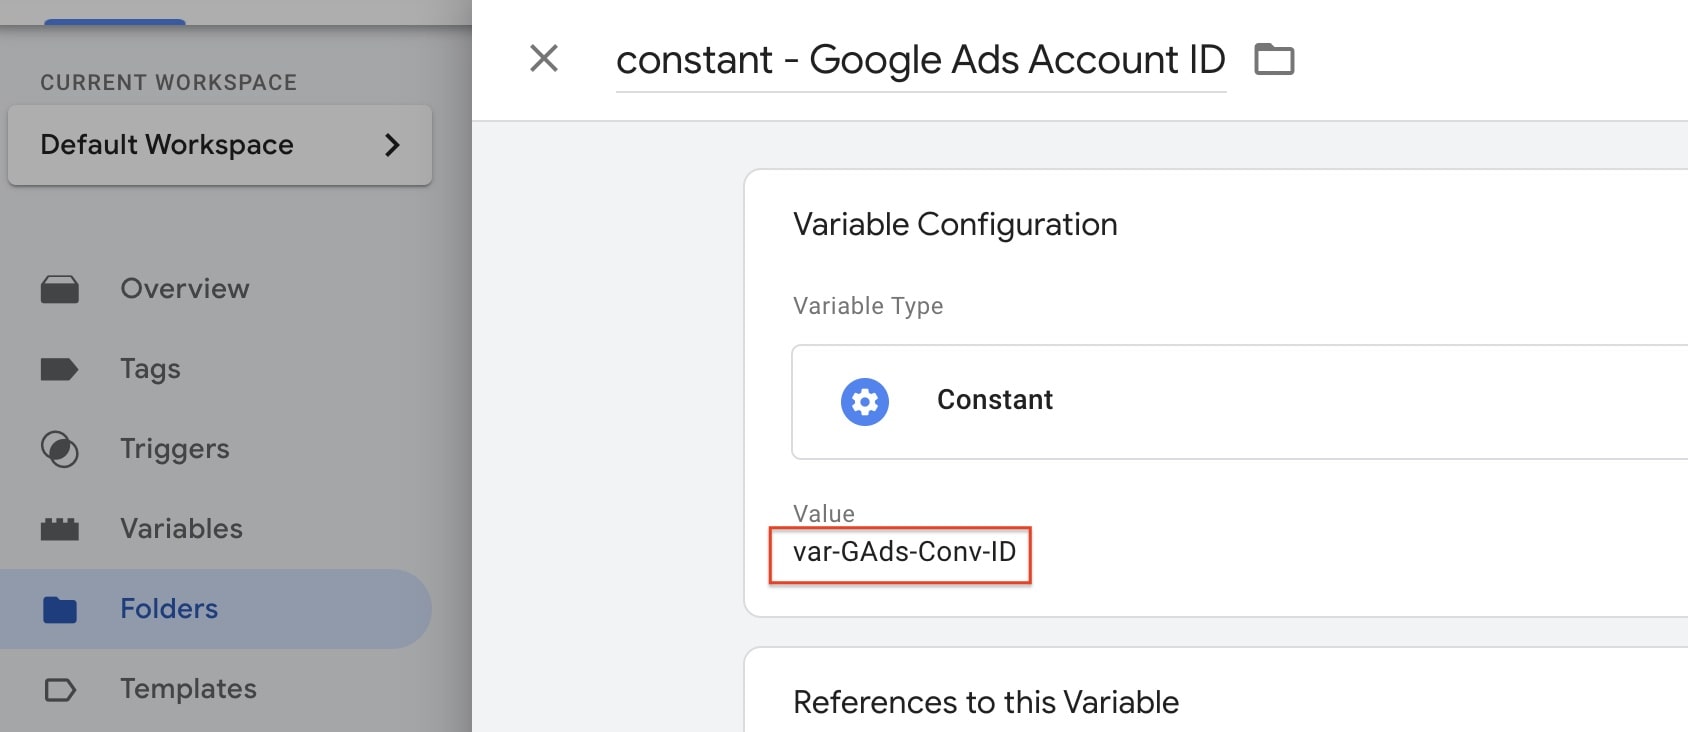
If your constant value is written as “var-GAds-Conv-ID” or “var-GAds-ConvLabel”, you probably did not enter your constants during the setup process. If that's the case, enter your constants in the related value brackets, and if not, click on each of them to make sure your conversion ID and label are all correctly placed.
Once you update/check the values, SAVE and SUBMIT the changes.
- You can follow this tutorial to find your Conversion ID and Label.
- If you don't have any conversions, you can follow this tutorial to create new ones.
Conclusion: If everything looks just like on the steps above but your conversion tracking is still not accurate - you can contact our support team through the app and our experts will take a look at your setup. Remember, data will never be 100% accurate due to various reasons. Click here to learn more about data inaccuracy.
