Debug and test your website's data tracking using Analytics Debugger and Google Tag Assistant with Analyzify's in-depth tutorials.
Option 1: Ask from expert team in app
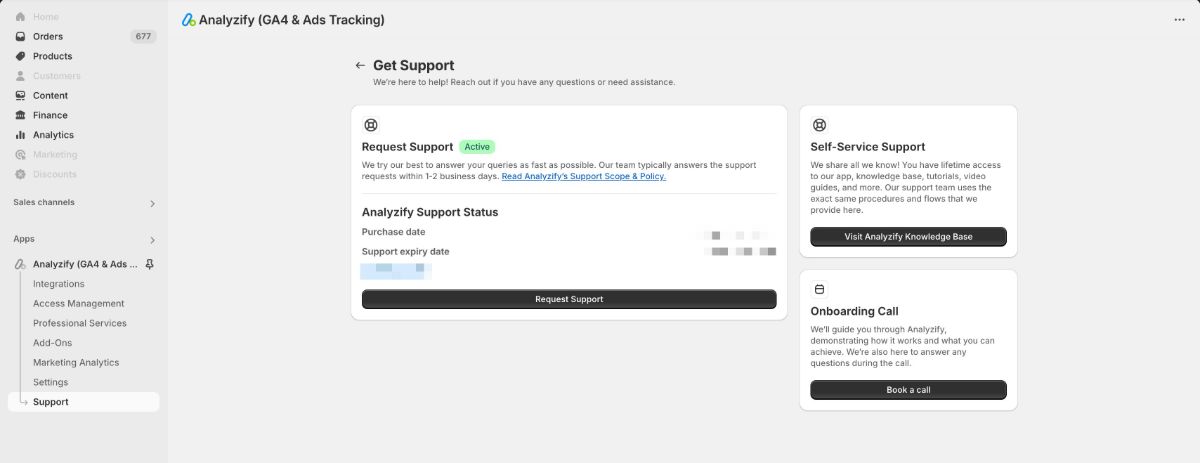
Once you complete your integrations, you can request a setup audit and validation from our expert team through the Analyzify app.
Simply go to the "Support" menu and click the "Request Support" button to submit your request.
Our team will review your setup and handle the validation for you.
Option 2: Do-It-Yourself
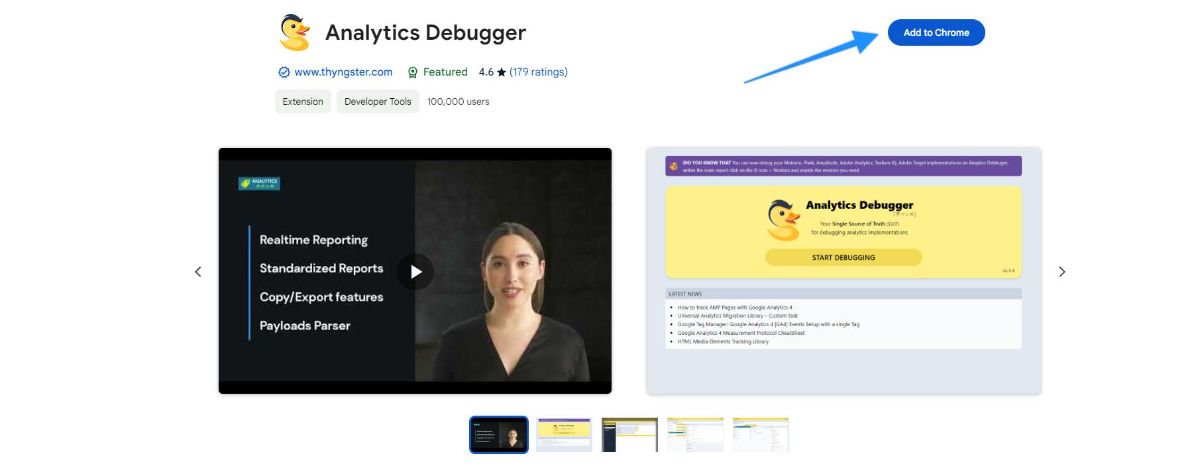
Alternatively, you can debug your events on your own. Follow this step-by-step tutorial to set up the Analytics Debugger and test your GA4 events.
Step 1-6: Analytics Debugger Setup
Go to your store's website, right-click on an empty space, and press "Inspect."
Navigate to the Analytics Debugger tool on the right tab and click "Start Debugging."
Then click on the plus icon to add the GA4 vendor.
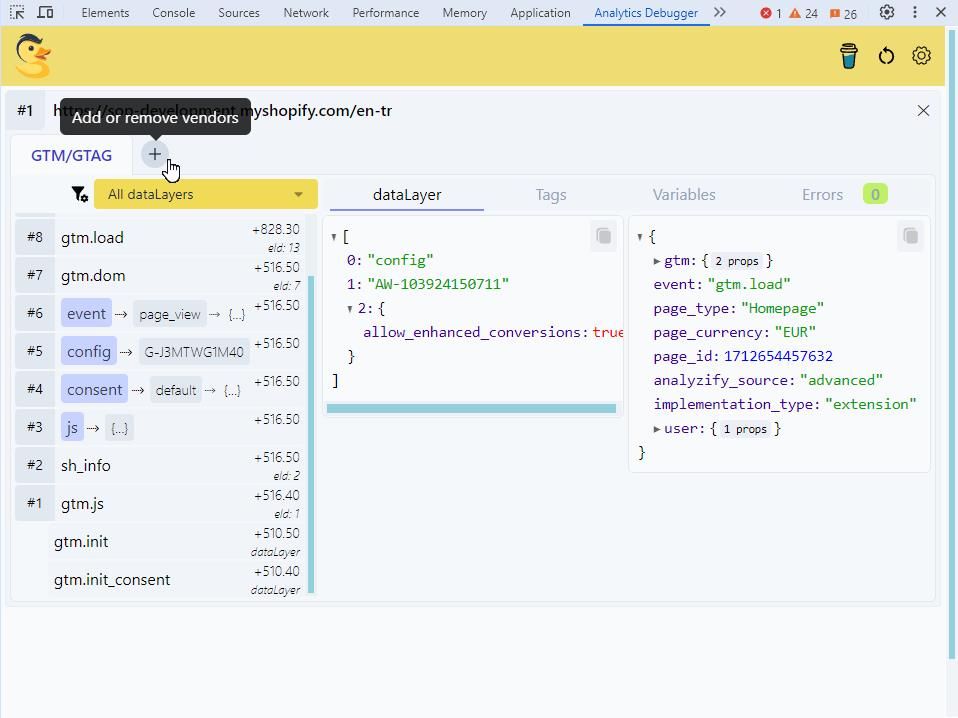
From the settings page, choose GA4 vendor by clicking the plus icon, apply changes, and wait for the tool to be refreshed.
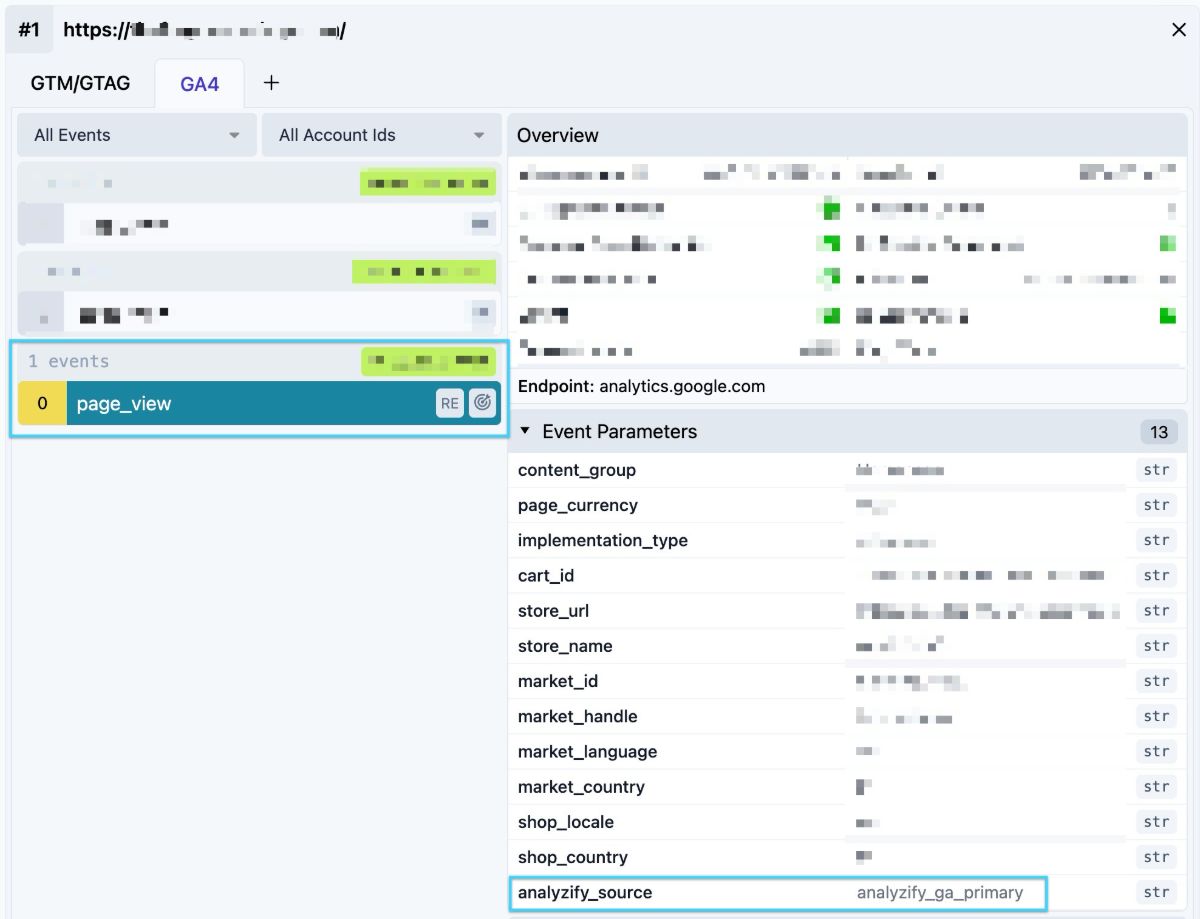
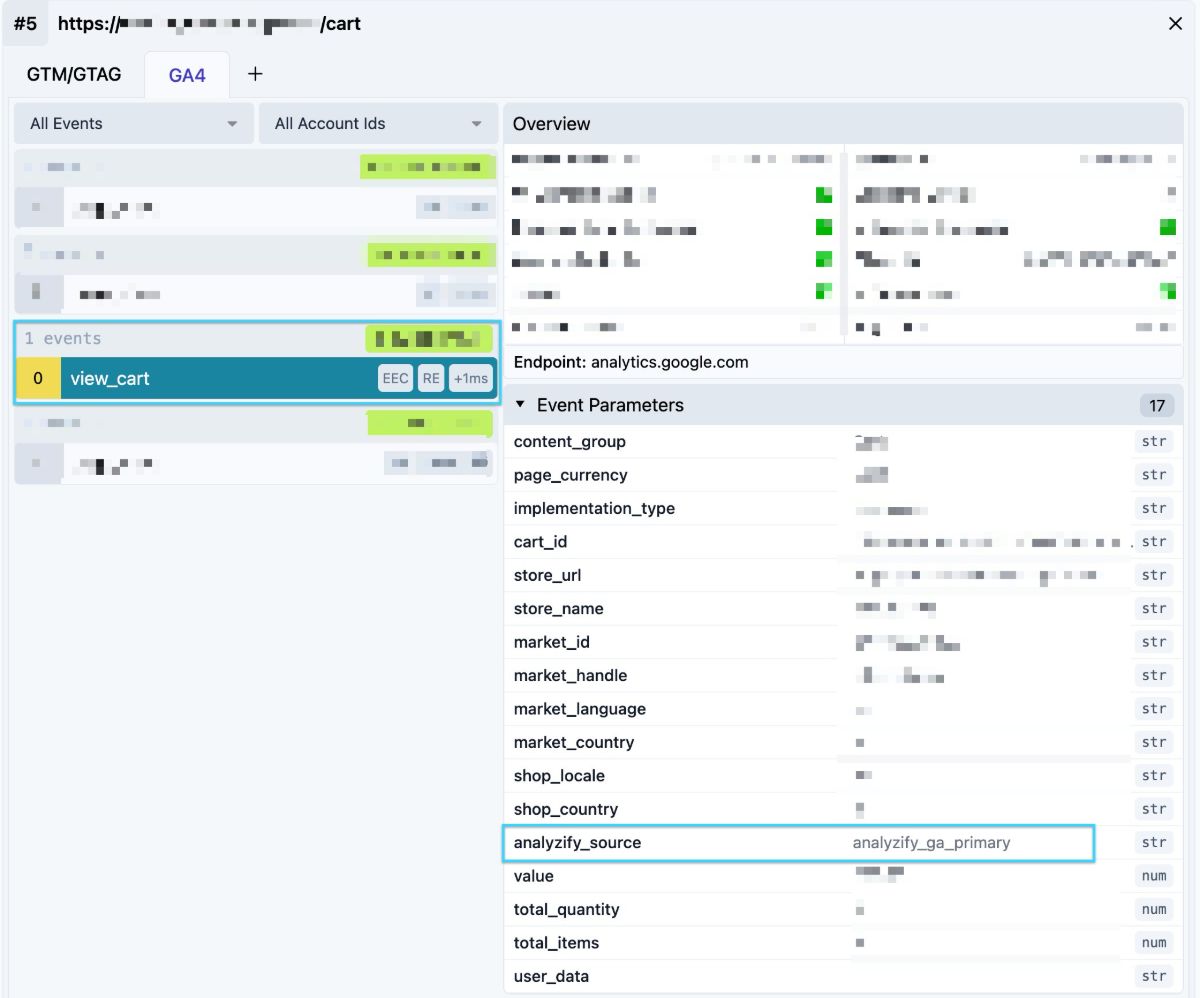
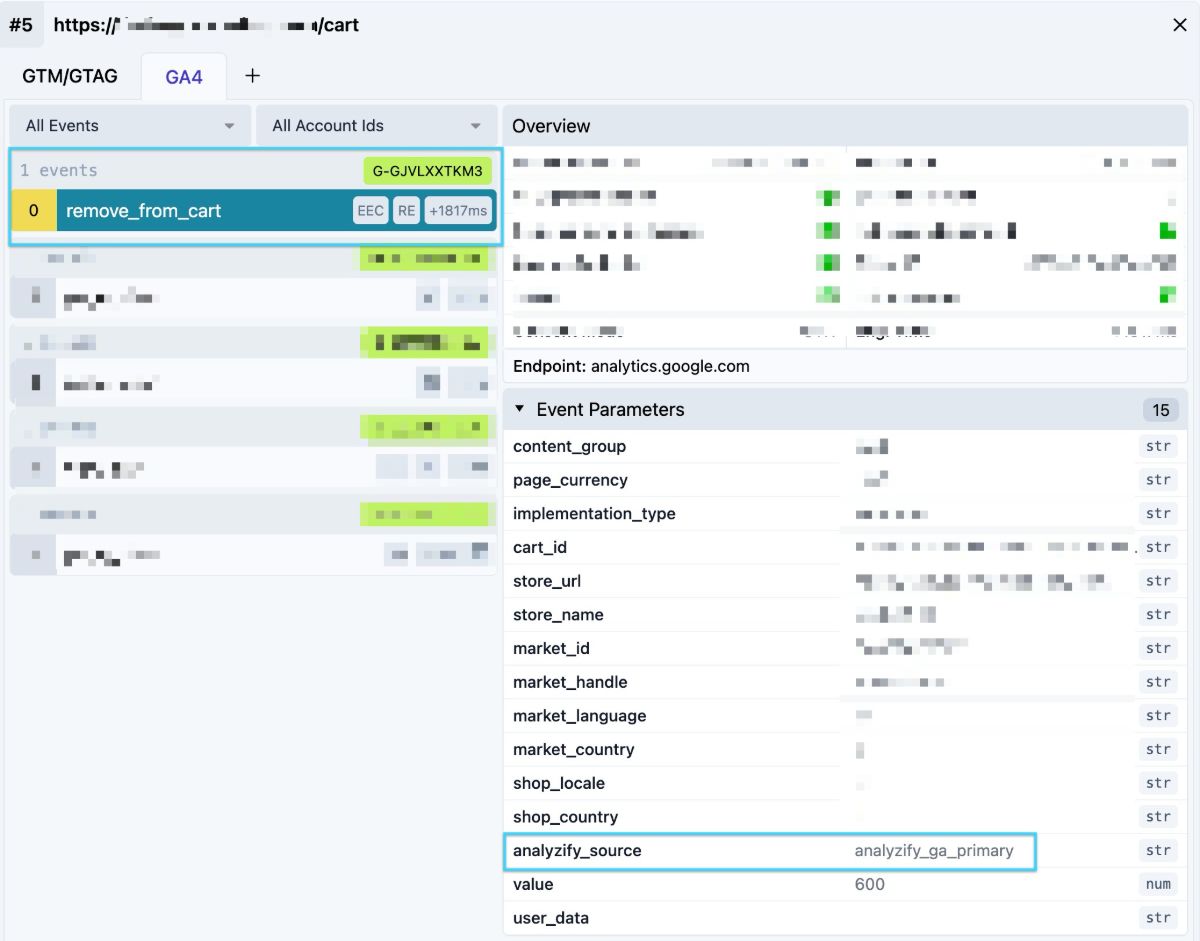
PS: If you're using the Direct Integration, you should see analyzify_source = analyzify_ga_primary. If you're using the Customized (GTM) Integration, it should appear as analyzify_source = advanced.
🚨 IMPORTANT NOTE
For Direct Integration Setups:
You can proceed directly to Step 8. This step is essential for verifying that your setup is functioning correctly.
For Customized (GTM) Integration Setups:
Start by reviewing the instructions in Step 7 to check your dataLayer integrations. Once you've confirmed that your dataLayer events are working properly, continue with Step 8 to complete the verification process.
Step 7: Check Events in GTM/GTAG
Customized (GTM) Integration users can debug the following events from the GTM/GTAG section to ensure the dataLayer is working properly.
Check these events if you're using Customized (GTM) Integration:
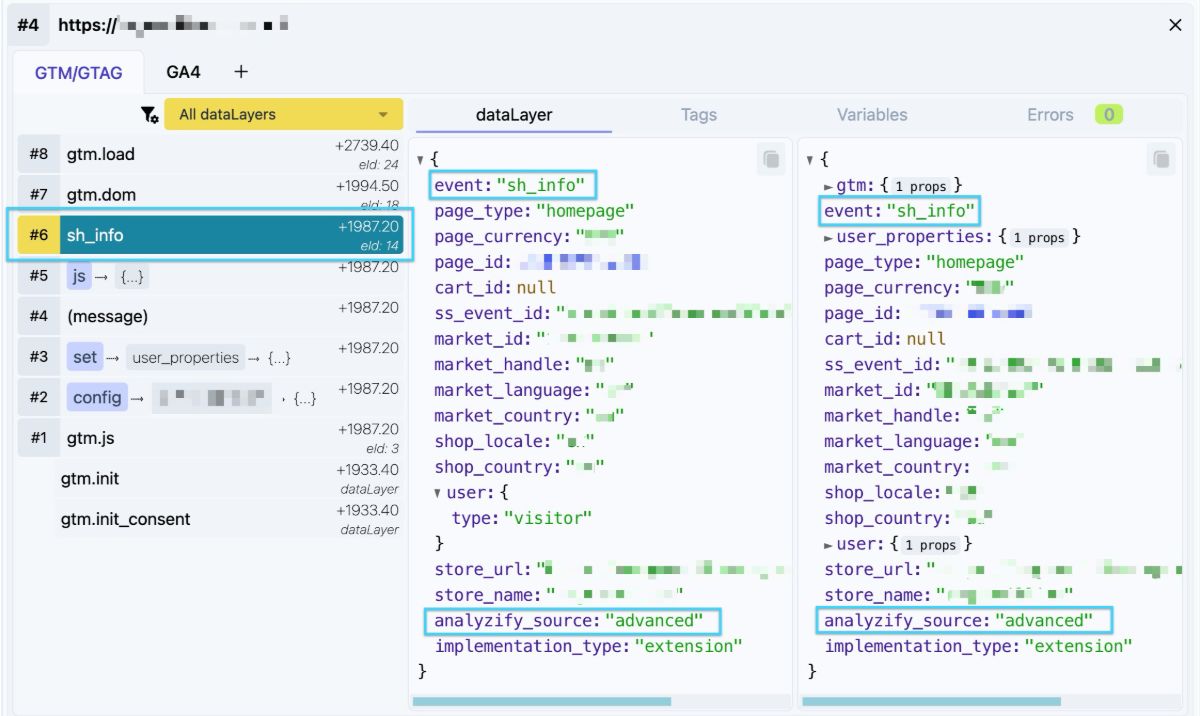
The first event you should see once you load the page is sh_info You should be able to see this event on all pages of your store.
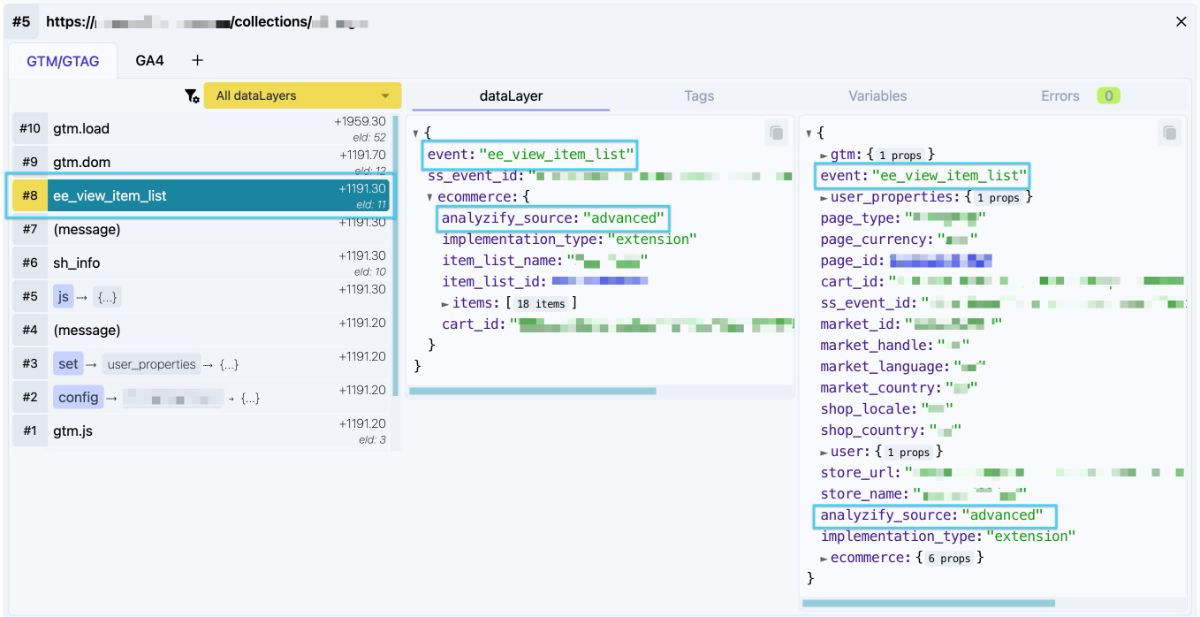
Now go to a collection page and see if the ee_view_item_list event is triggered at the GTM/GTAG tab.
Then, navigate to a product page and check if the ee_view_item event is triggered at GTM/GTAG tab.

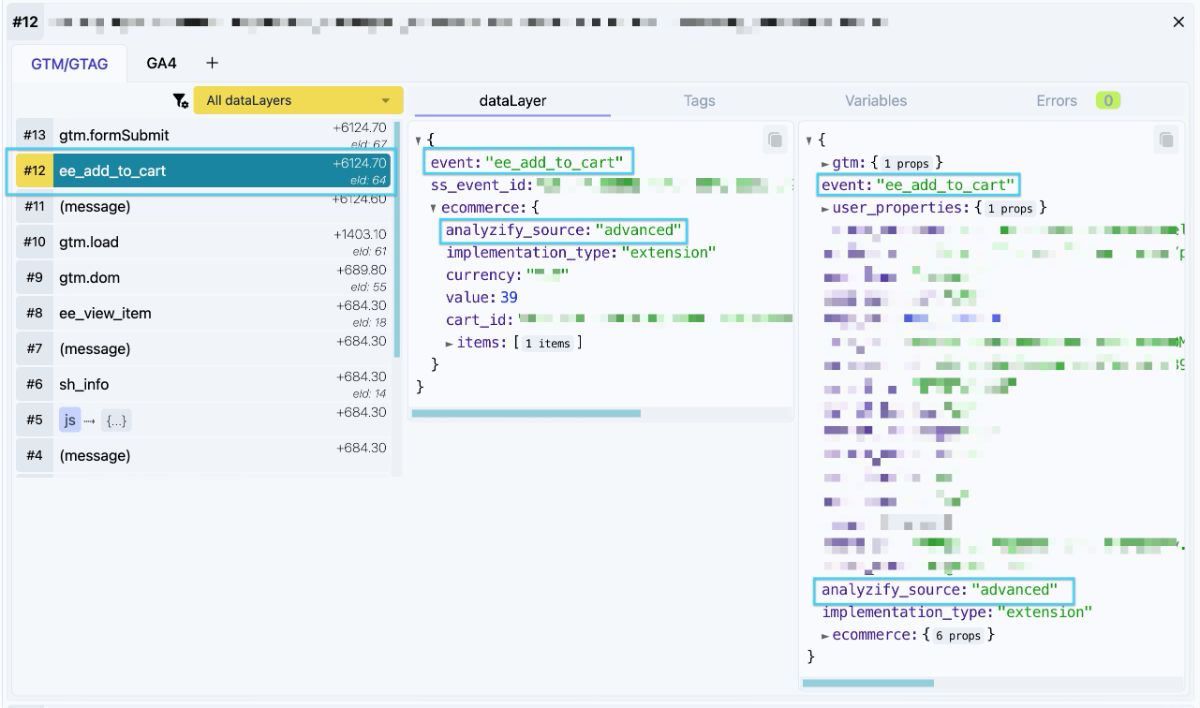
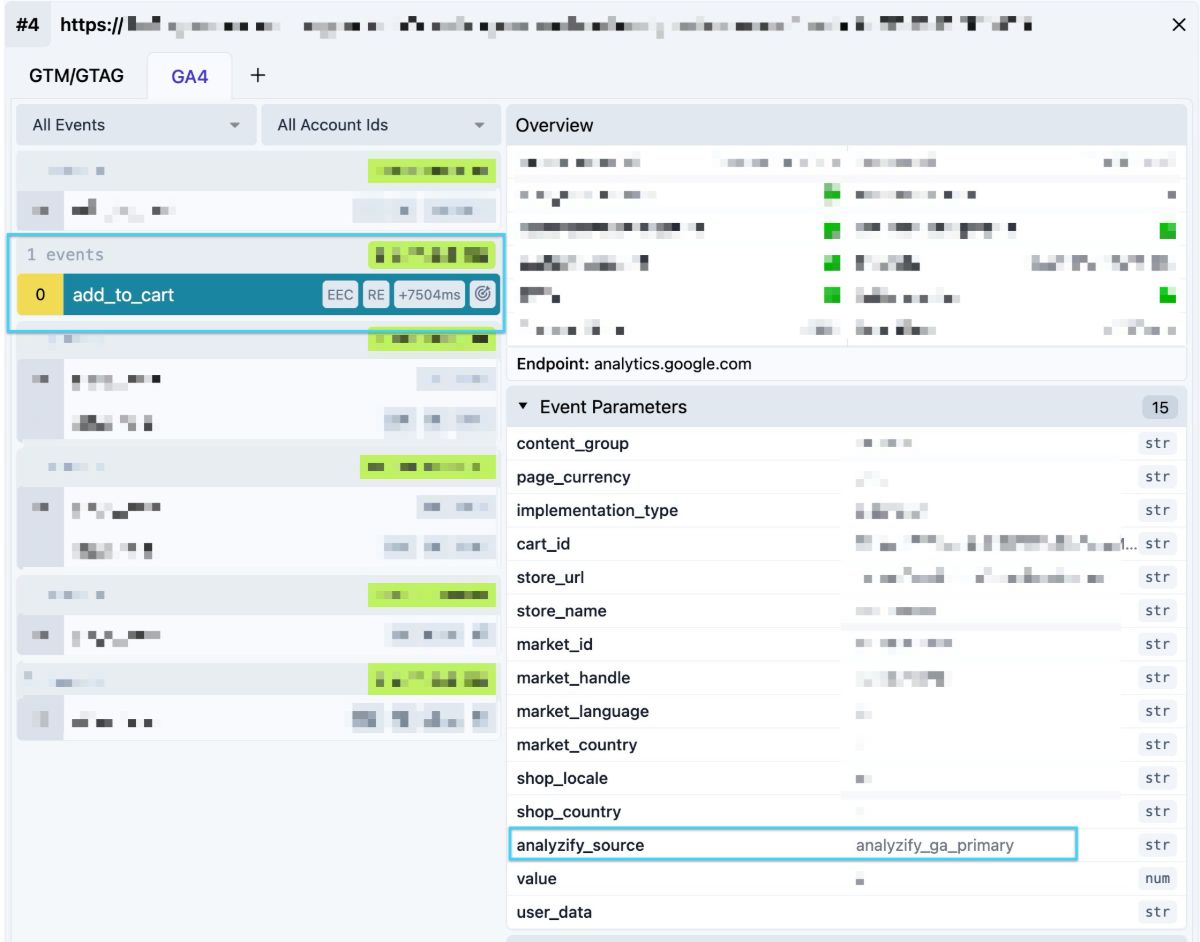
To see if the ee_add_to_cart event is triggered, you can add a product to your cart.
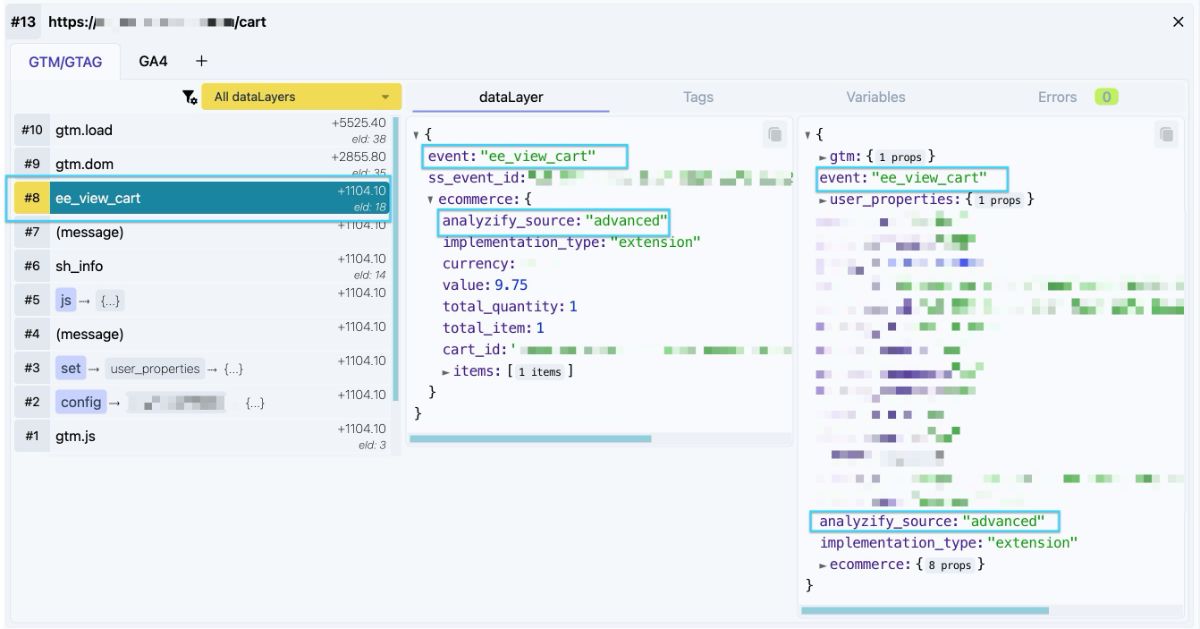
By going to your cart, you can check that the ee_view_cart event is triggered.
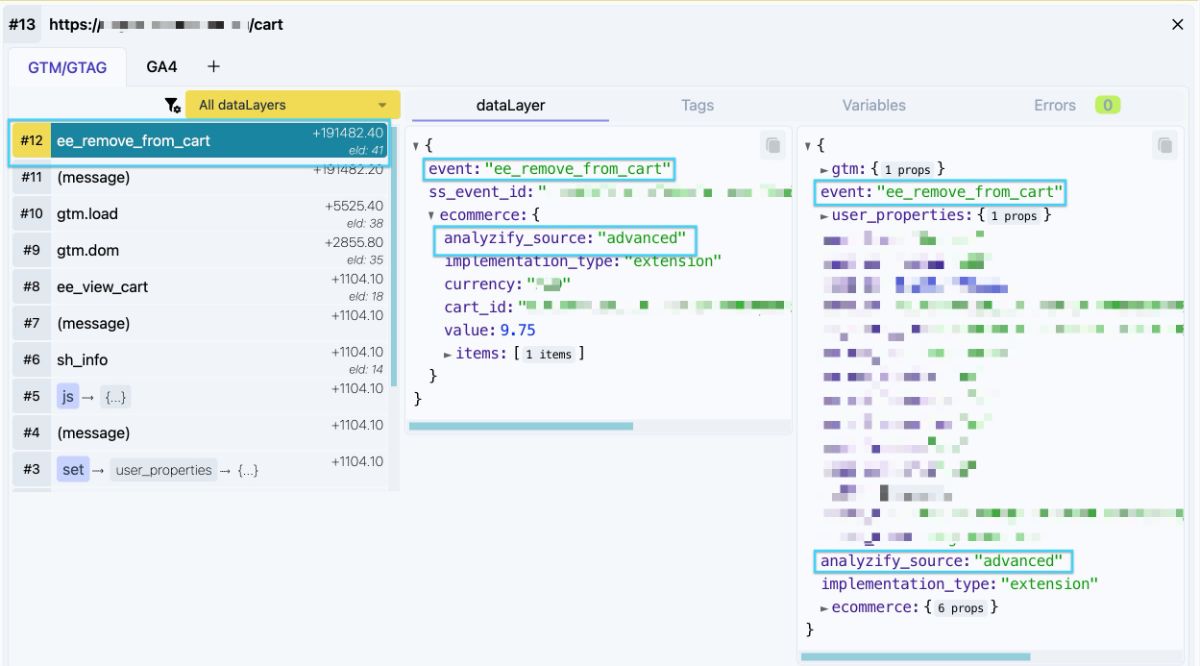
In your cart, try removing an item to check if the ee_remove_from_cart event is triggered.
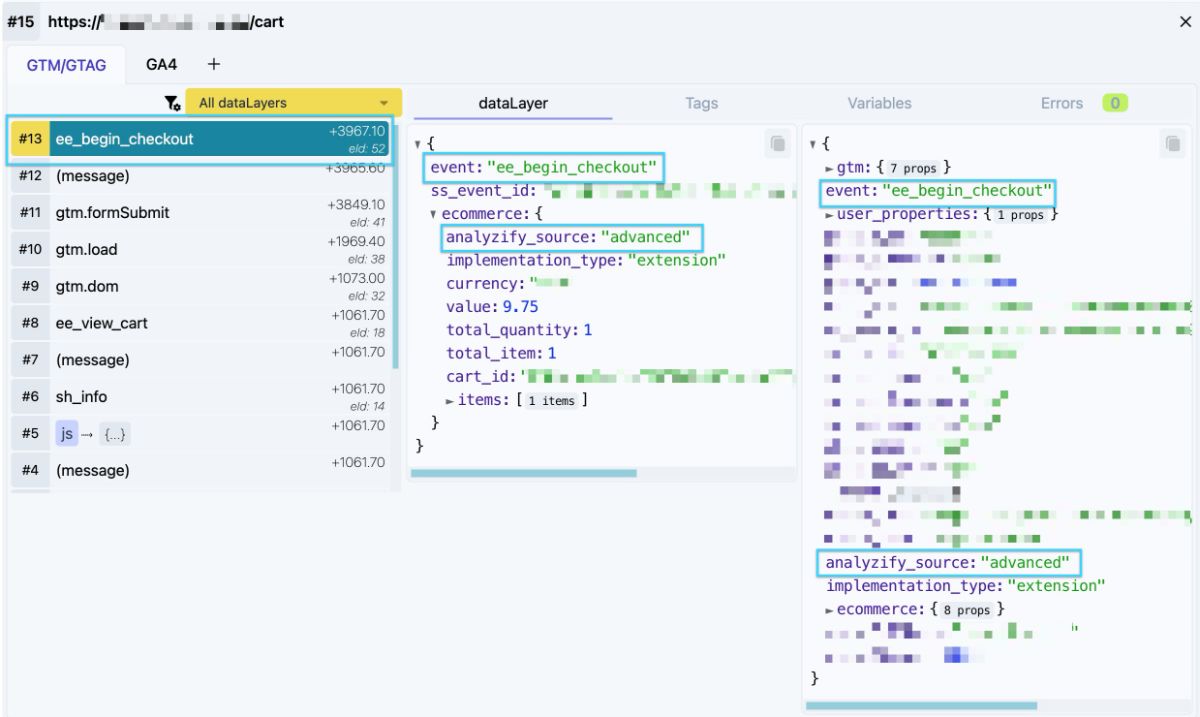
Finally, initiate the checkout process and check the GTM/GTAG tab to see if the ee_begin_checkout event is triggered.
Step 8: Check Events in GA4
Now, let's check the GA4 section to see which events are properly sent by visiting the pages of a store one by one.
When you debug your store, the first event you should see once you load the page is page_view. You should be able to see this event on all pages of your store.
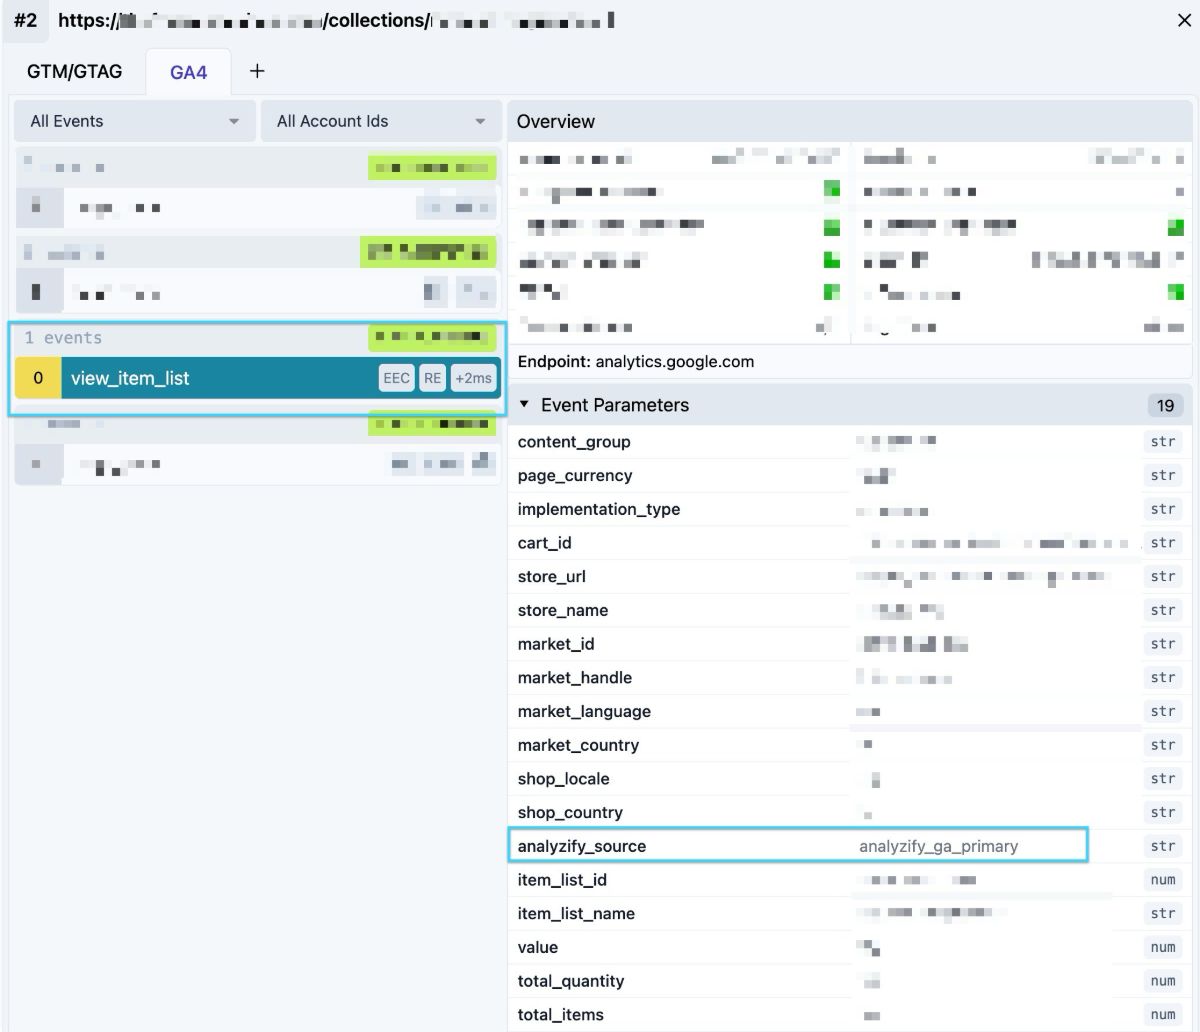
Then you can move on and go to a collection page and see if the view_item_list event is triggered here.
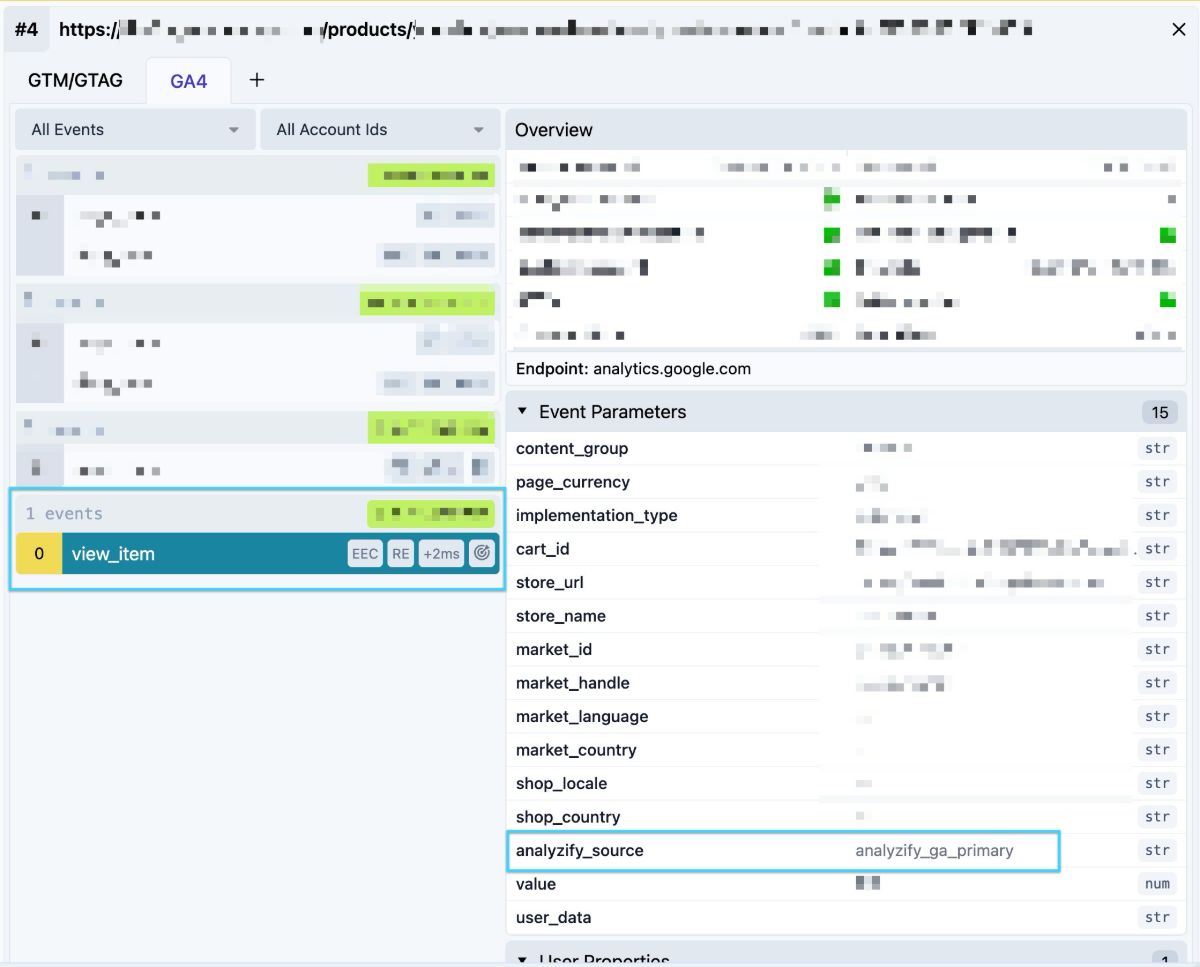
You can navigate to a product page and see if the view_item event is triggered.
In your cart, try removing an item to check if the remove_from_cart event is triggered.
Step 8.7: Check Purchase Event
In order to check the purchase event, firstly, you need to create a 100% discount code including Shipping through the Shopify interface and complete a purchase.
Since it’s managed by the customer events section, the purchase and checkout events won’t appear in the summary section of GTM Preview Mode.
To confirm its functionality, you’ll need to check the console dataLayer argument, monitor the real-time purchase event report in GA4, or check the outgoing requests section in the GA4 tab of the Analytics Debugger Chrome extension, following the same steps as previously outlined.
Info: For client-side setups (excluding GDPR-restricted setups), you can expect approximately 80% accuracy in tracking purchases made through the Online Store. With Analyzify’s server-side setup, this accuracy can reach up to 98% and includes purchases from all sales channels, not just the Online Store. Learn more here: Analyzify GA4 Server-Side Integration.
To create a discount code, simply follow the steps below:
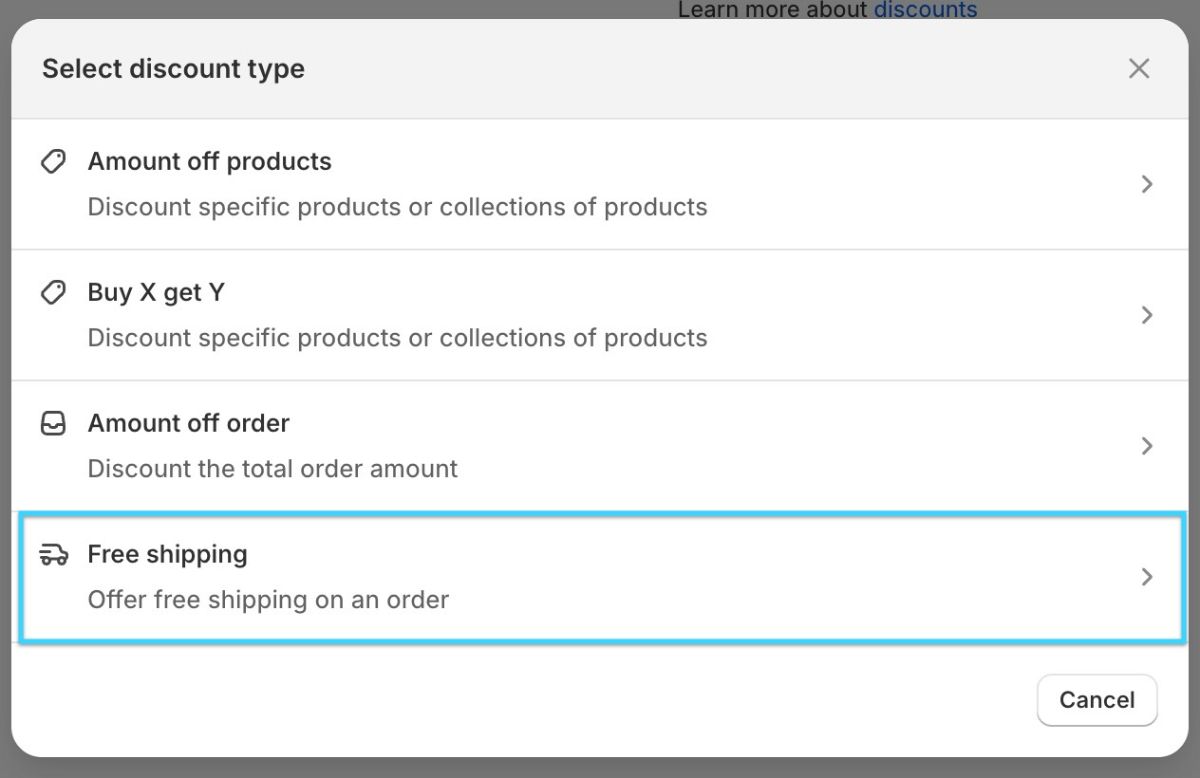
In your Shopify Admin, go to the "Discounts" section and click on "Create discount."
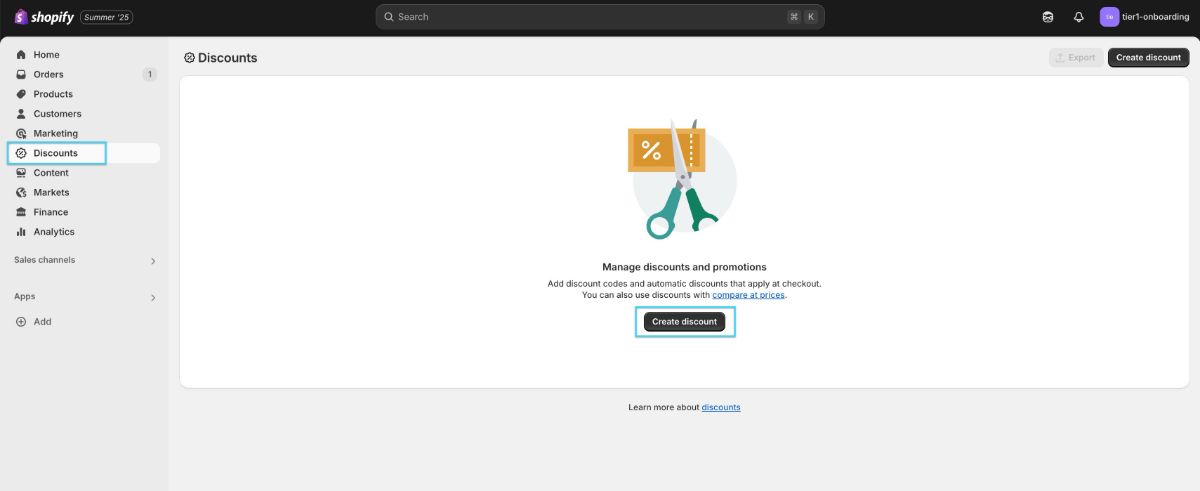
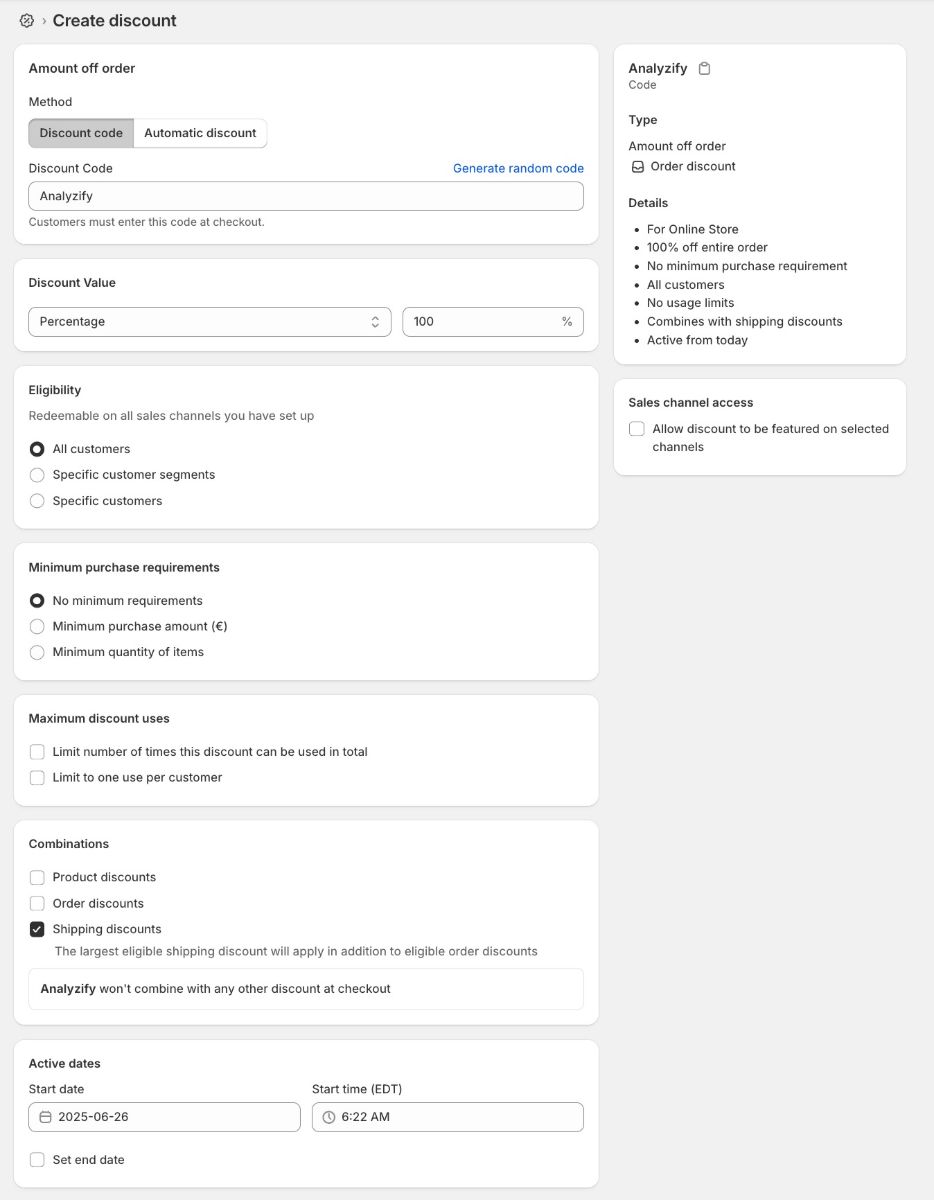
Select the discount type as "Amount off order."
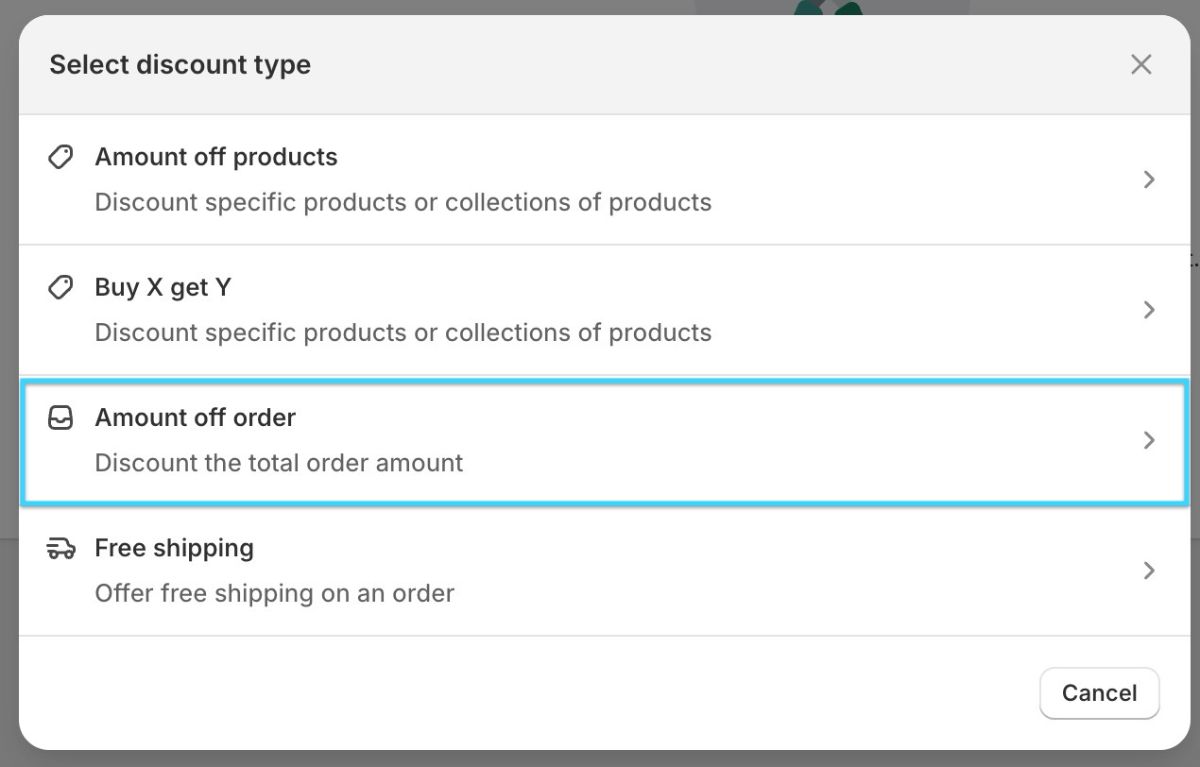
Fill in the relevant details such as percentage, eligibility, usage limits, combinable options, and active dates. Be sure to enable the option to combine it with other discounts so they can be used together. Once completed, save your changes.
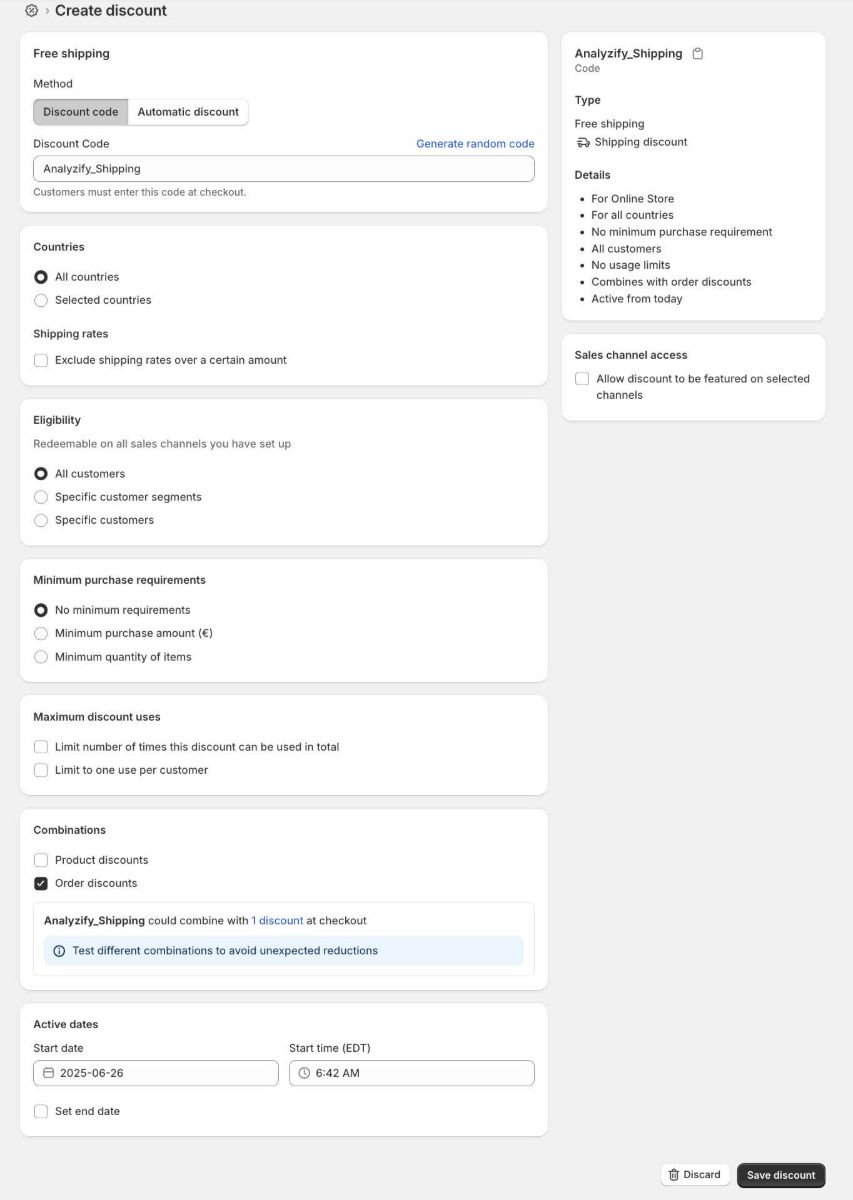
Next, create a second discount code by selecting "Free shipping" as the discount type.
Now, fill in the details for your free shipping code. Make sure to enable the option to combine it with your previously created discount so both can be used together
Once both codes are created, you can test them during a purchase to debug the purchase event tracking.
After creating your coupon code, complete a purchase using that code through the Shopify interface.
Make sure to keep the Dev Tools page open (activated via Inspect > Dev Tools) throughout the process. Closing it may cause the session to reset, and you might need to repeat the purchase.
📢 We also prepared a full guide to debug checkout and purchase events in a separate article. You can read our article on Debugging Custom Pixels on Checkout Pages .
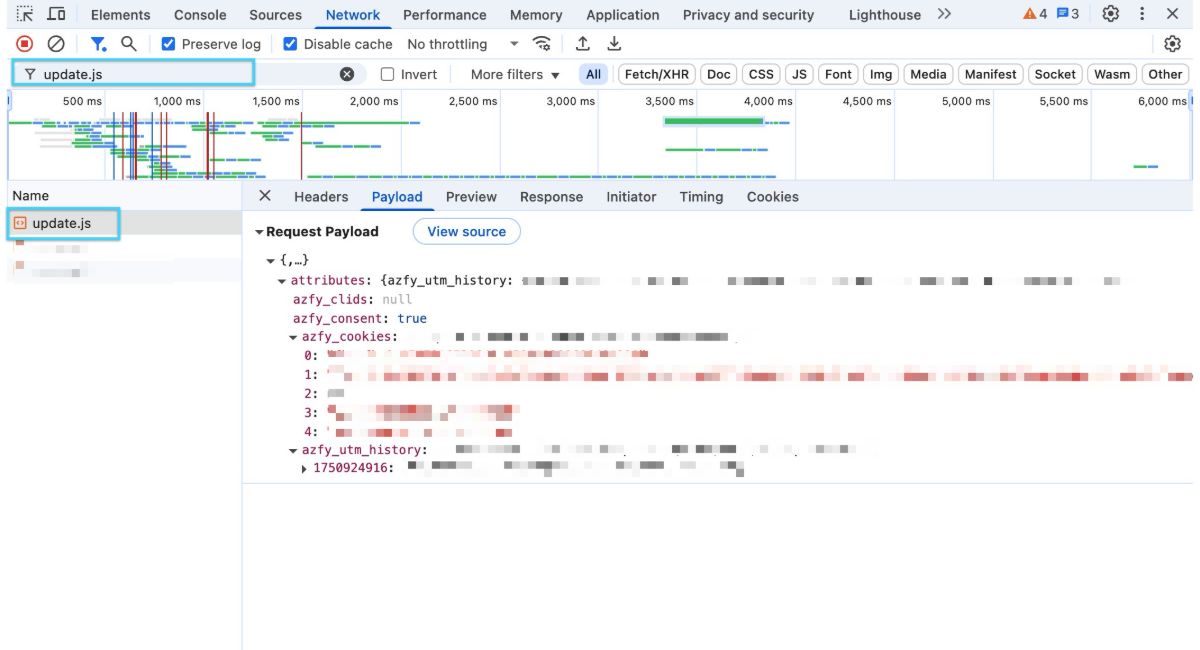
Step 9: Debug Analyzify GA4 Server-Side (Yearly Plan Users Only)
If you're on the Analyzify Yearly Plan and have GA4 server-side tracking enabled for your store, you can verify that it’s working by opening
Inspect > Network
and searching for
update.js
. From there, you can inspect the request payload to review the data being sent.
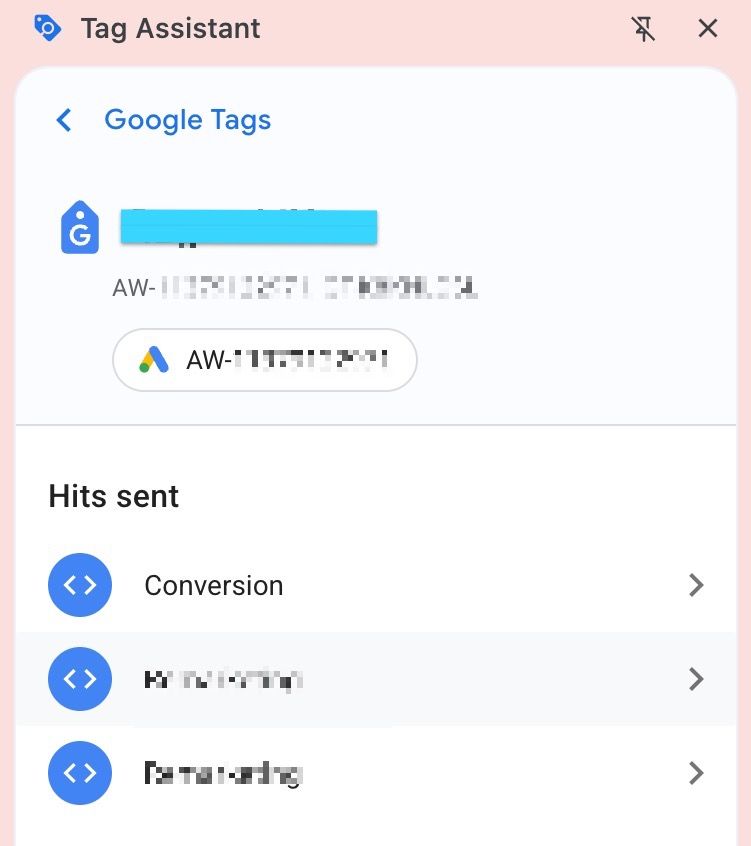
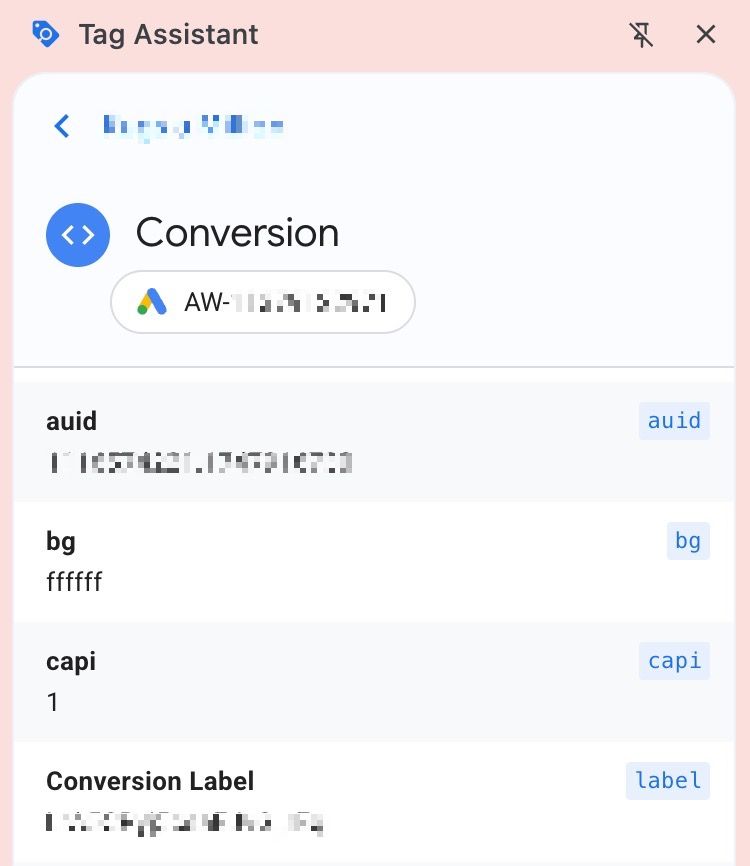
Step 10: Debug Google Ads Conversions
Here are the steps to follow when debugging Google Ads Conversions:
Go to your store, enable Tag Assistant, and click on the relevant Google Ads tag that starts with "AW-".
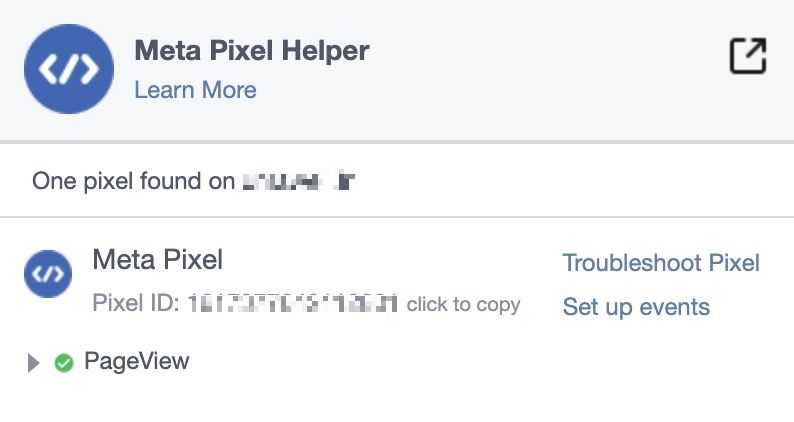
Step 11: Debug Meta Client-Side & Server-Side Events
After connecting both the Meta client-side and server-side integrations via Analyzify, you can follow the steps below to verify that everything is working as expected:
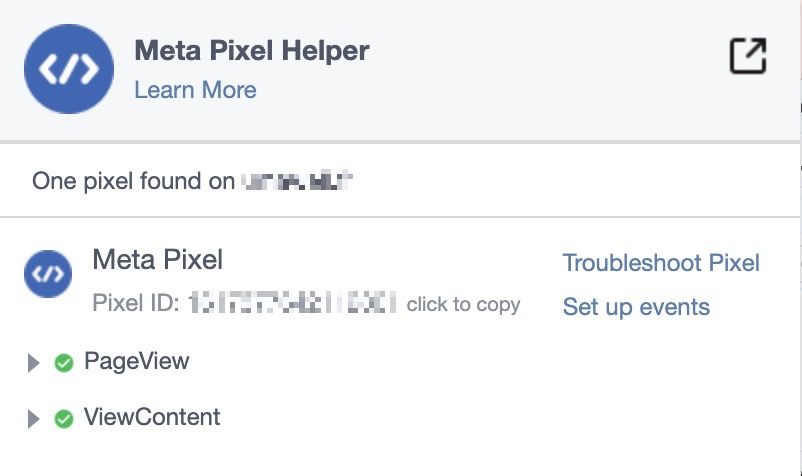
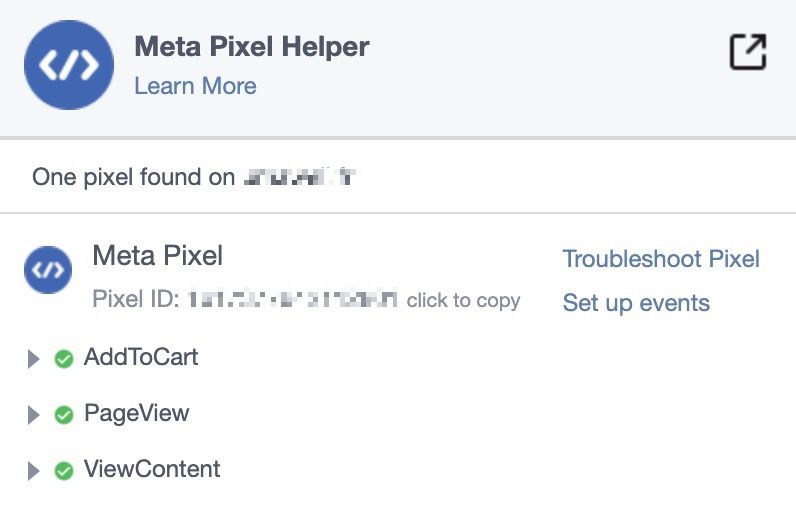
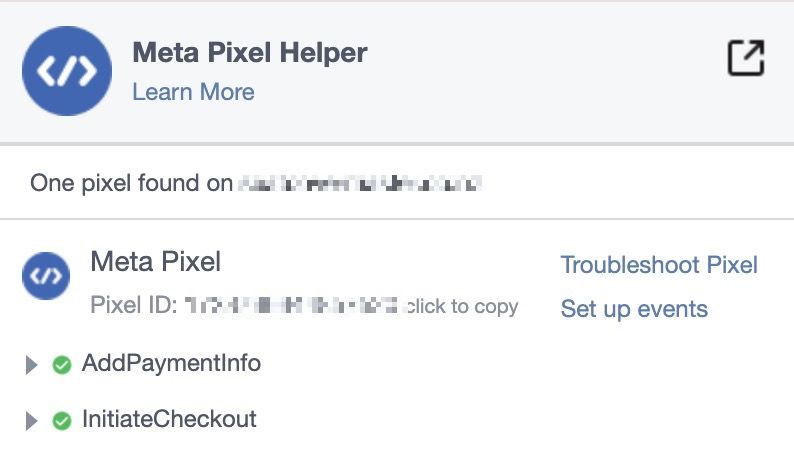
Go to your store, and enable Meta Pixel Helper extension.

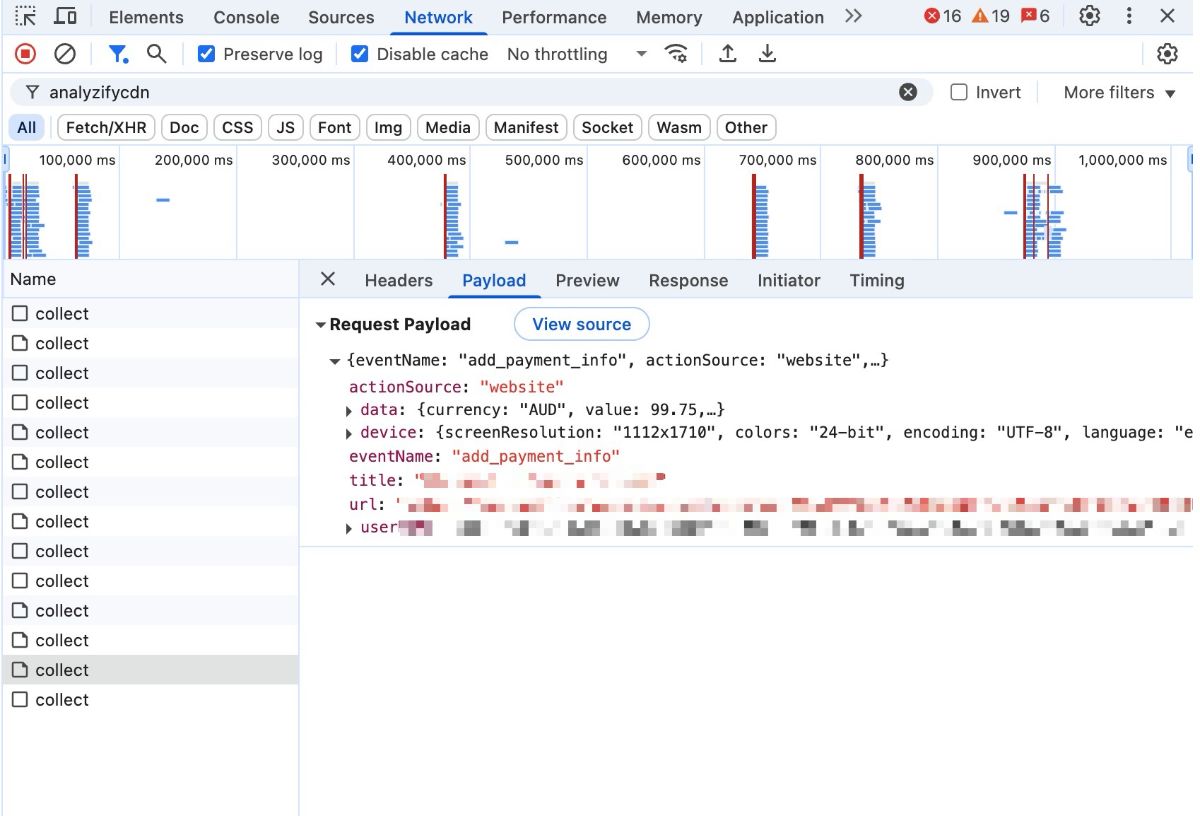
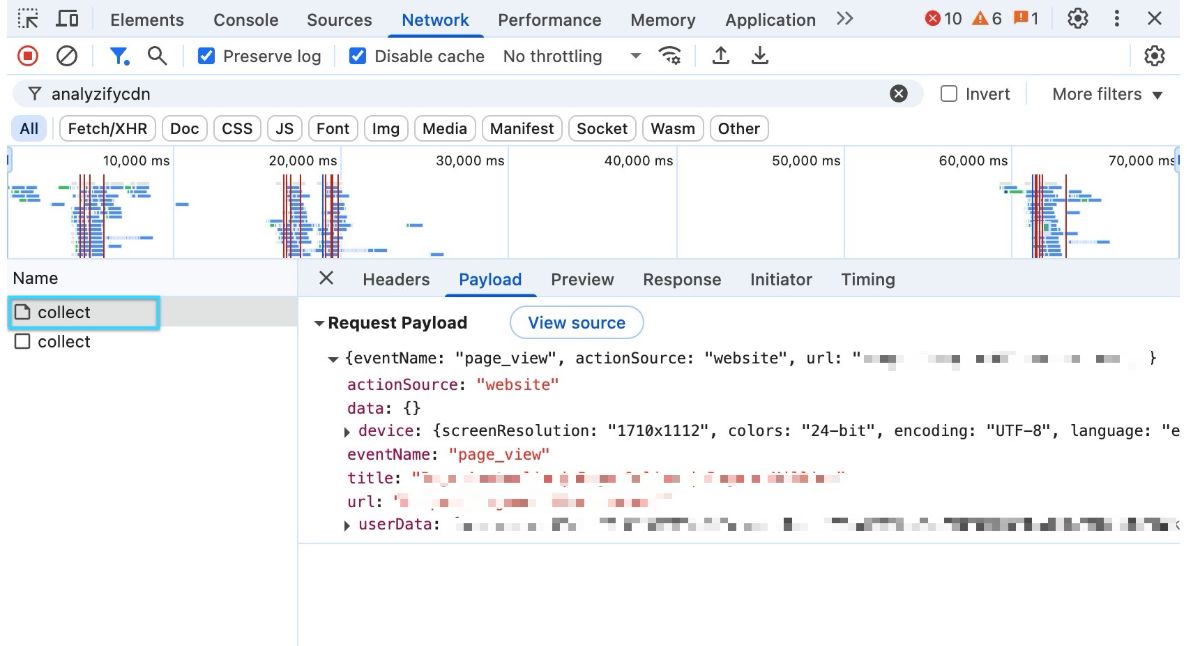
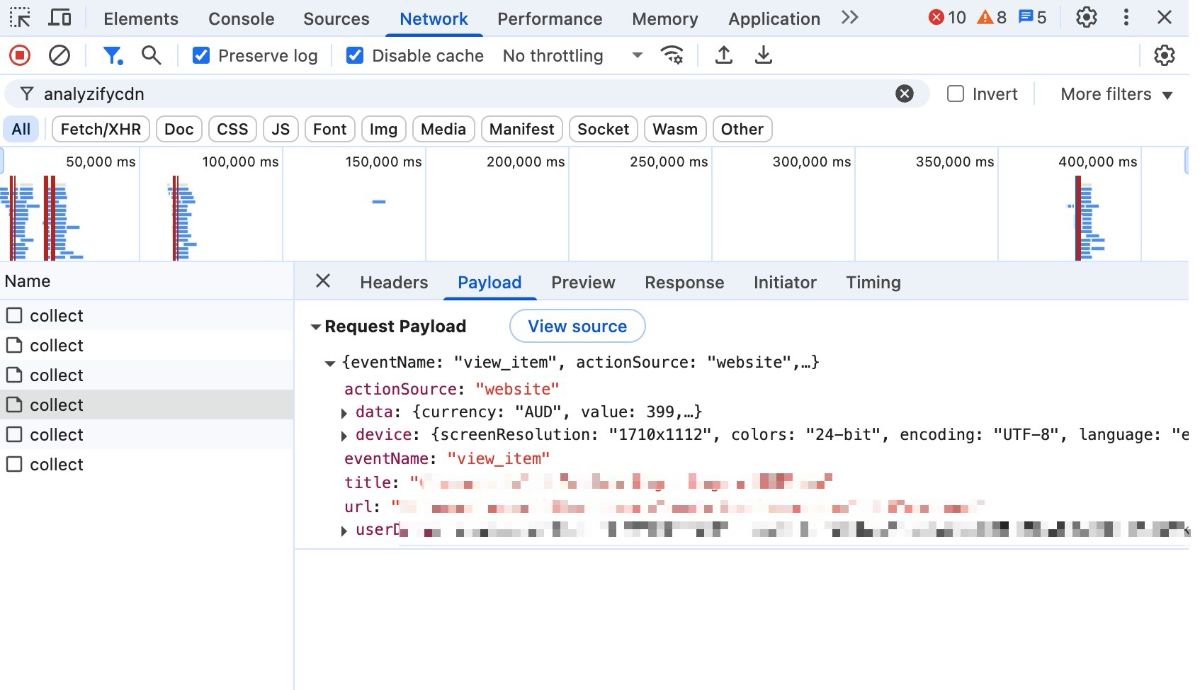
As shown in the screenshot, once you filter by analyzifycdn in the Network tab, look for the “collect” request with a small arrow or triangle icon next to it (indicating expandable content). Click on it to view and verify the event data being sent.
While the Network tab is open and analyzifycdn is filtered, navigate to a product page and verify that the view_item server-side event is working.
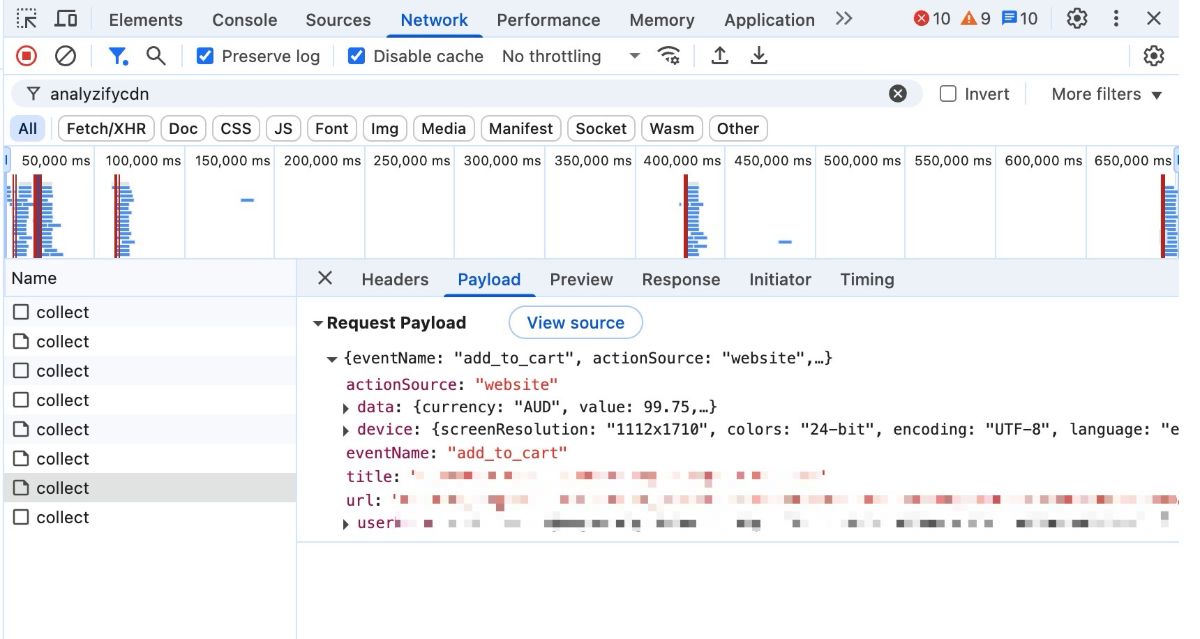
While the Network tab is open and analyzifycdn is filtered, add a product to your cart and verify that the add_to_cart server-side event is working.
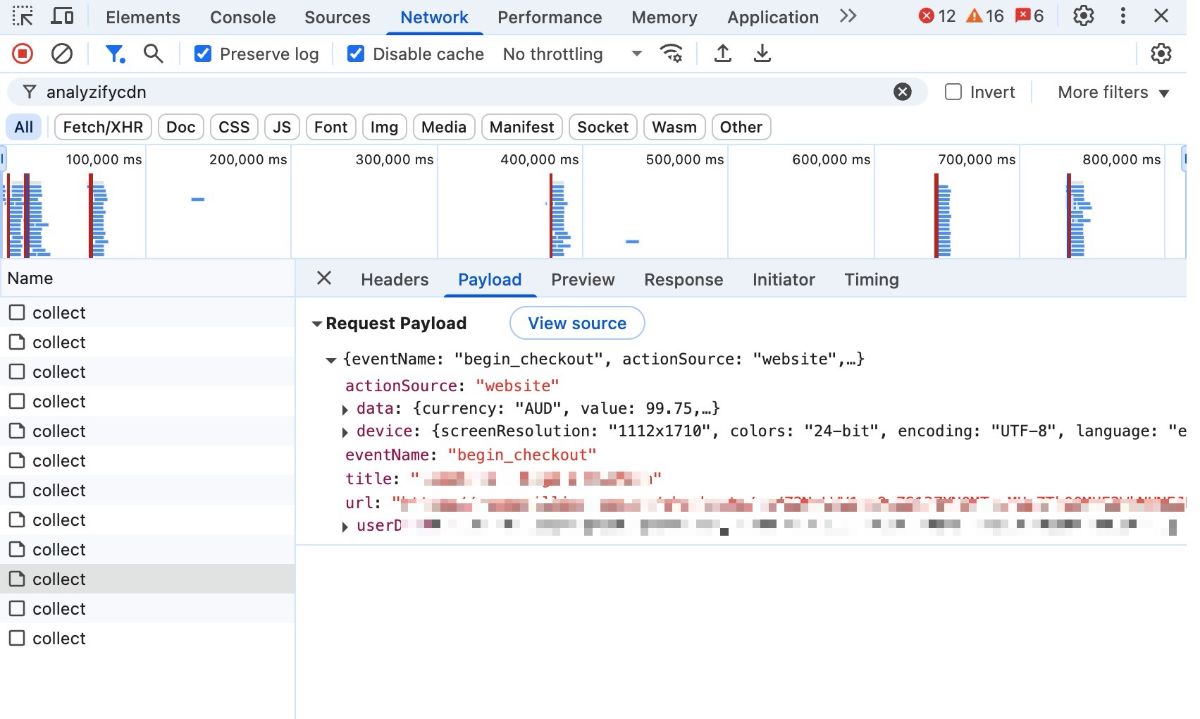
While the Network tab is open and analyzifycdn is filtered, proceed to the checkout page and verify that the begin_checkout server-side event is working.
On the checkout page, enter your payment information while the Network tab is open and analyzifycdn is filtered, and verify that the add_payment_info server-side event is fired.