Introduction
This tutorial will guide you on how to update tags in your GTM container. If any parameters in the Custom Tags of your unpublished container use old Analyzify versions, you'll need to replace them with the updated equivalents from the new version.
Before you begin customizing your tags, it’s essential to activate the dataLayer codes. Analyzify manages the dataLayer through the App Embed until the checkout stage, and then switches to custom pixel codes for checkout events. While the App Embed can be easily toggled within the app, the checkout codes must be added manually.
You can start by activating the dataLayer in our app and applying our custom code block for checkout and purchase tracking. The Custom Pixel includes configurable parameters to fit your specific setup.
Inside your GTM container, there's an unpublished container in a new Workspace. It includes both unadjusted Analyzify v4 tags and other Custom Tags. Before publishing, make sure to check the Variables section for dataLayer variables that must be updated to match the new version.
Once you set up, you can follow the instructions below to customize your tags for each channel.
Adjust GTM Container
Select your tracking channels (such as GA4, Google Ads, Bing, etc.) for your GTM container. Choose either the "Standard GTM Container" or the "GTM Container with Consent Mode," depending on your tracking requirements. Once you've created your container, you can download it at any time and access our instructions to complete your Data Layer activation.
Import Analyzify v4 Tags into GTM
When importing the Analyzify v4 file into Google Tag Manager, we recommend using the Overwrite method . Please note that selecting this method will delete everything in your current GTM container, and only the Analyzify tags from the setup file will be imported.
If your GTM container contains other tags apart from the Analyzify setup, be sure to export and save those tags before proceeding.
To easily find the tags you've added outside of Analyzify, scroll to the end of the Tags section. Analyzify tags typically have numeric values at the beginning, so you can identify them easily.
However, if any of your custom tags also start with numbers, be cautious as they may be mixed in with the Analyzify tags.
Here are the steps to export these tags:
Select Admin > Export Container > Default Workspace
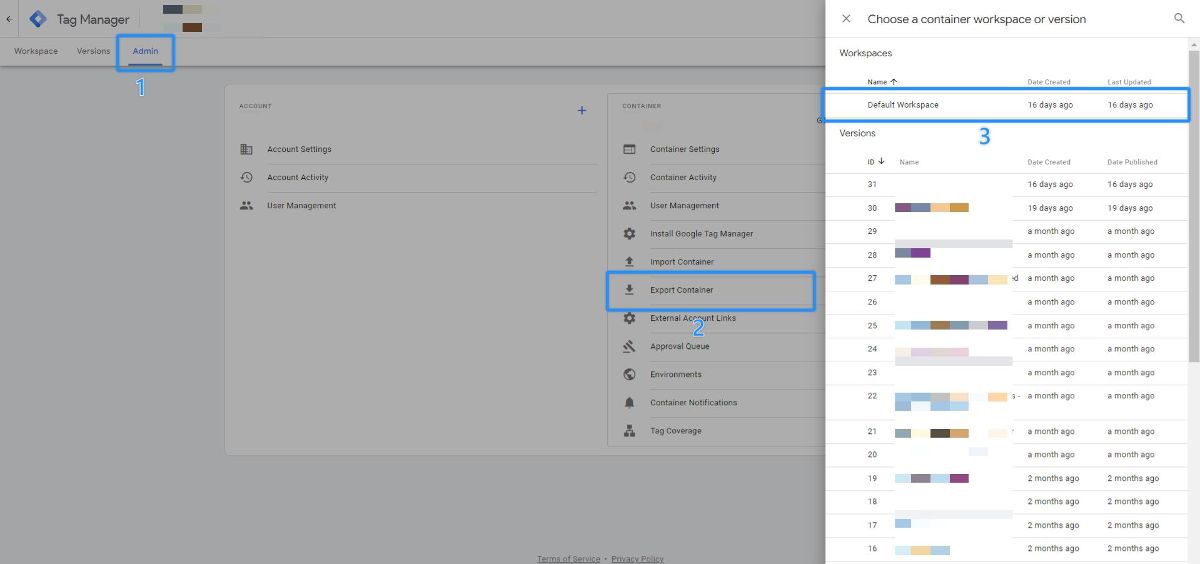
Find and select the relevant tags from the list one by one. Here, we want to inform you that only the Tags need to be selected; Variables, Triggers, and Templates will be automatically added in the next step. After all Additional Custom Tags are selected, click on Export.
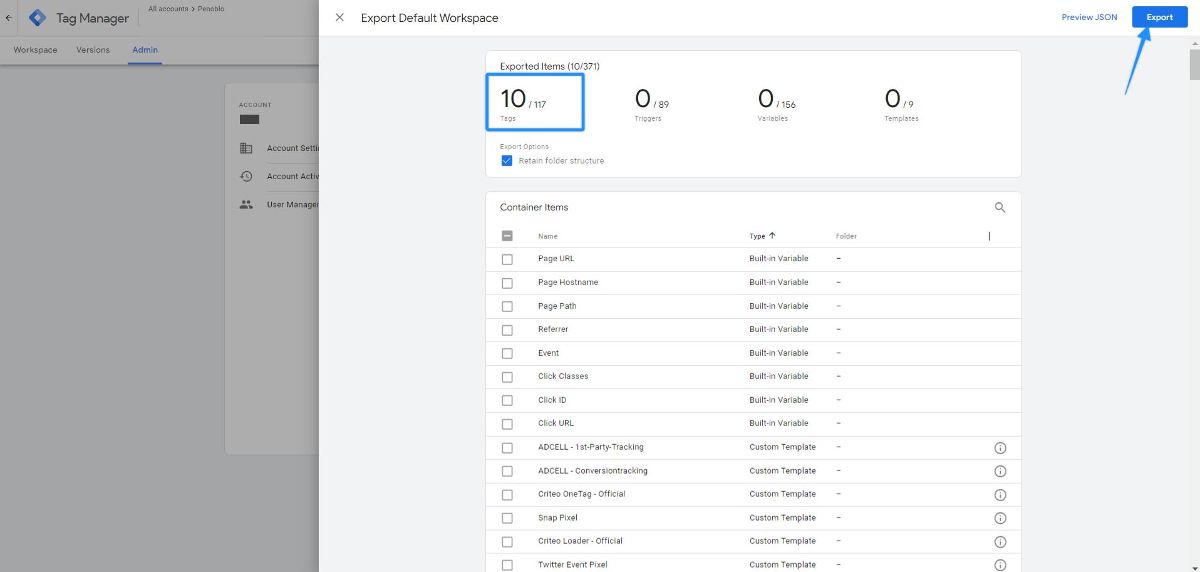
Click the Cancel button in the warning pop-up that appears
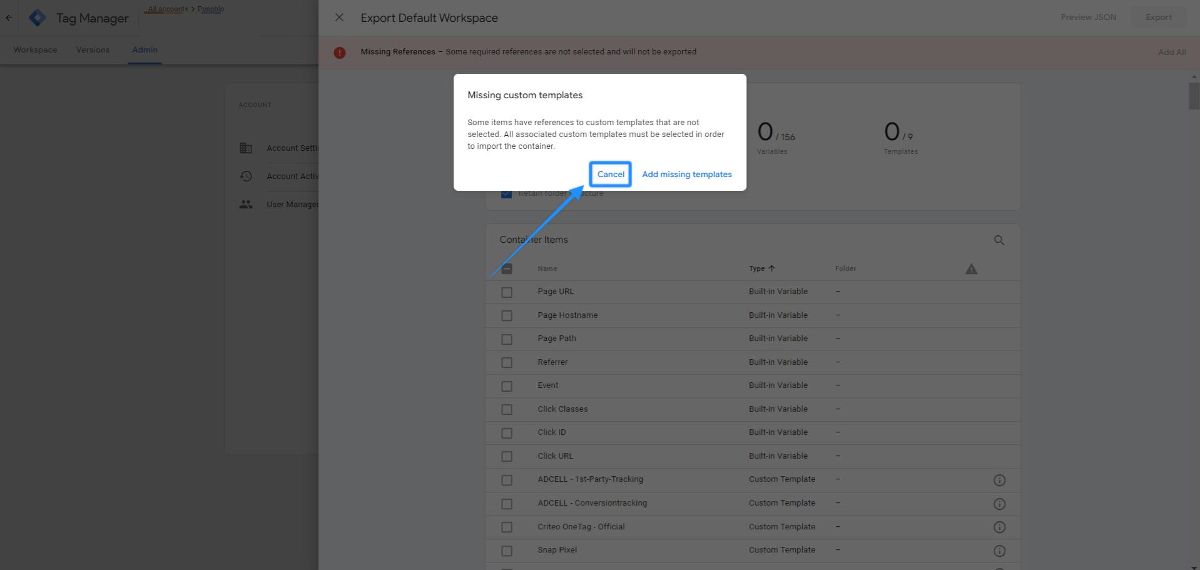
Then click the Add All button.
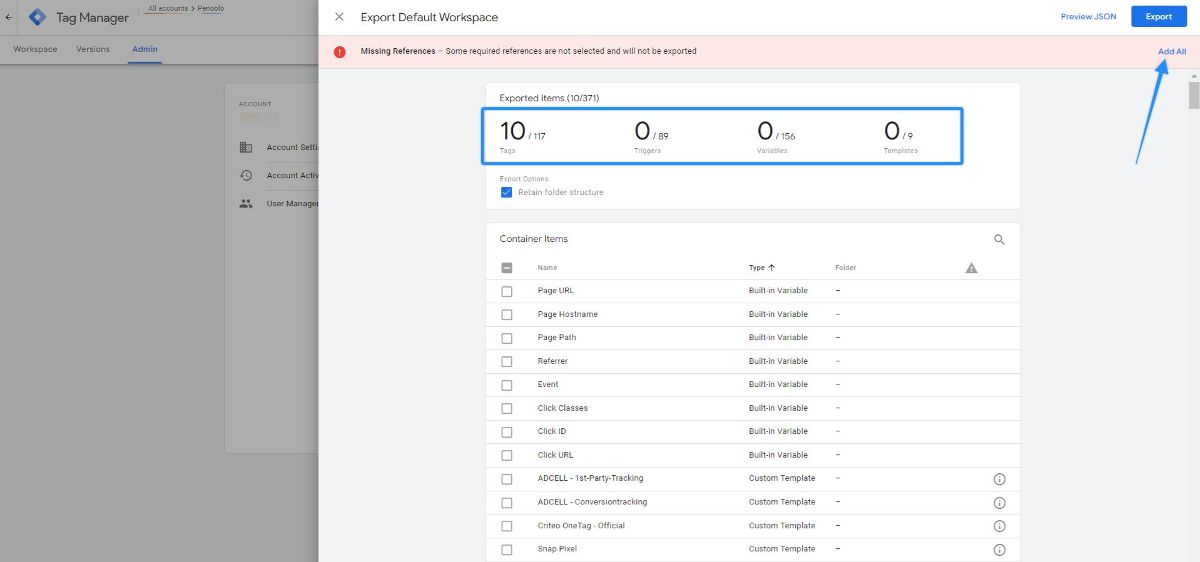
Add all Variables, Triggers, and Templates related to the selected Tags to the JSON file.
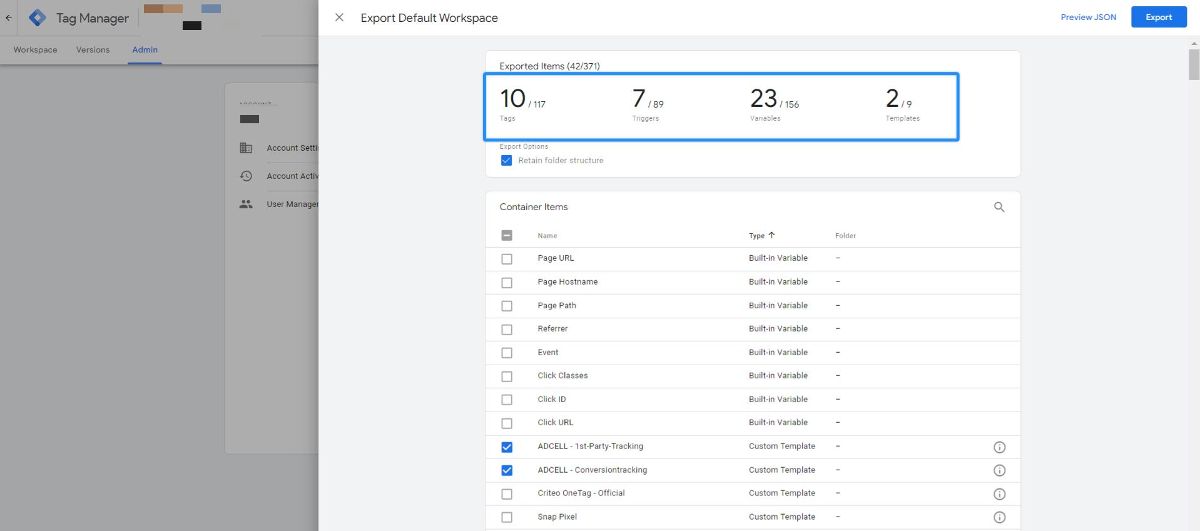
Click the Export button to save all Tags and their associated parts, other than the Analyzify setup, into a separate JSON file.
Now, firstly, you should import the JSON file downloaded from the Analyzify App into a different Workspace by creating it.
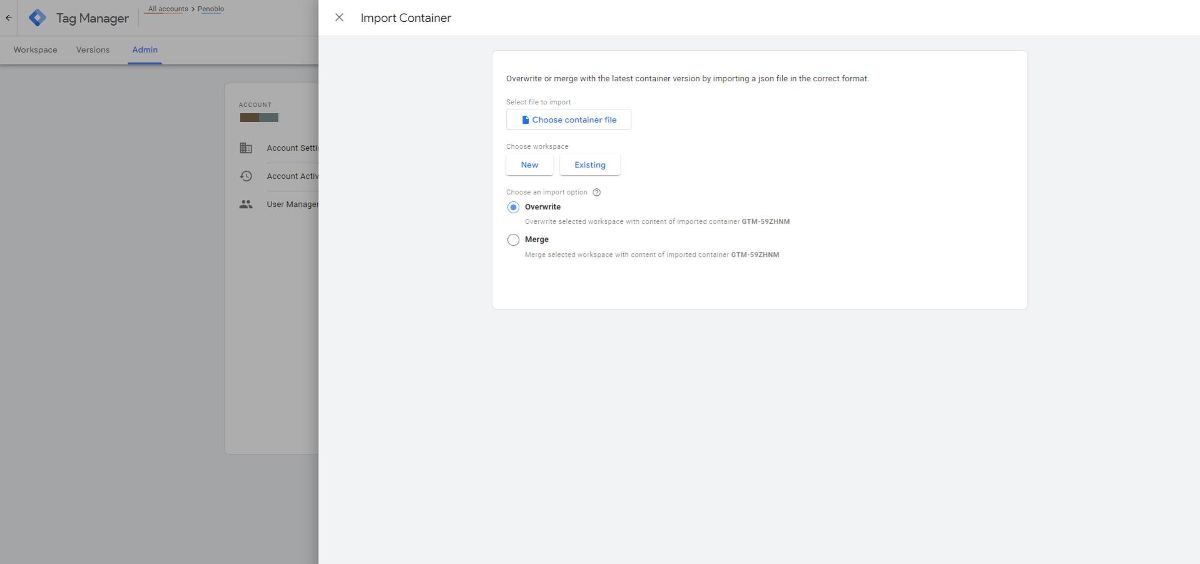
Choose your Container File: Select the Analyzify JSON file from your folder
Choose workspace: Select New and name it as Analyzify v4
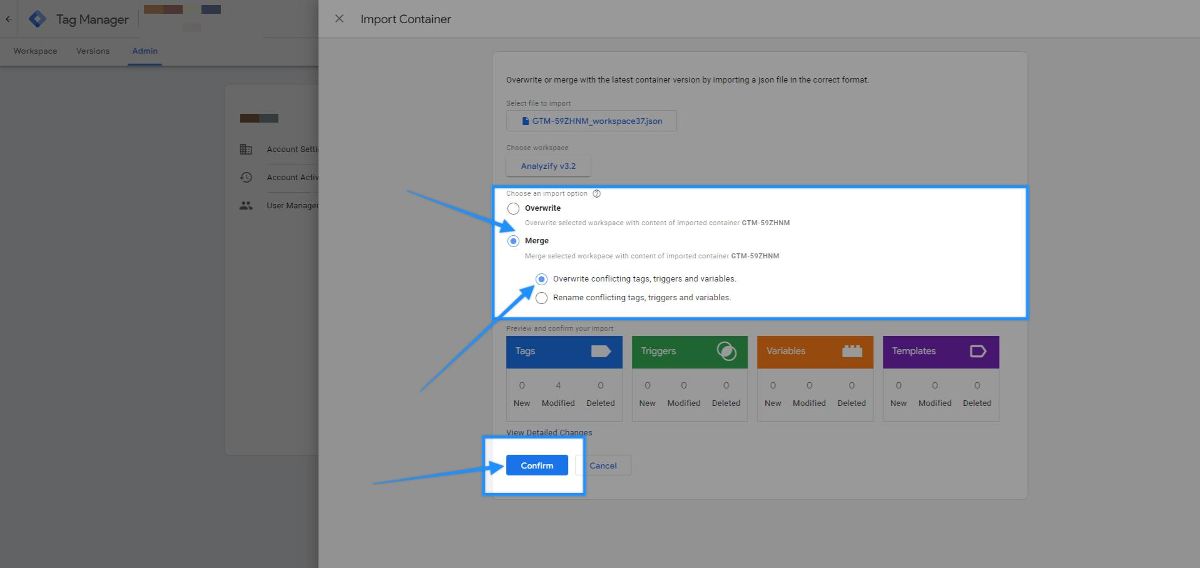
Choose an import option: Can stay as Overwrite.
Finally, as shown in the screenshot, click the Confirm button.
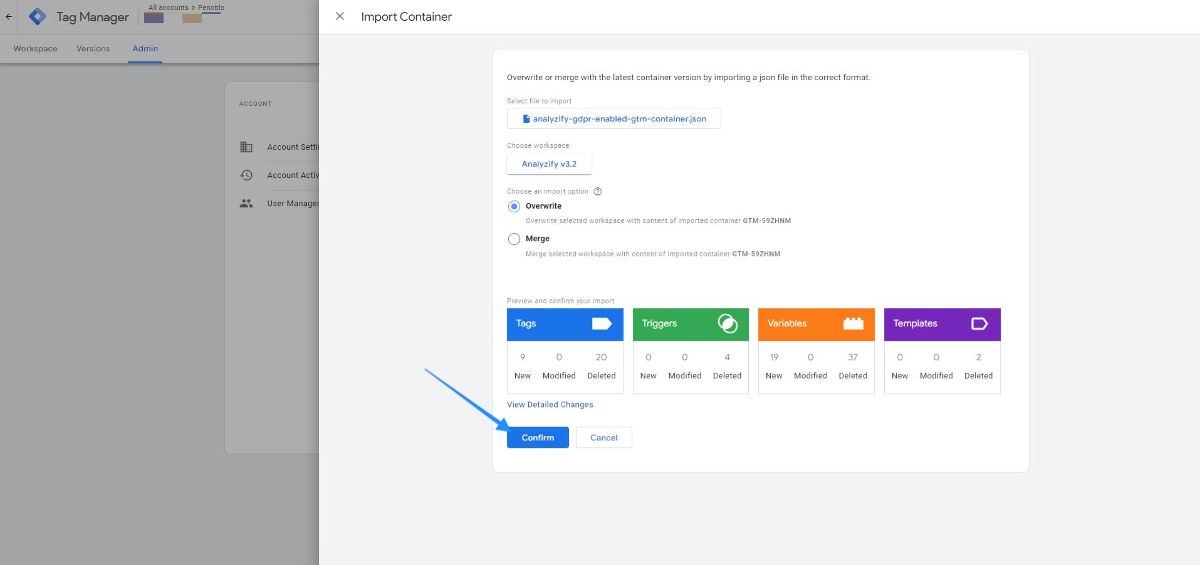
You will repeat the same process for the JSON file containing your Custom Tags, but this time you need to choose Merge instead of Overwrite so that the Analyzify tags you just imported are not deleted. You can click Confirm as shown in the screenshot.
Update Your Integrations' IDs
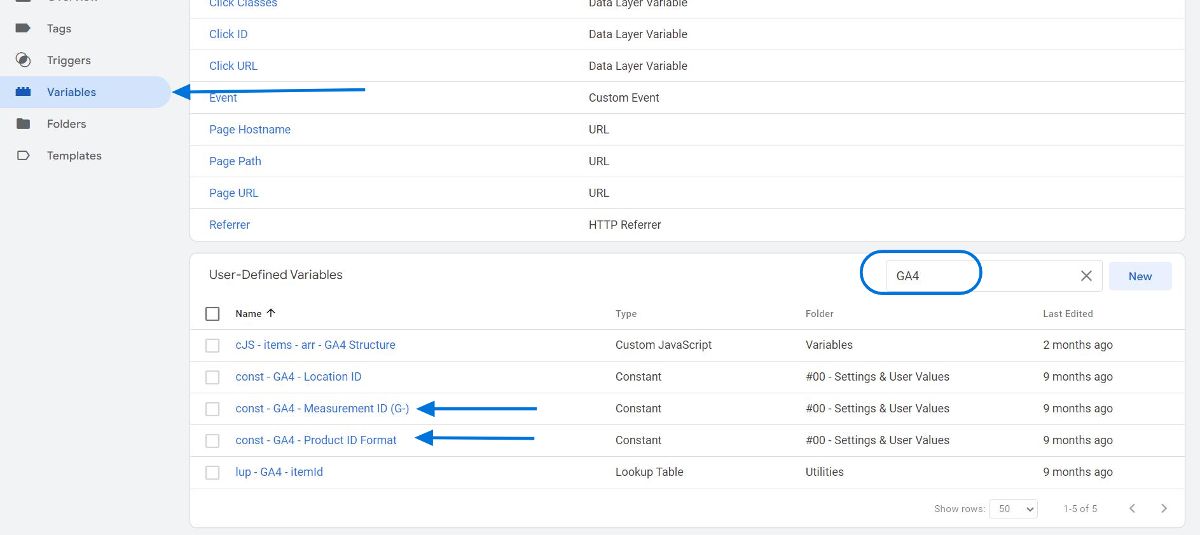
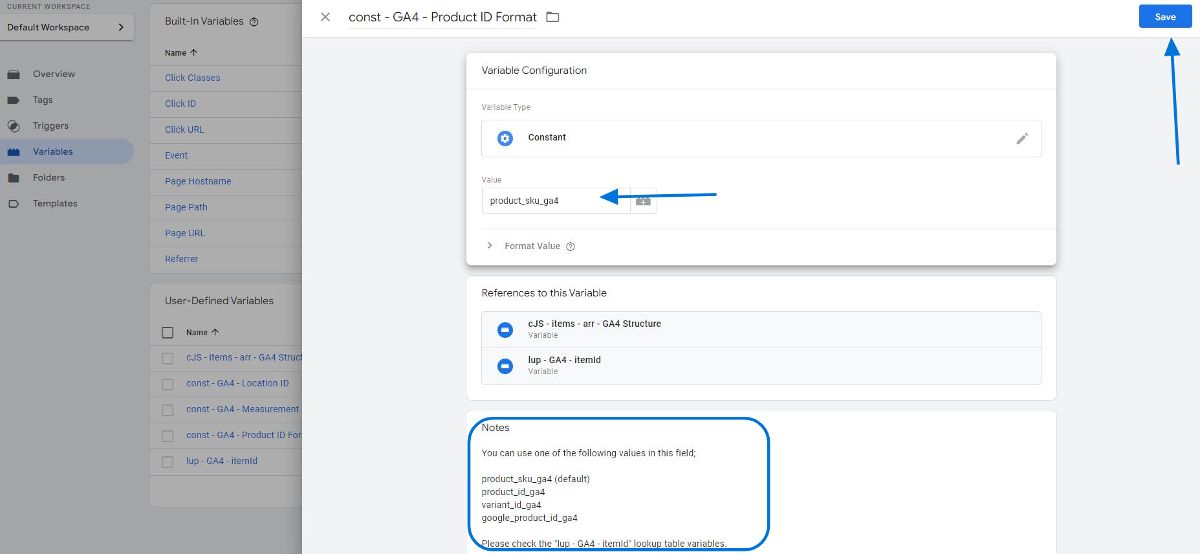
Since your Analyzify V4 GTM container is not provided as ready-made , you need to manually enter your integrations’ IDs and other relevant details. We’ve outlined everything step-by-step below.
Google Analytics 4 (GA4) Integration

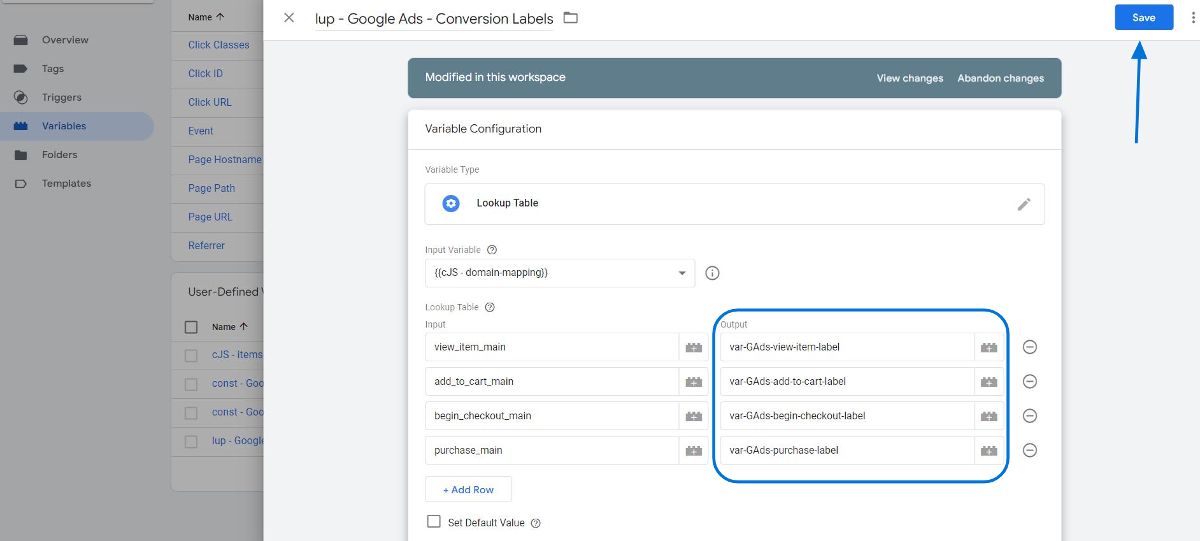
Setting Up Google Ads Conversion Tracking
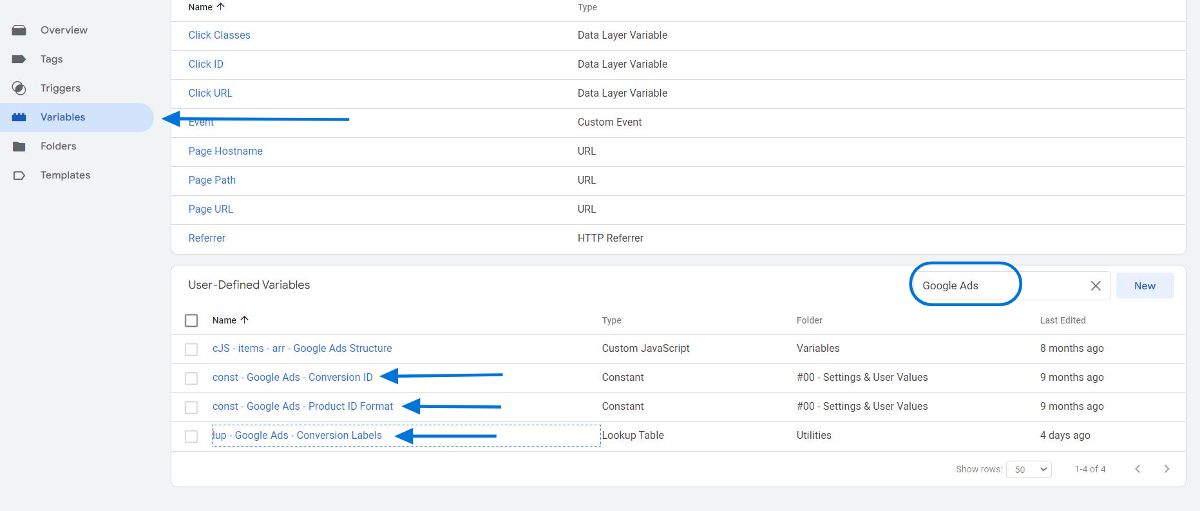

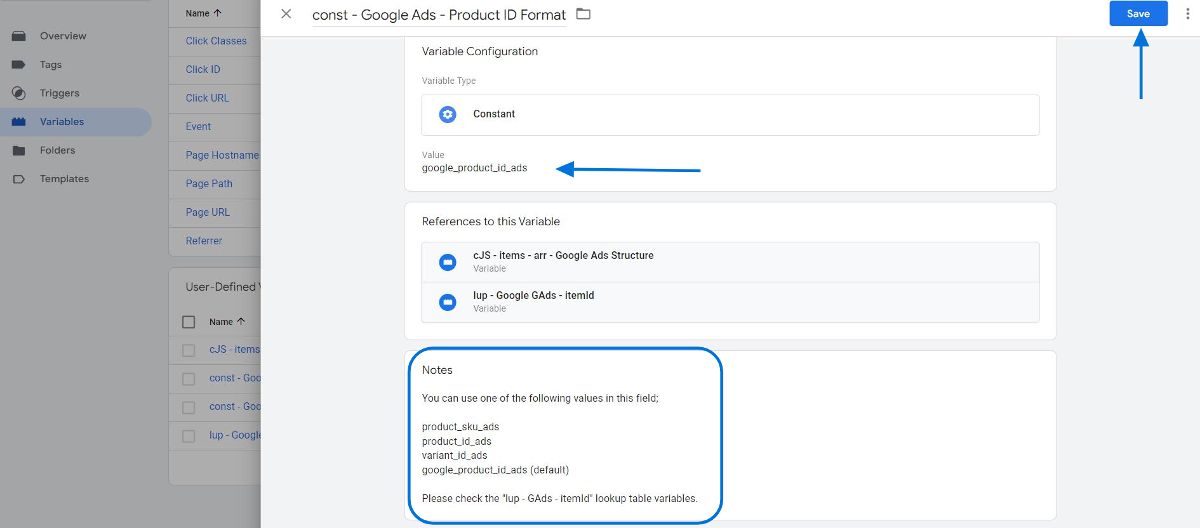
Integrating Google Ads Remarketing with GTM

Note:
If you have already entered the Google Ads - Conversion ID while setting up Google Ads Conversion, there is no need to enter it again.

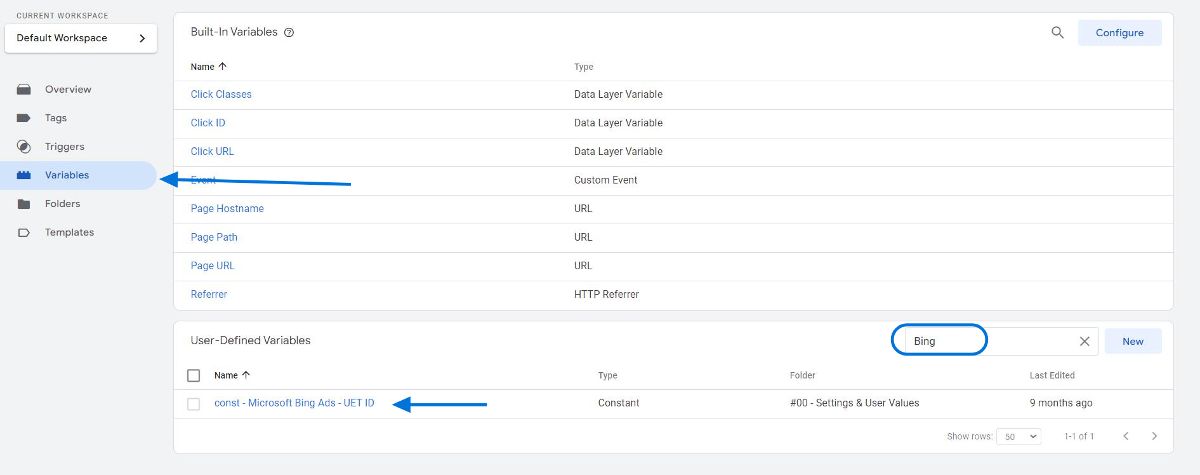
Microsoft Bing Ads Integration

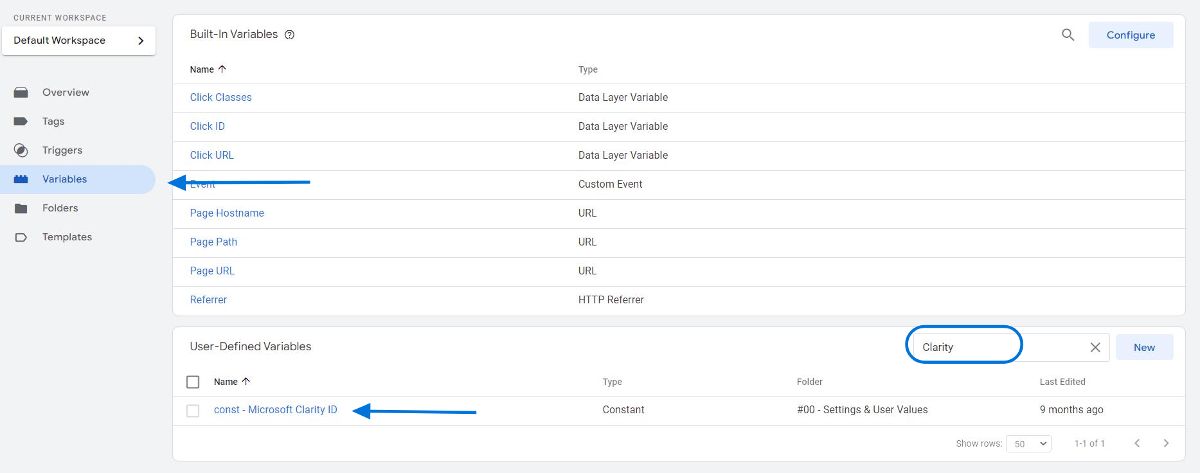
Microsoft Clarity Integration

Adjusting Changes Made in Flags within the Custom Pixel in GTM
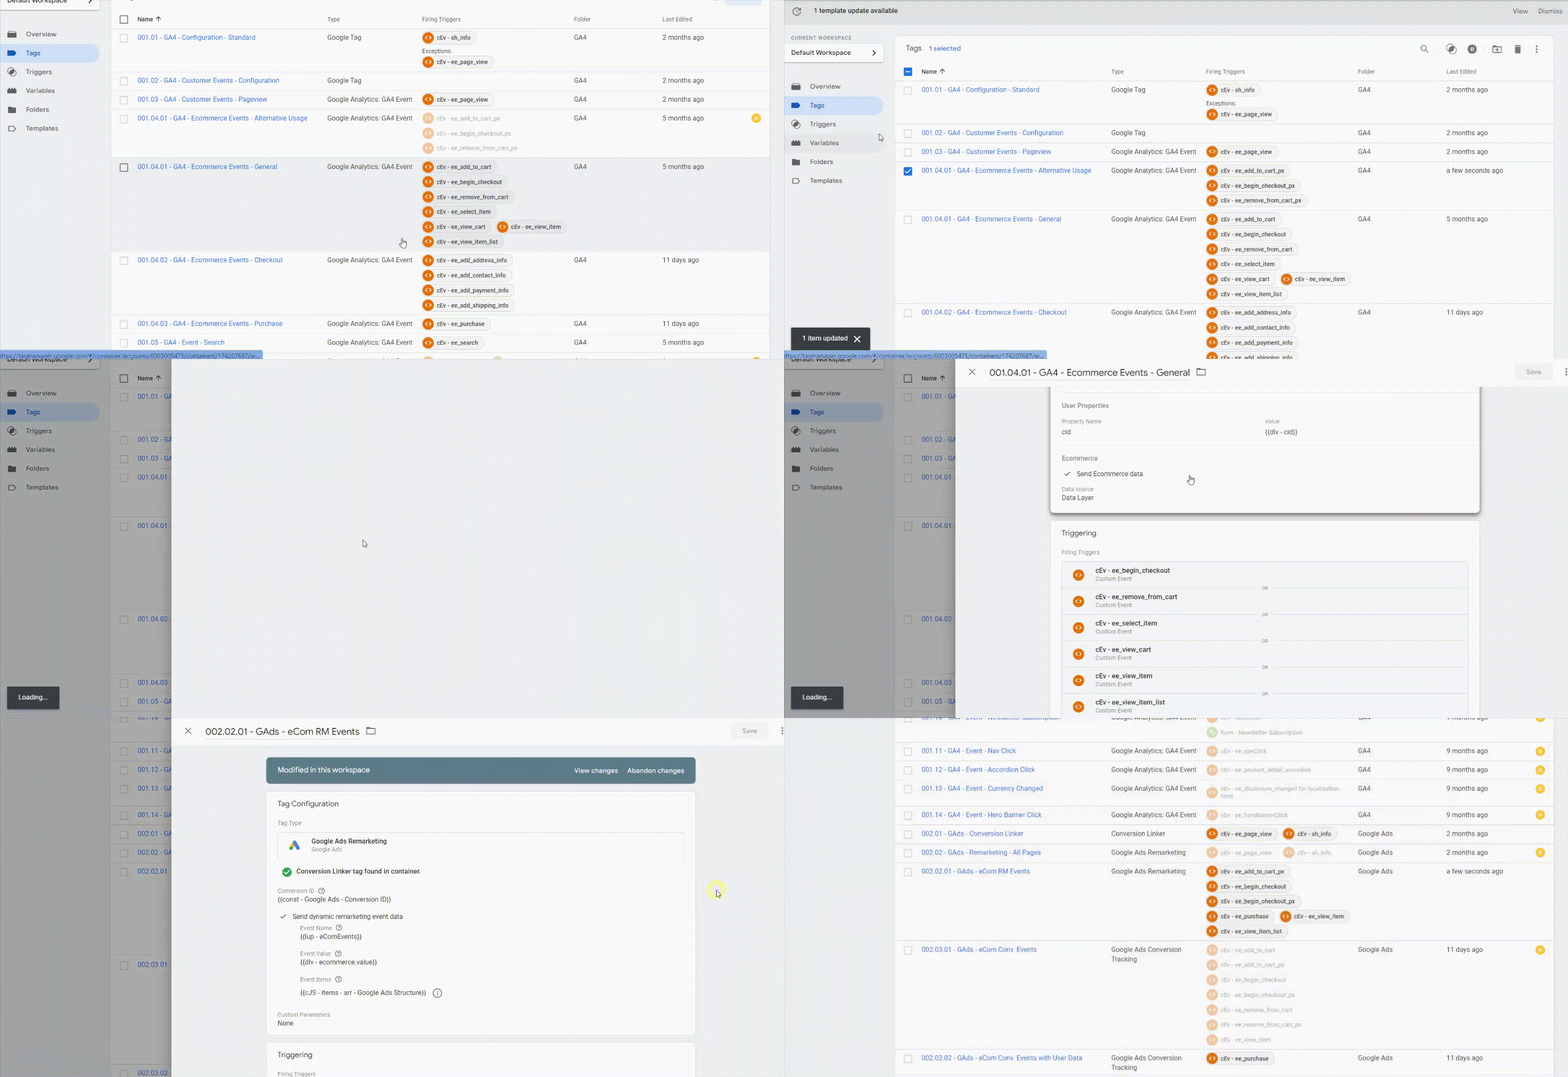
1. If the events product_added_to_cart, product_removed_from_cart, and checkout_started under the "flags" section of the Custom Pixel code have been changed to "true", the 001.04.01 - GA4 - Ecommerce Events - Alternative Usage tag in GTM should be activated.

2. Then, for the tags that are active, the triggers ee_add_to_cart, ee_begin_checkout, and ee_remove_from_cart should be removed. The integration will start working with the triggers ee_add_to_cart_px, ee_begin_checkout_px, and ee_remove_from_cart_px.
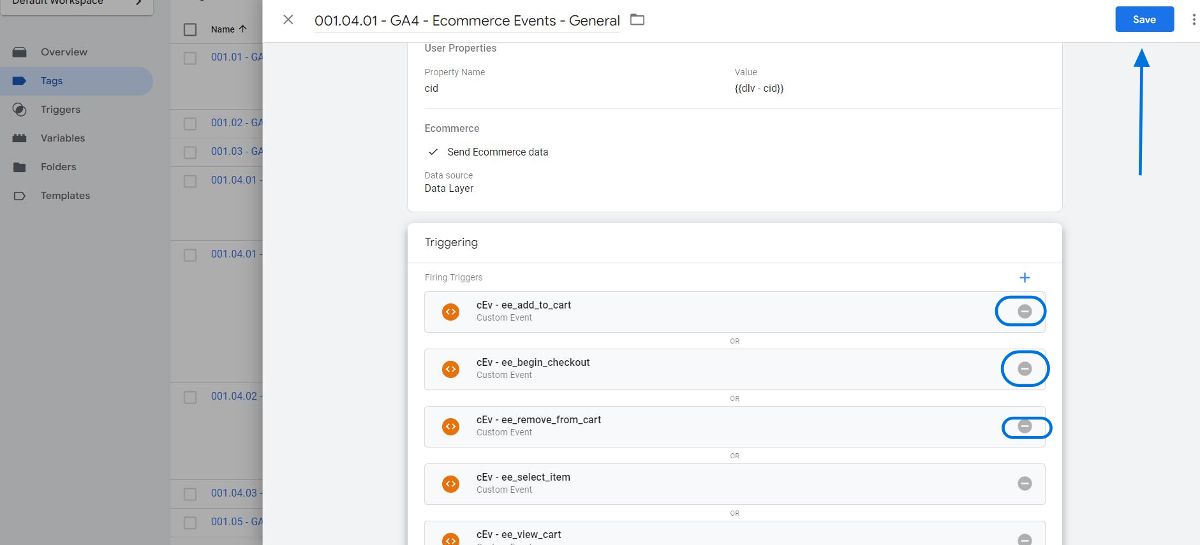
3. For example, if we set the product_added_to_cart variable under the "flags" section of the Custom Pixel code to "true", we should make the necessary changes in the active tags as shown in the screen recording and then publish our GTM container.
