Analyzify's TikTok Server Side implementation enables you to send conversion events directly to TikTok using their Events API. This server-side tracking provides more reliable data collection and improved tracking accuracy for your TikTok ads performance.
Analyzify's TikTok Server Side implementation tracks the following events:
- Pageview When a customer views a page
- View Content : When a customer views a product
- Add to Cart : When a customer adds a product to their cart
- Search : When a customer searches for products on your store
- Initiate Checkout : When a customer begins the checkout process
- Add Payment Info : When a customer adds payment information
- Place an Order (Purchase) : When a customer completes a purchase
- Refunded: When a refund is issued for an order
Best practices:
- Server + Browser: For optimal tracking, we recommend implementing both TikTok Pixel (client-side) and Events API (server-side) as recommended by TikTok.
- Set Up Client-Side First: Start with our client-side (browser-side) integration before implementing the server-side tracking.
- Content ID Consistency: Choose the Content ID format that matches your existing tracking setup for consistency across platforms.
How to Set Up TikTok Server Side
Before setting up TikTok Server Side with Analyzify, you'll need:
- A TikTok Business Account with admin access
- A TikTok Pixel (existing or new)
- TikTok Events API Access Token
- Browser (client-side) tracking implementation
Step 1: Create a TikTok Pixel (if needed)
For the best experience, we recommend creating a new pixel specifically for Analyzify, especially if you're using existing pixels with other integrations like native Shopify TikTok integration.
To create a TikTok Pixel:
- Access Events Manager :
-
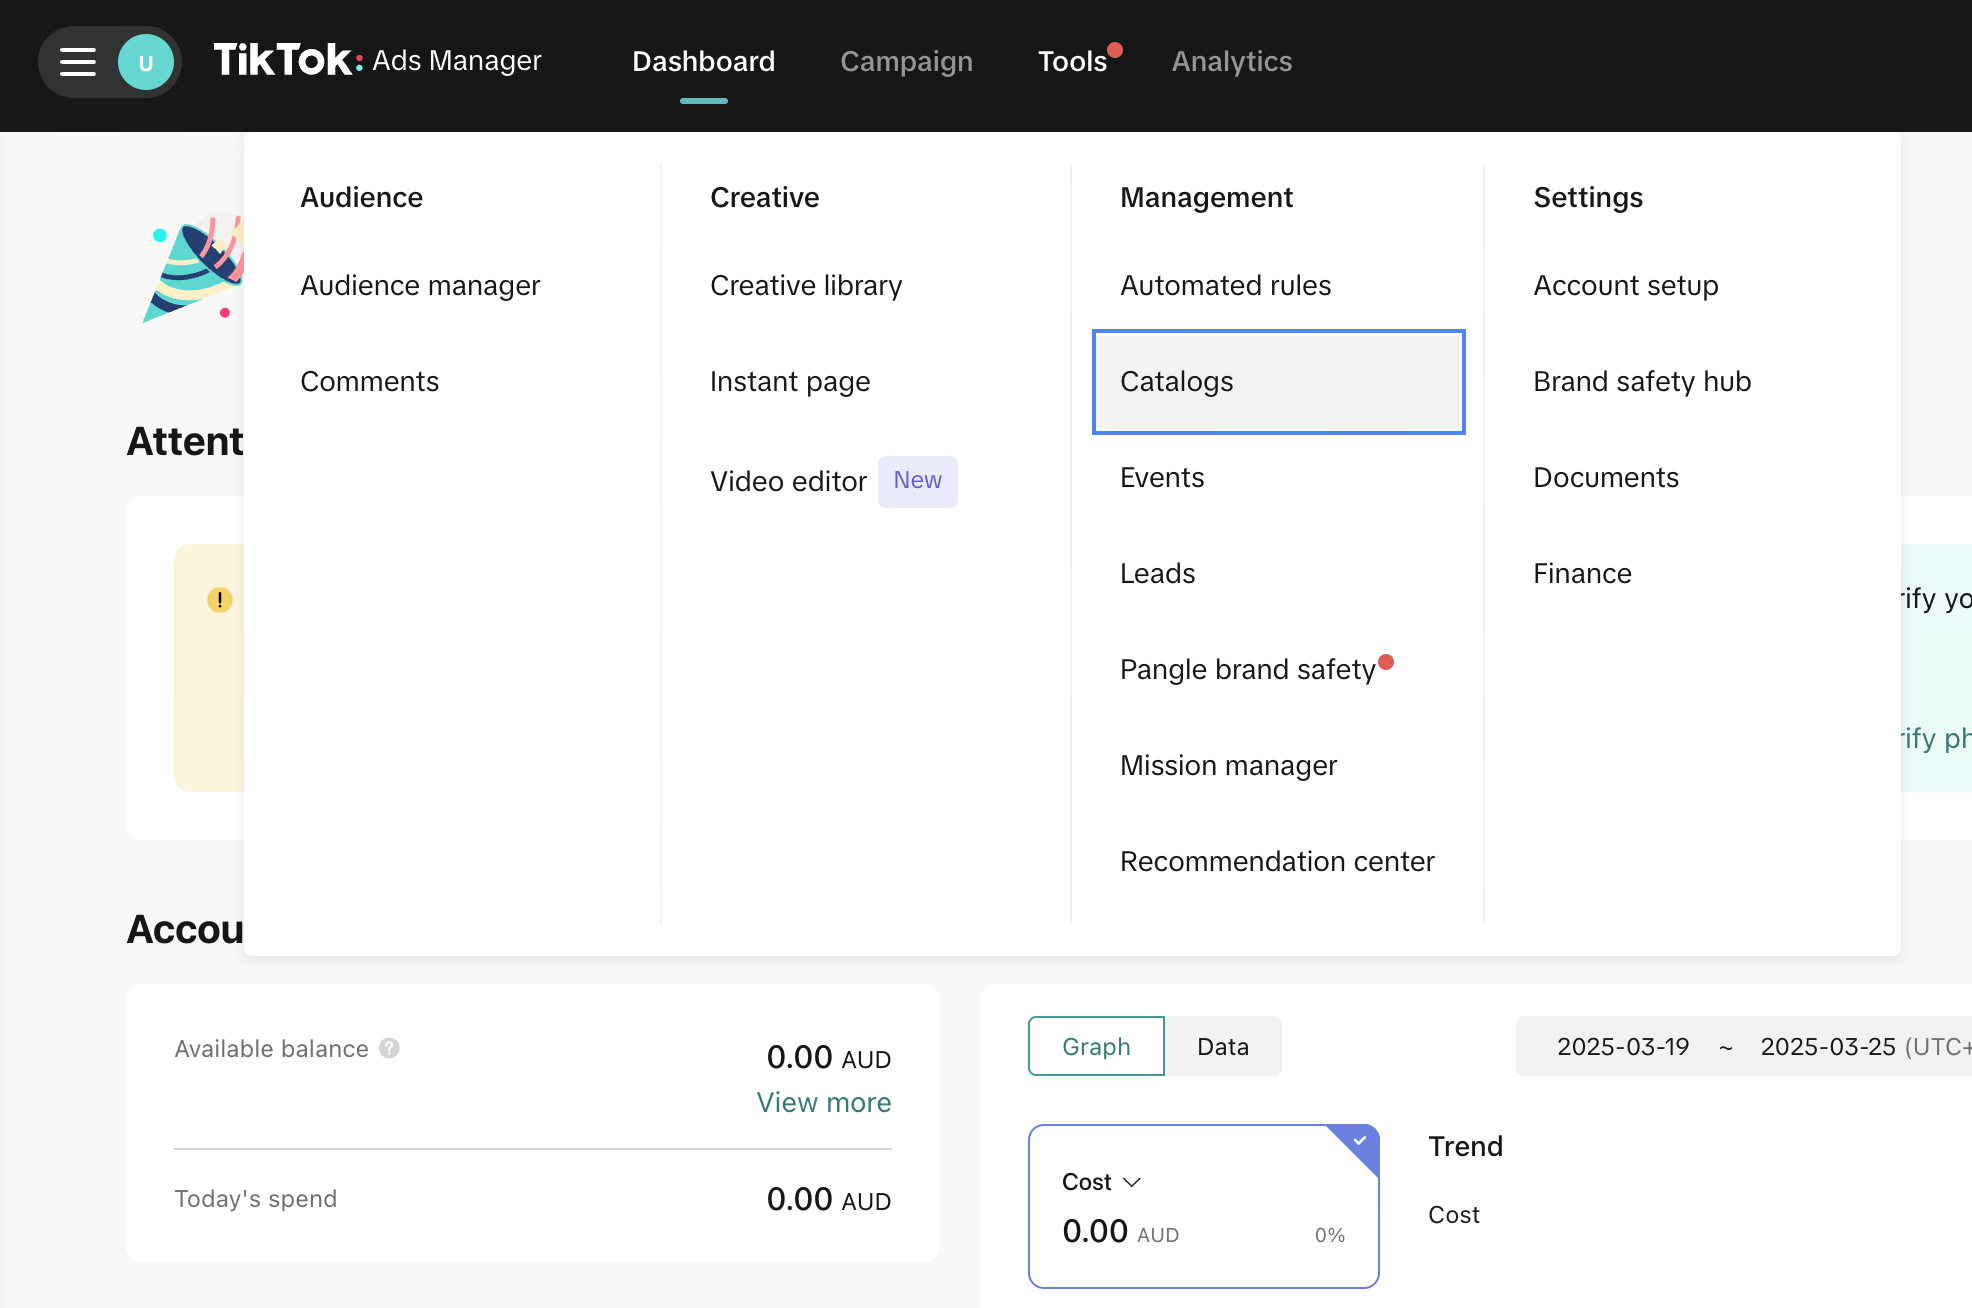
- Go to the homepage of your TikTok Ads Manager account
- Click the "Tools" tab in the top menu
- From the dropdown menu, click on "Events"
- Connect Data Source :
-
- On the Events Manager page, click the "Connect data source" button in the upper right corner
- Follow the on-screen instructions to complete the pixel setup
Step 2: Generate an Access Token (Pixel Secret)
To use the TikTok Events API, you'll need to generate an access token:
- Log in to your TikTok Ads Manager
- Click on Tools → Events from the menu bar
- Open Events Manager and open your Pixel
- Click the Settings tab
- Click Generate Access Token
- Copy the access token, then paste it into Tiktok Pixel Secret field in Analyzify's setup screen.
Note : You must be an Admin or Operator to generate the token. If you don't have access, ask your business admin to grant permission or generate it for you.

Step 3: Set Up Analyzify TikTok ServerSide
- Log in to your Analyzify dashboard
- Navigate to Integrations > TikTok Server Side Tracking
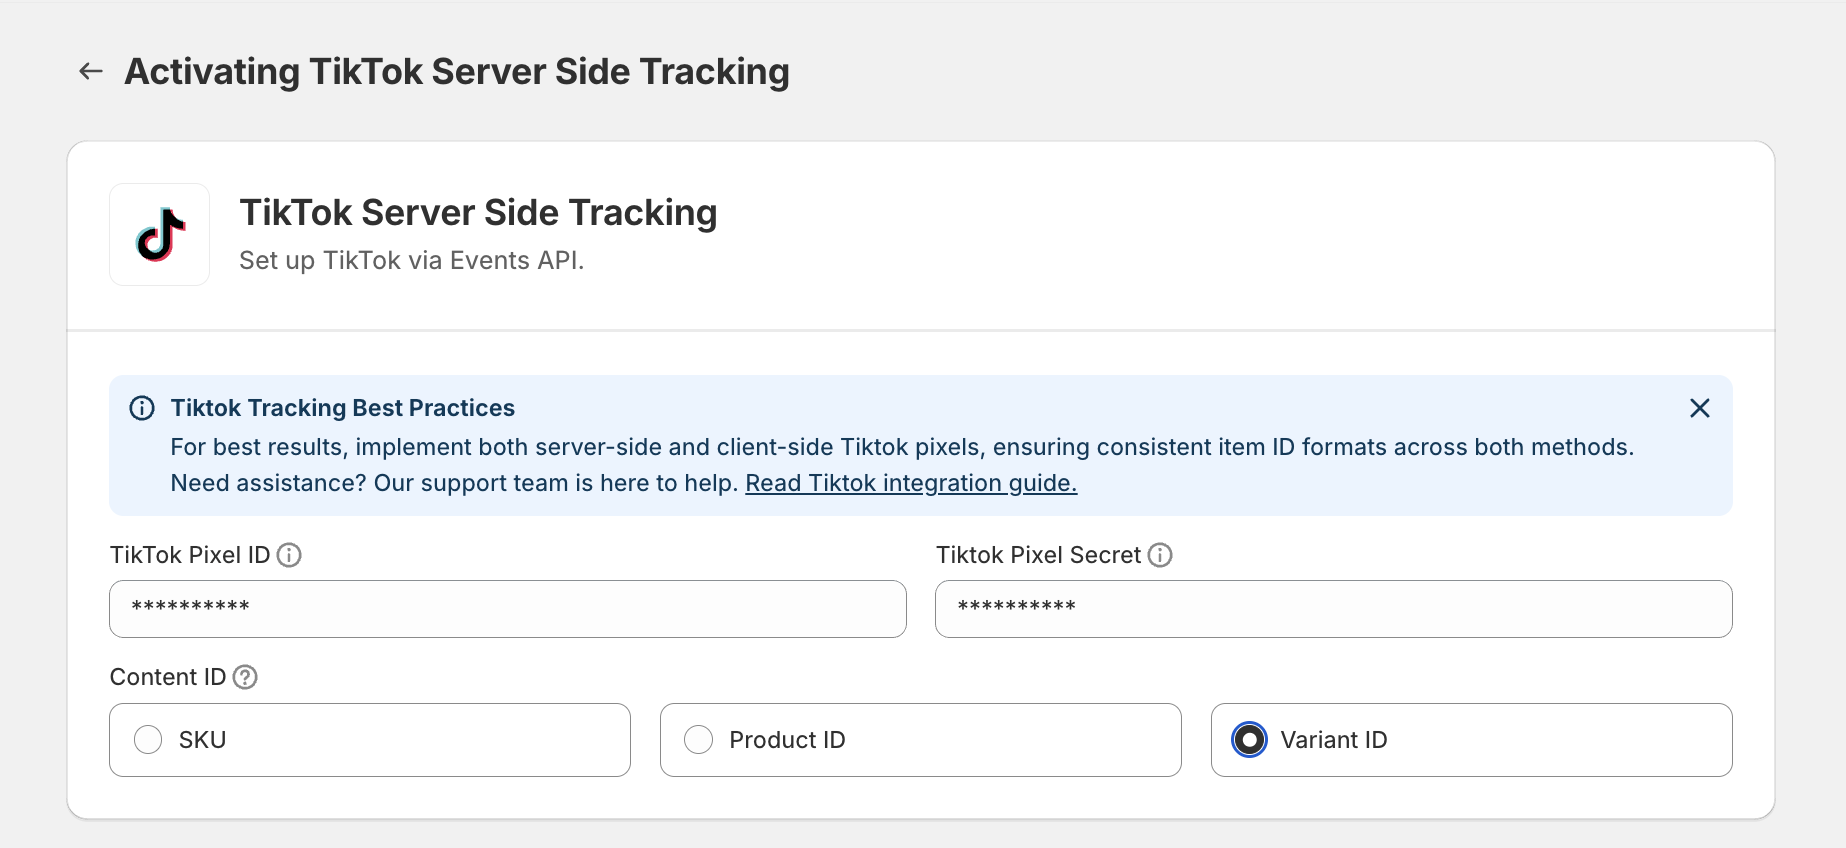
- Enter the required information:
-
- Pixel ID : Your TikTok Pixel ID
- Access Token : The token generated in Step 2
- Content ID (item ID) Format : Select the correct format by following this tutorial .
- Click Next to proceed
Follow these steps to determine which format (SKU, Product ID, or Variant ID) your TikTok catalog is using:
How to Check TikTok Content ID Format
Please ensure that the content IDs reported to TikTok through Analyzify will match those in your TikTok catalog, allowing for accurate event attribution and conversion tracking.

dataLayer in the console and press Enter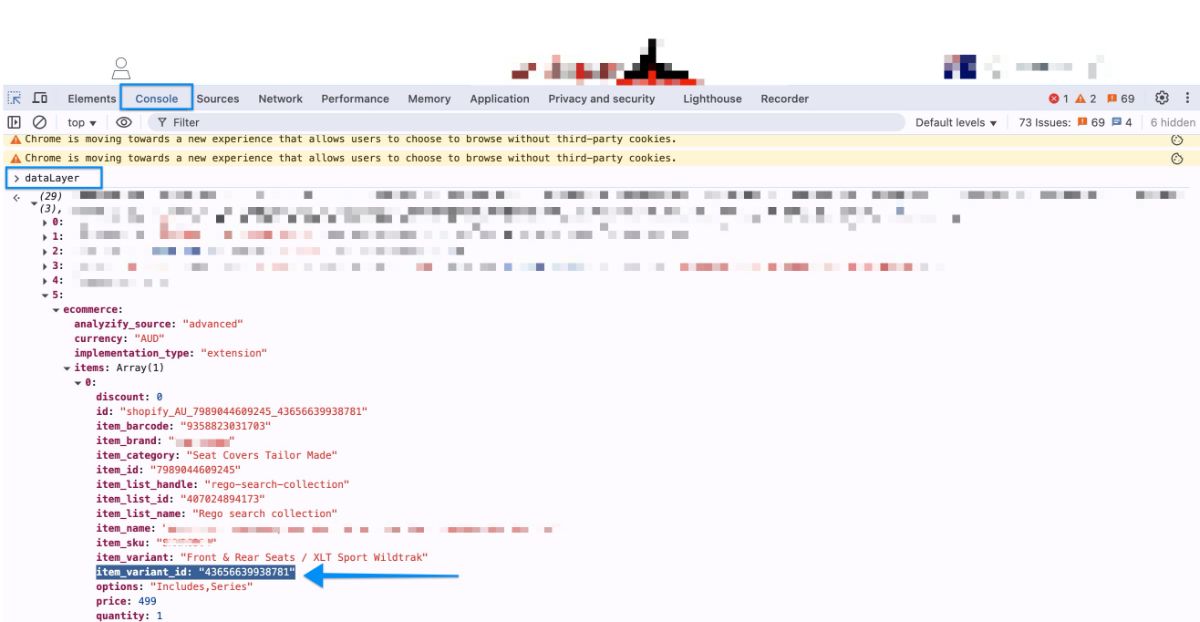
Step 4: Add Analyzify Server Side Tracking Code for Customer Events
🚨 Important Note: This same tracking code is used for both Meta CAPI and TikTok server-side integrations. If you've already added this code for Meta CAPI, you don't need to add it again.
For server-side integrations to work properly, you need to add the Analyzify Server Side tracking code to the Customer Events section of your Shopify store:
- Copy the provided tracking code
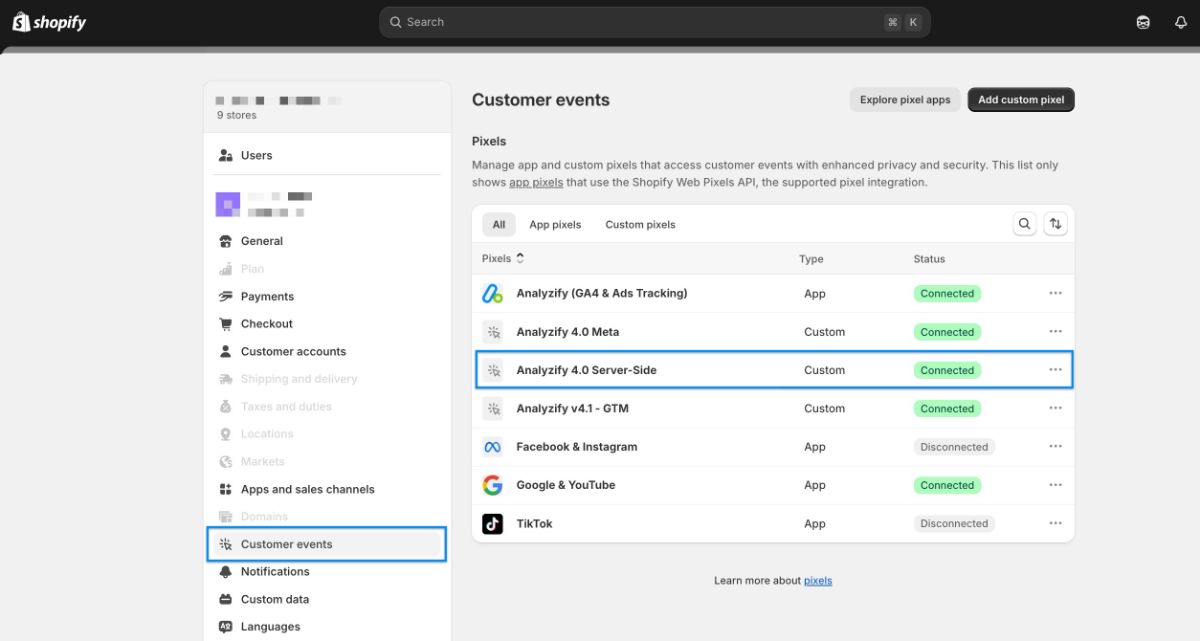
- Go to your Shopify admin panel
- Navigate to the Customer Events section
- Add the Analyzify 4.0 Server Side tracking code as a custom pixel
- Connect, save and finish your setup.
Verify Your Events in TikTok
After completing your setup, you can verify that your events are tracking correctly by testing them in TikTok Events Manager. Here's how to do it:
- Go to TikTok Ads Manager
- Navigate to Tools > Events
- Click on Data sources
- Select your pixel
In the Overview tab, you'll see all your events and their details, giving you insight into what actions users are taking on your website.
The Diagnostics tab is your go-to resource for identifying and fixing problems:
- It displays any active issues with your current setup
- It suggests specific actions you can take to resolve them
- Issues will appear in this tab within 24 hours
- The tab includes information about the number of events and ads affected by each issue
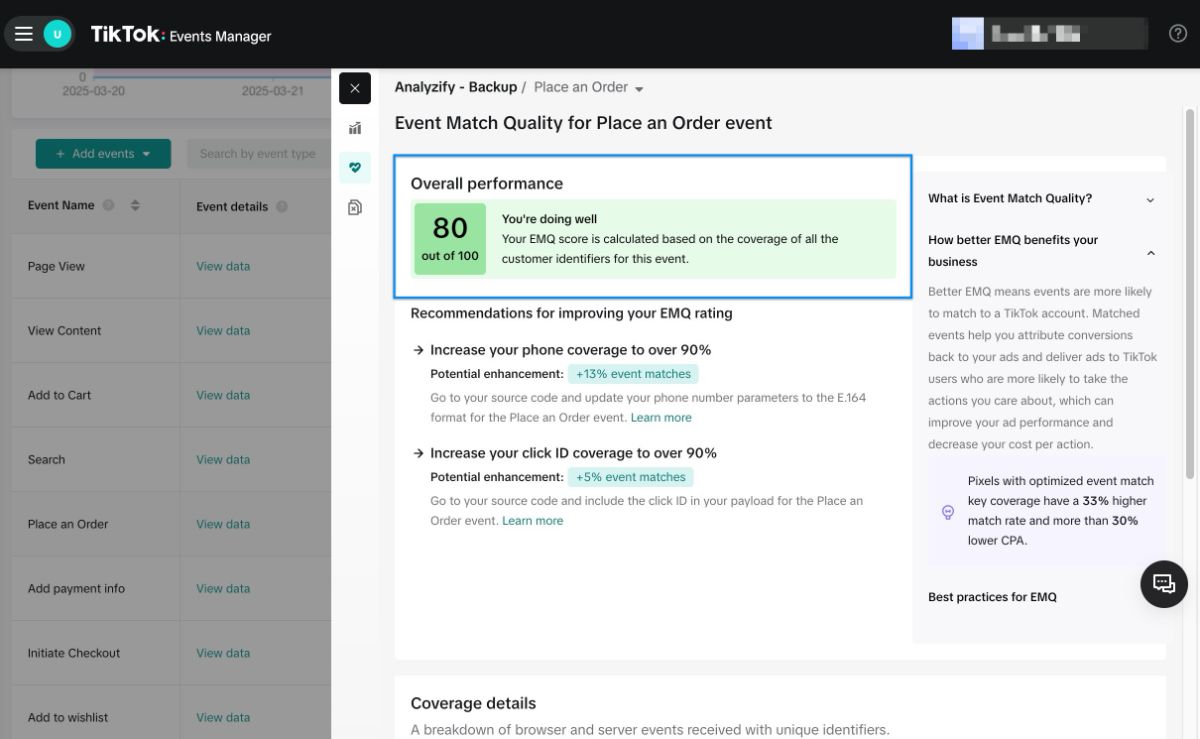
TikTok Event Match Quality Score (EMQ)
The TikTok EMQ Score (Event Match Quality Score) measures how well your website's event data matches TikTok user data. You can check EMQ scores for each event by clicking on View details . This is important because:
- Matched events help attribute conversions back to your ads
- They enable delivery of ads to TikTok users more likely to take your desired actions
- This can improve your overall ad performance
- It can decrease your cost per action
Read More On Analyzify Hub:
