Analyzify requires collaborator access to your Shopify store to provide comprehensive analytics and tracking services. This access is managed through Shopify's collaboration system for security purposes.
Providing Access to Analyzify
There are two scenarios under which our team may request collaborator access, depending on your store settings.
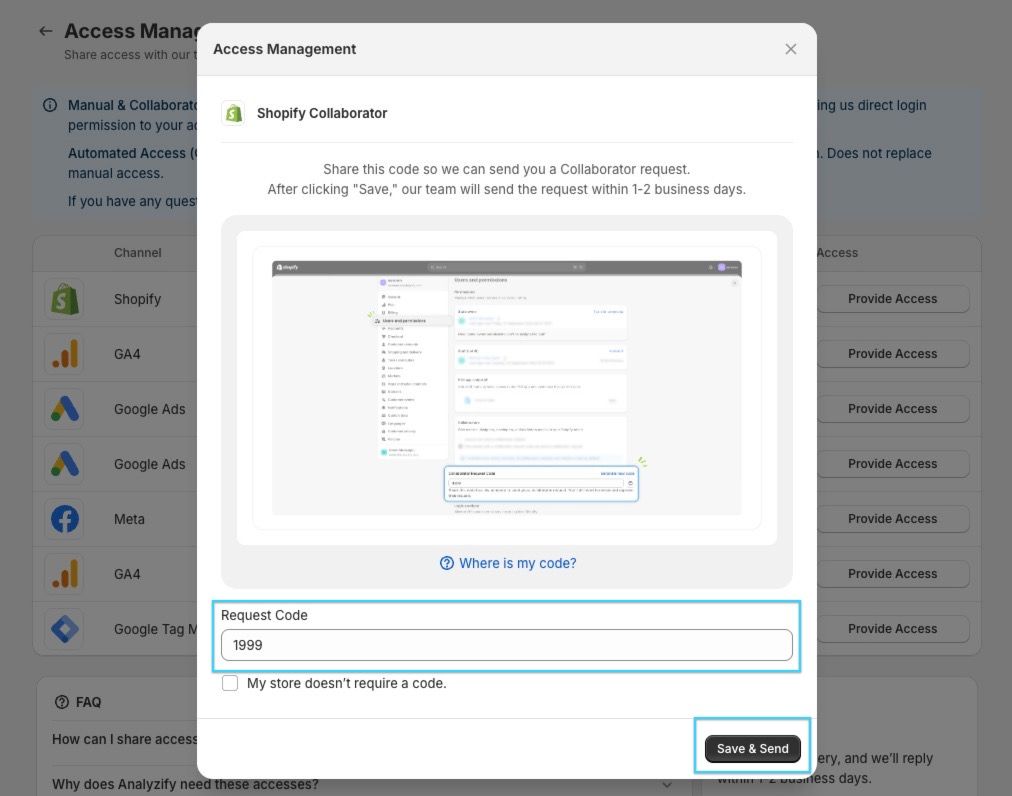
If You Require a Code
Click the "Provide Access" button in Analyzify > Access Management Menu > Shopify Collaborator Access
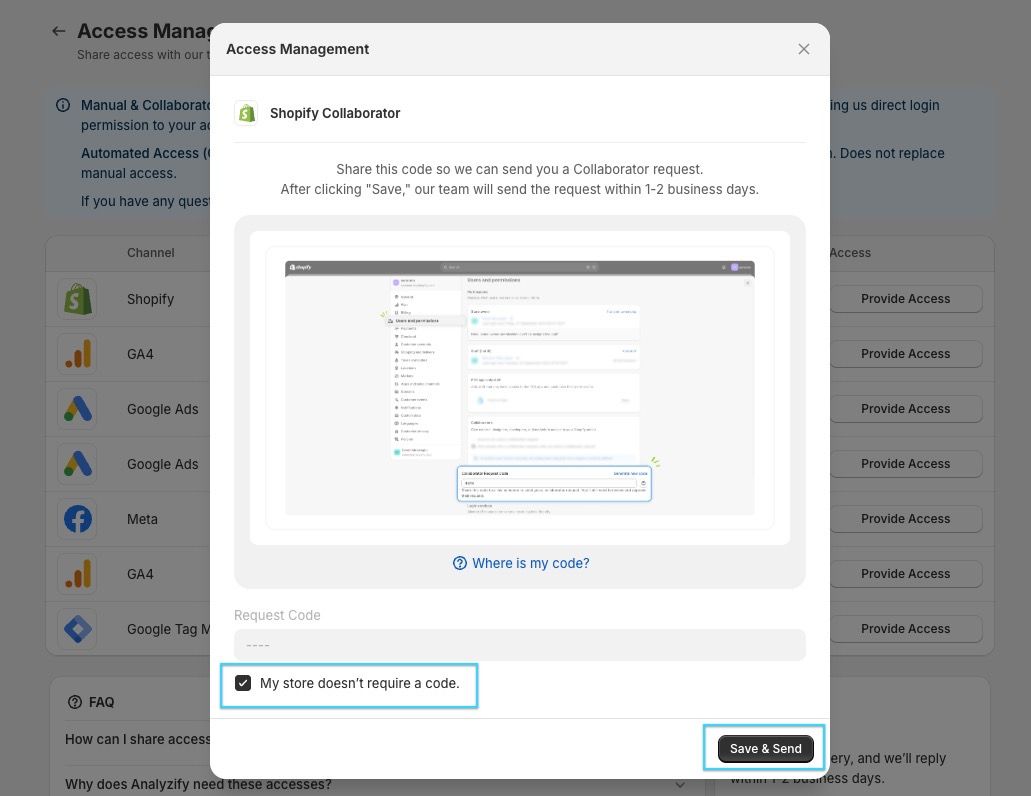
If You Allow Open Collaboration
Click the "Provide Access" button in Analyzify > Access Management Menu > Shopify Collaborator Access
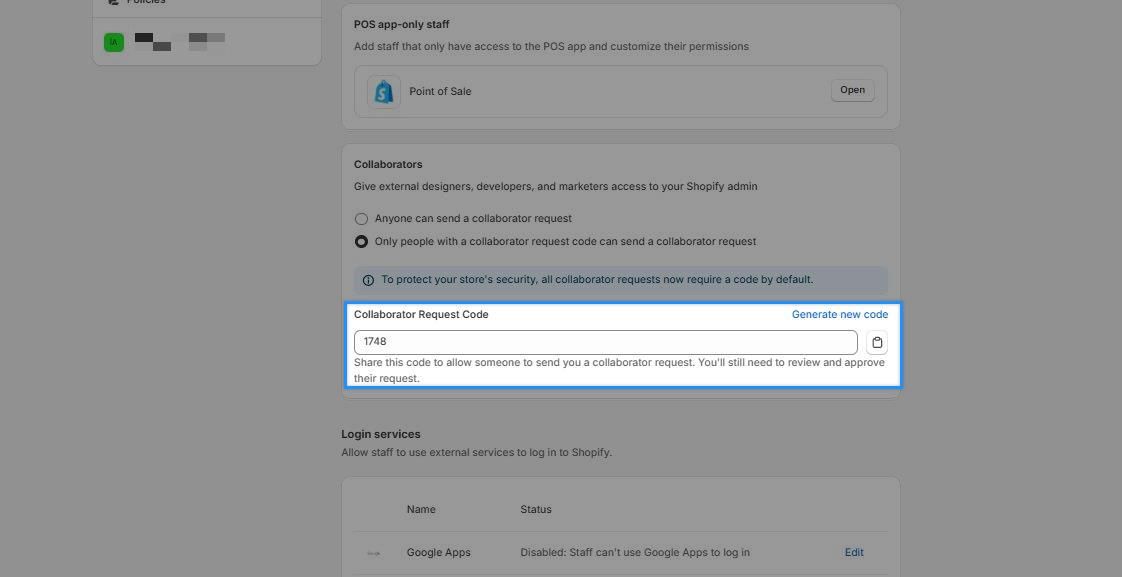
Finding Your Collaborator Request Code
- In your Shopify admin panel, go to Settings > Users and Permissions > Collaborators
- Look for your collaborator request code in this section
- By default, your store is set to "Only people with a collaborator request code can send a collaborator request" for enhanced security
What Happens Next
- After submitting the code, Analyzify's team will send you a collaborator access request within 1-2 business days. Until we send the collaborator request, the access status column will display "Queued".
- You will receive a notification from Shopify when the request arrives
- Log in to your Shopify admin panel to review and approve the collaborator request
- Once approved, the connection between Analyzify and your store will be established
Please be reminded NOT to send us the Shopify staff access, as we are not able to process that one. You will receive a Shopify collaborator access request from our team shortly.
What Access Do We Need?
We require access to the:
- " View " permission under the "Orders" section and "Reports" permission under the "Analytics" section to compare the orders between GA4 and Shopify to see if Analyzify gets your data across and how well it works.
- "Themes" and "Edit Code" permissions under the "Online Store" section to check for hardcoded scripts that may conflict with our integration.
- "Manage settings" and "Domains" permissions under "Store Settings" to be able to review your store settings and domains.
- "Checkout" permission under "Store Settings" to check if you have any additional scripts.
- "Manage and add custom pixels" under "Store Settings" to add our custom pixel to track the checkout and purchase events.
Lastly, we need access to " Manage and install apps and channels" under the " App Permissions" section to check whether the native GA4 integration is enabled, identify any other apps that could conflict with the Analyzify setup, or access your consent management platform to review its settings.
How to Update Analyzify Collaborator Permissions
If your store uses Shopify’s role-based permissions system, you can update our access by following the steps below. This will also make it easier to grant any additional permissions in the future if we need access to other areas of the store.
- In your Shopify admin, go to Settings > Users > Roles .
- Click Add Role .
- Create a new role (for example, Analyzify Access ).
- Enable the permissions you would like to grant.
- Click Save .
- Return to Settings > Users .
- Select the Analyzify | Solverhood collaborator account.
- Click Assign Role .
- Choose the role you just created and click Continue to apply the changes.
Important Security Notes
- You can monitor all collaborator access from your Shopify admin panel
- You can revoke access at any time through Shopify's collaborator settings.
- Collaborator access does not allow changes outside the permissions you explicitly approve.
- Our team only uses granted access for implementation, verification, and troubleshooting purposes.
