In this guide, we will walk you through the process of creating an sGTM container, mapping a subdomain on Google Cloud, and providing access to the Analyzify Server-side team.
Let's get started!
Section 1: Creating sGTM Container
Let's dive into the process of creating an sGTM (Server-Side Google Tag Manager) container. Follow these steps to get started:
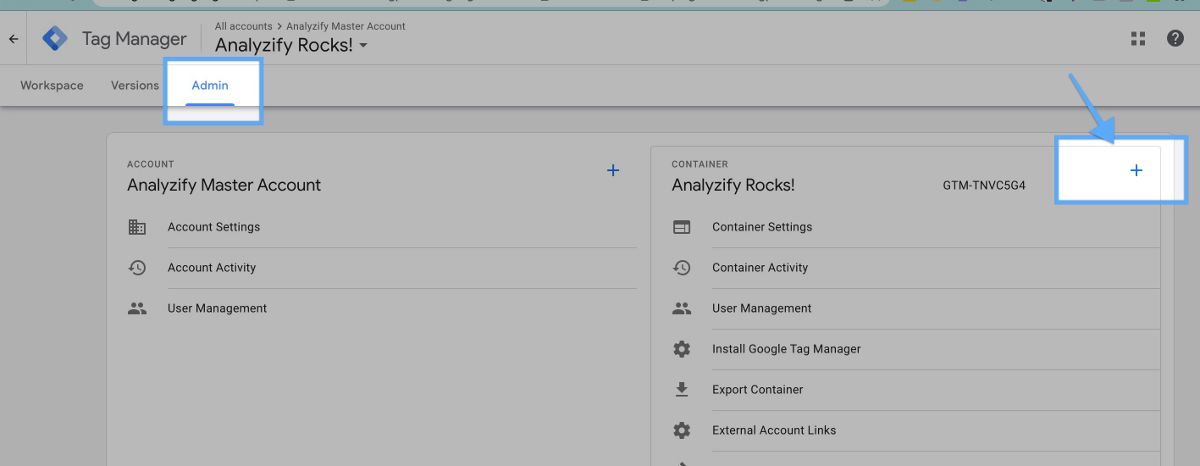
Go to your Google Tag Manager account. Click Admin and then Click + icon on the top-right corner
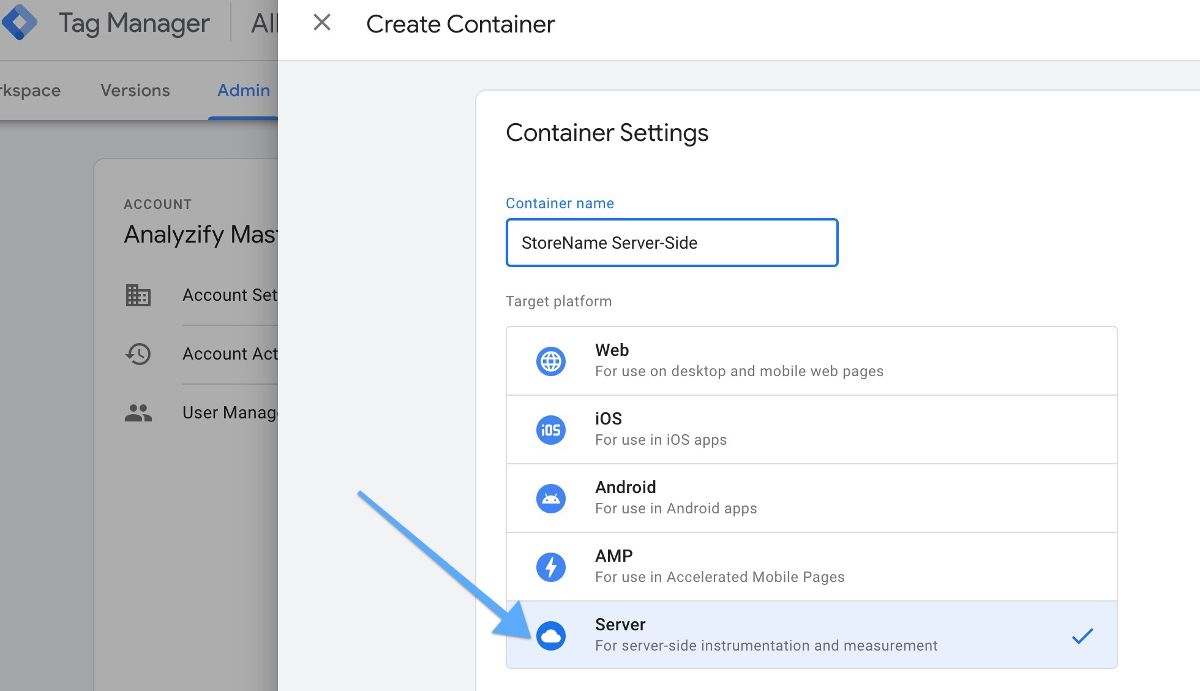
Name the container like “Store Name - Server-Side” and then choose “Server” as the target platform.
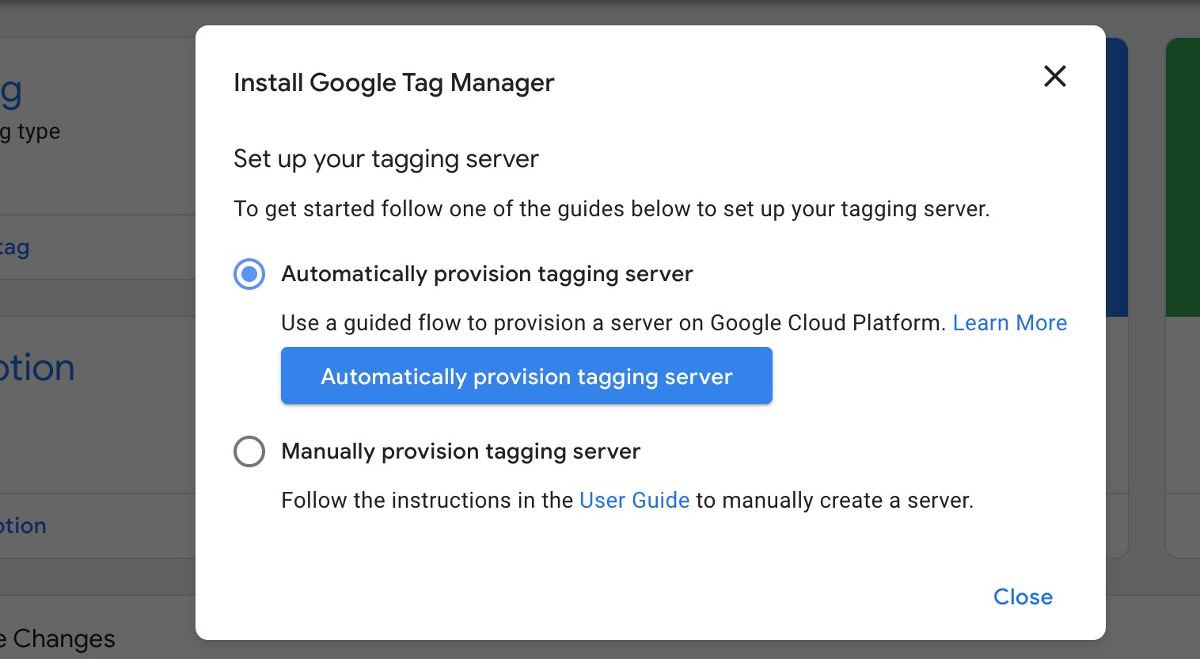
Choose “Automatically provision tagging server.”
Choose or create the billing account.
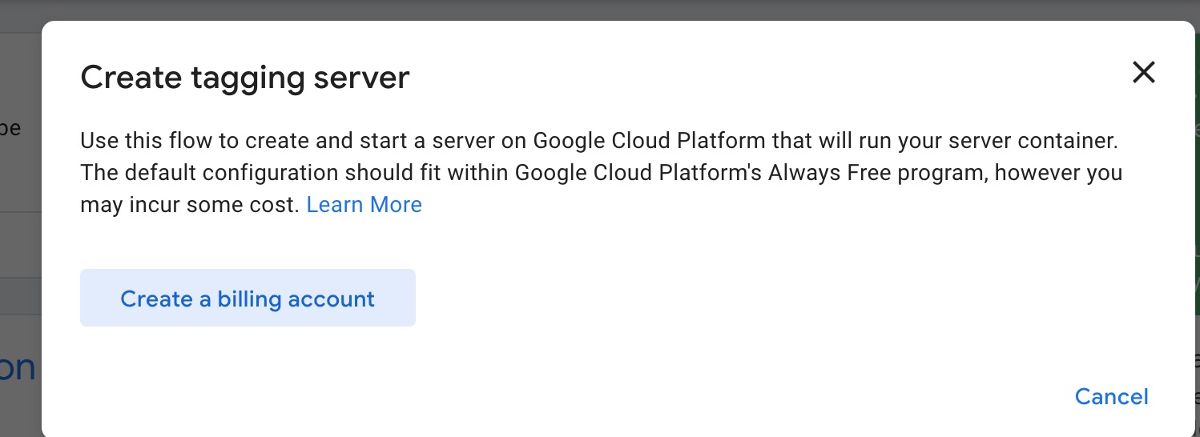
Once you are done with the billing choose “Select Billing and Create Tagging Server.”
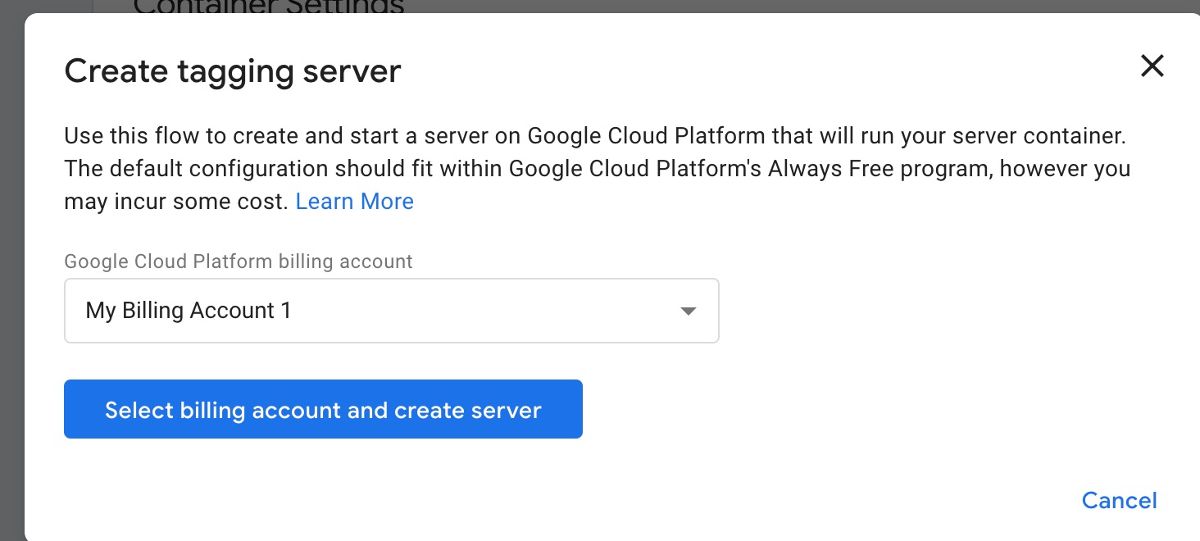
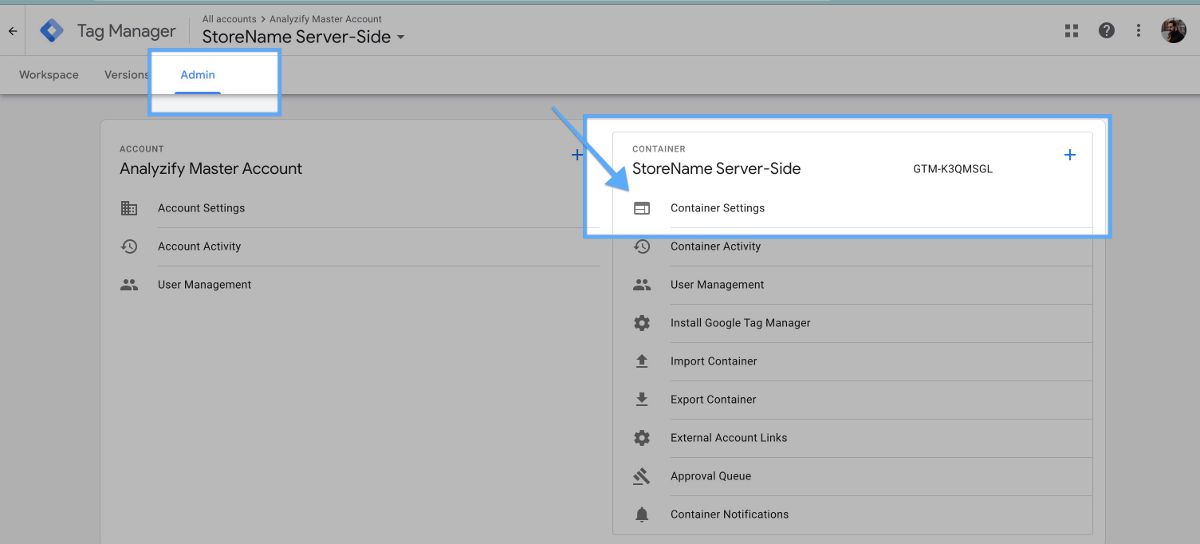
Click Admin on your Tag Manager Server-side container. Click Container Settings. And then choose "Set up Your Tagging server" again.
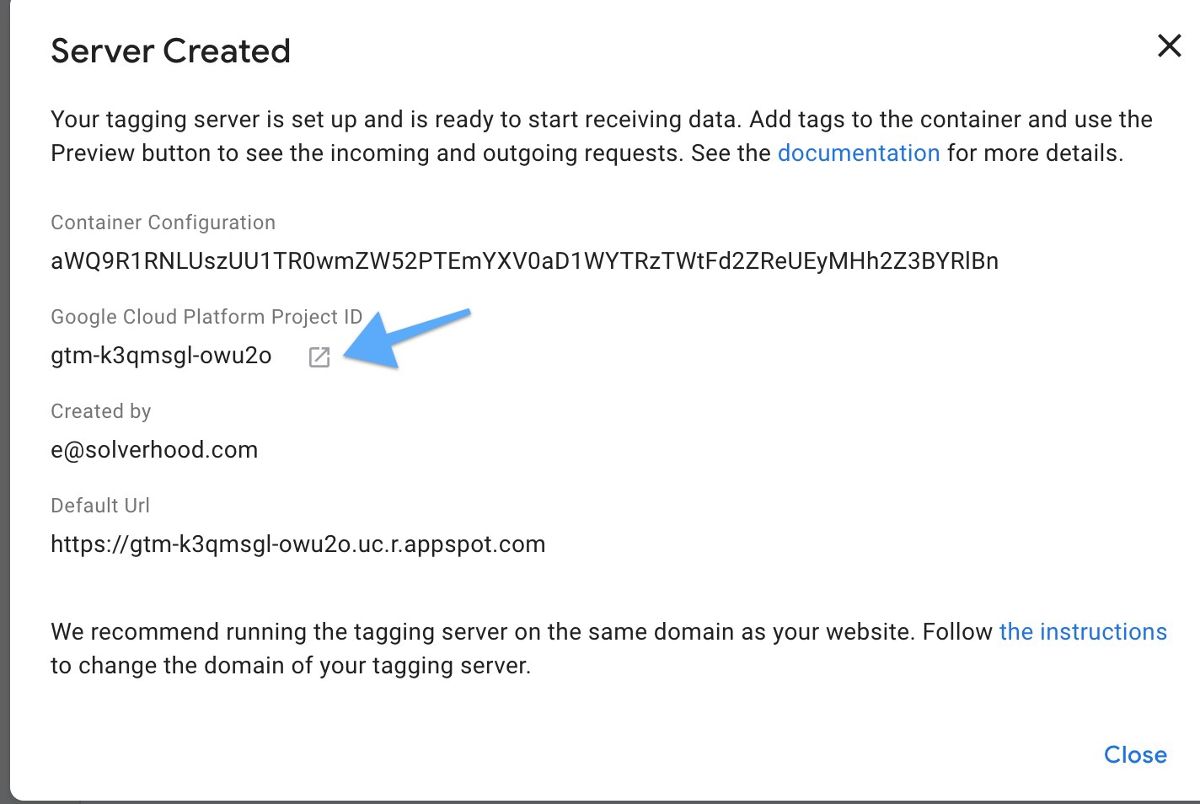
Once completed, you will see this screen and click the link icon to visit Google Cloud.
Section 2: Provide Access to Analyzify Server-side Team
In this section, we will outline the steps to provide access to the Analyzify team in both Google Cloud and Google Tag Manager. By following these steps, you will successfully share access and enable our team to assist you.
1. Google Cloud
To share access on Google Cloud, follow these steps:
On Google Cloud, search IAM and choose IAM & Admin

Click GRANT access.
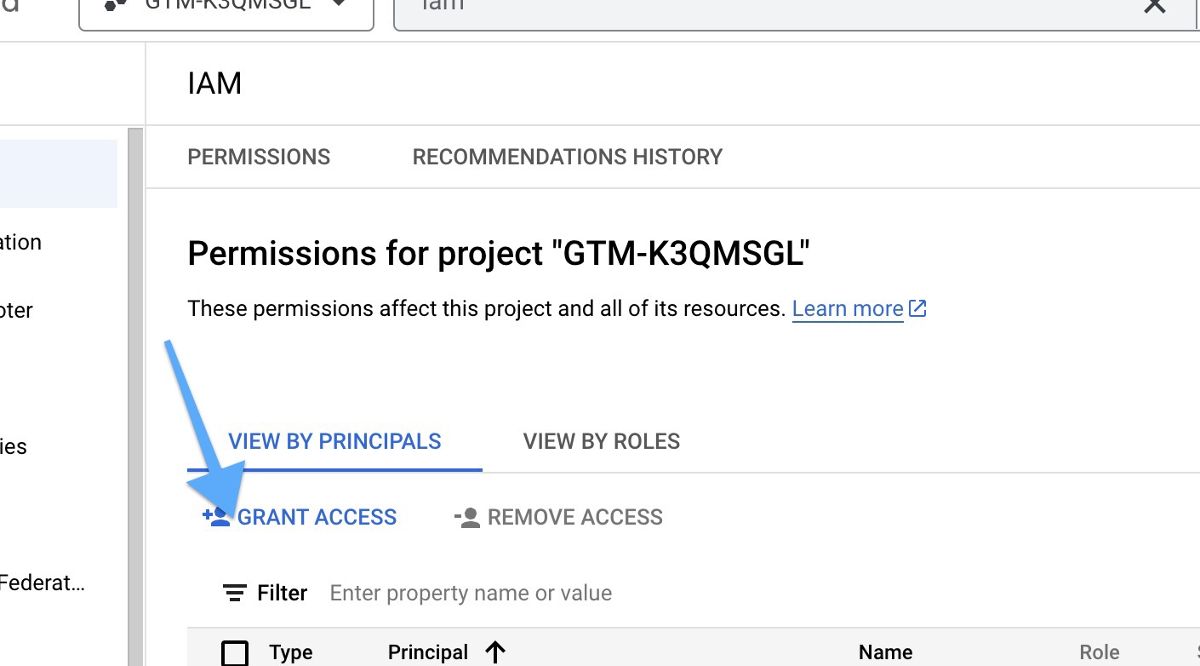
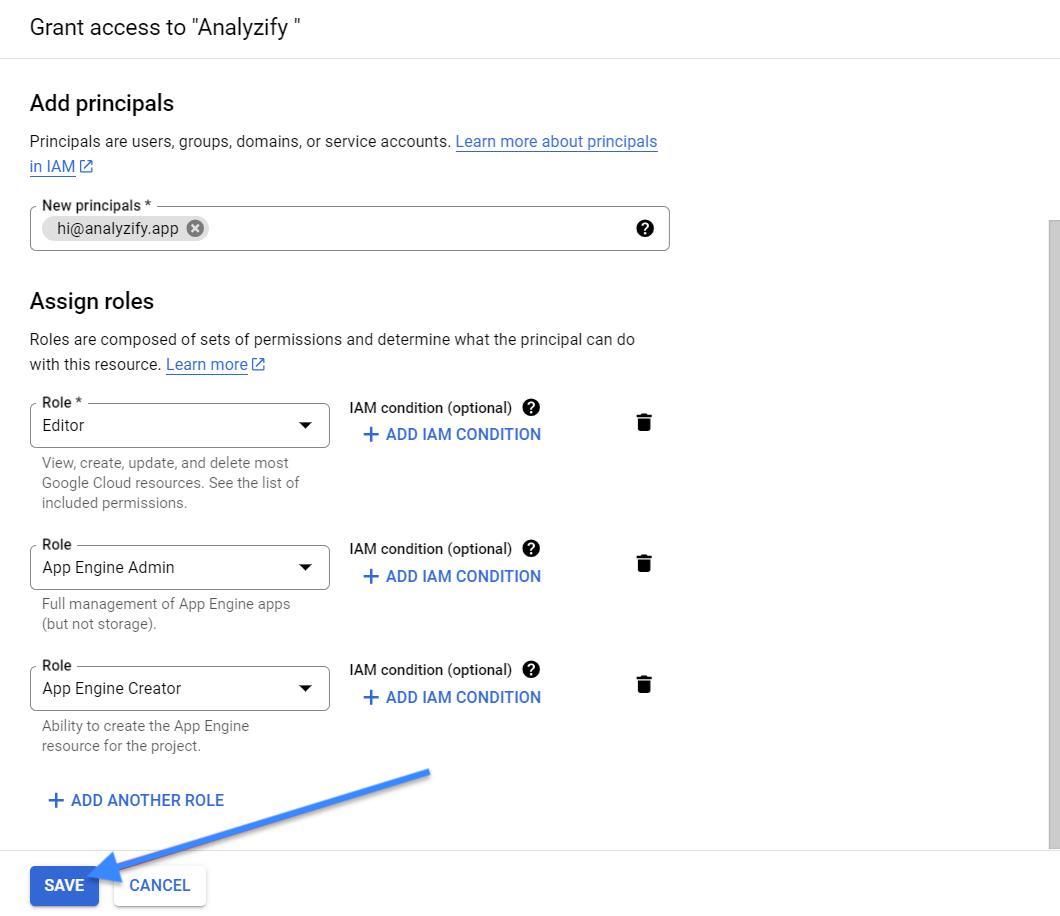
Type our email address hi@analyzify.app and choose EDITOR in the access level.
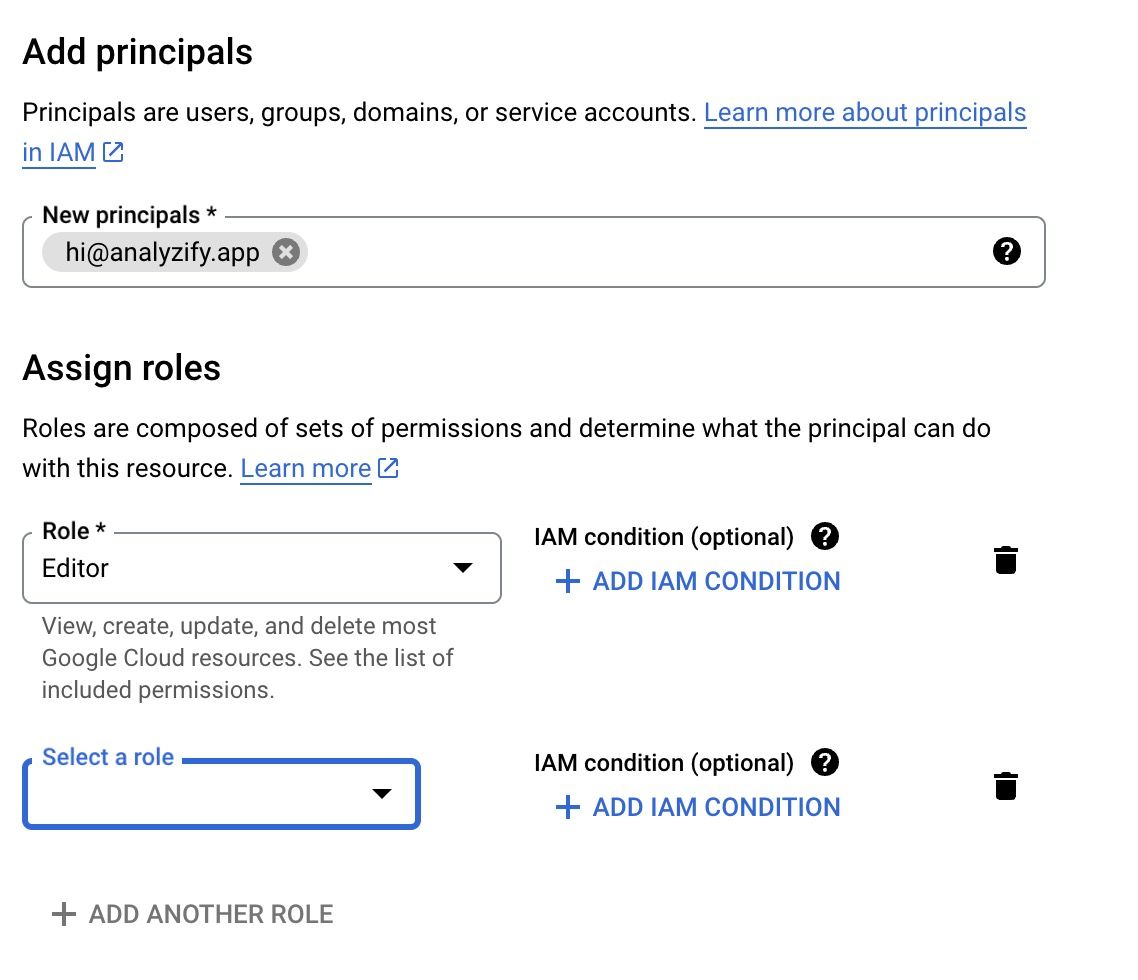
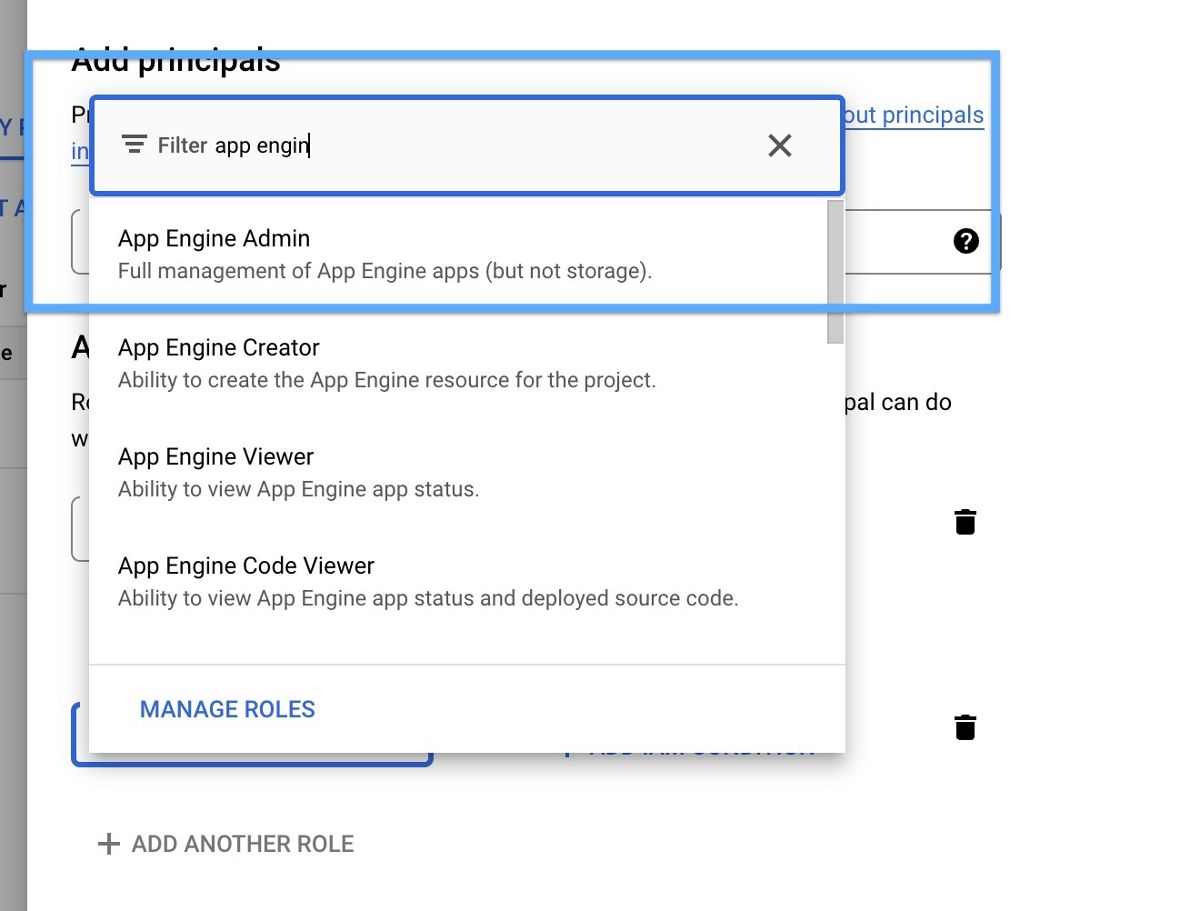
Click add another role and search for “App Engine Admin” - choose that.
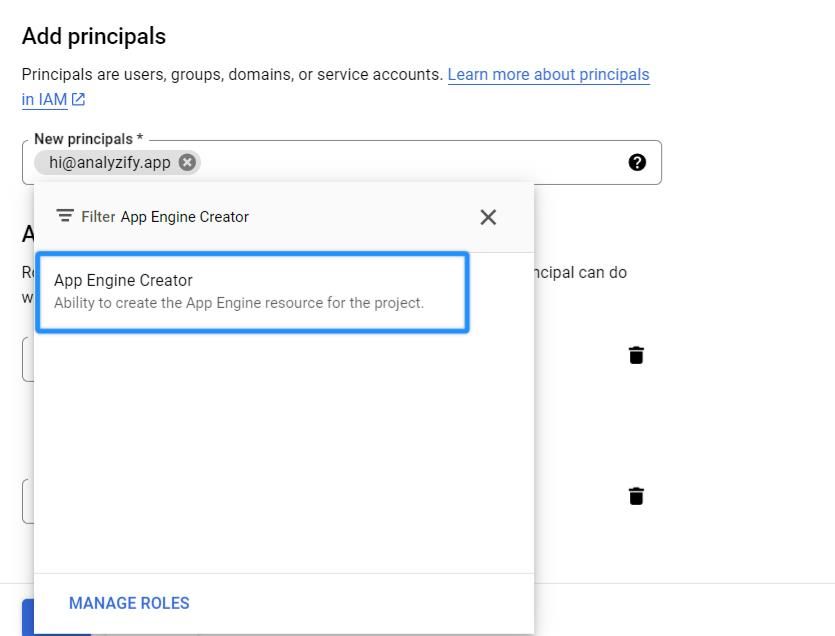
Select the "Add Another Role" option, then search for "App Engine Creator" and choose it from the list.
Click "Save."
2. Google Tag Manager
Now let's proceed with the steps to share access to Google Tag Manager.
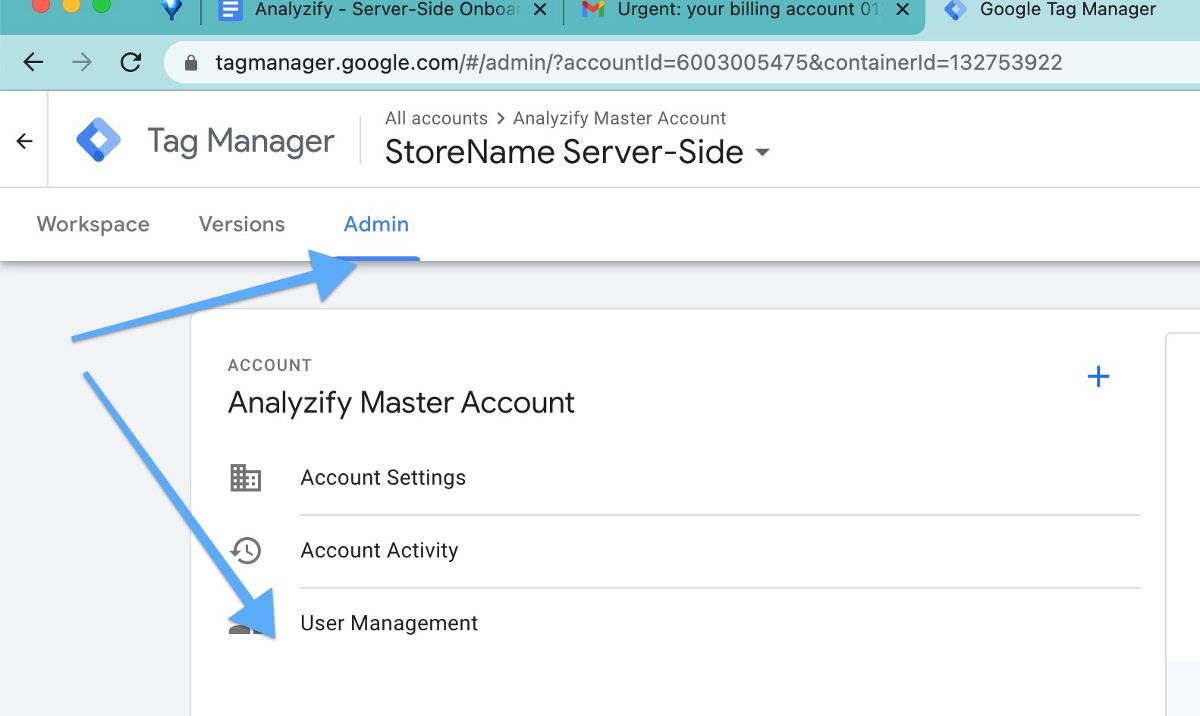
Go to Google Tag Manager > Admin > User Management
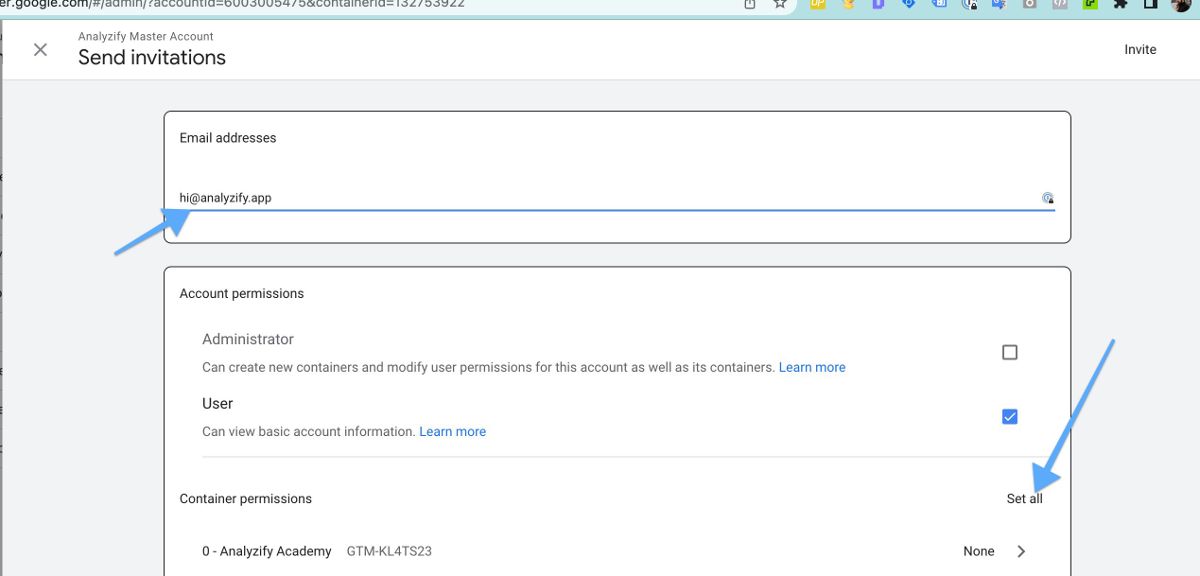
Type our email hi@analyzify.app and then click SET ALL.
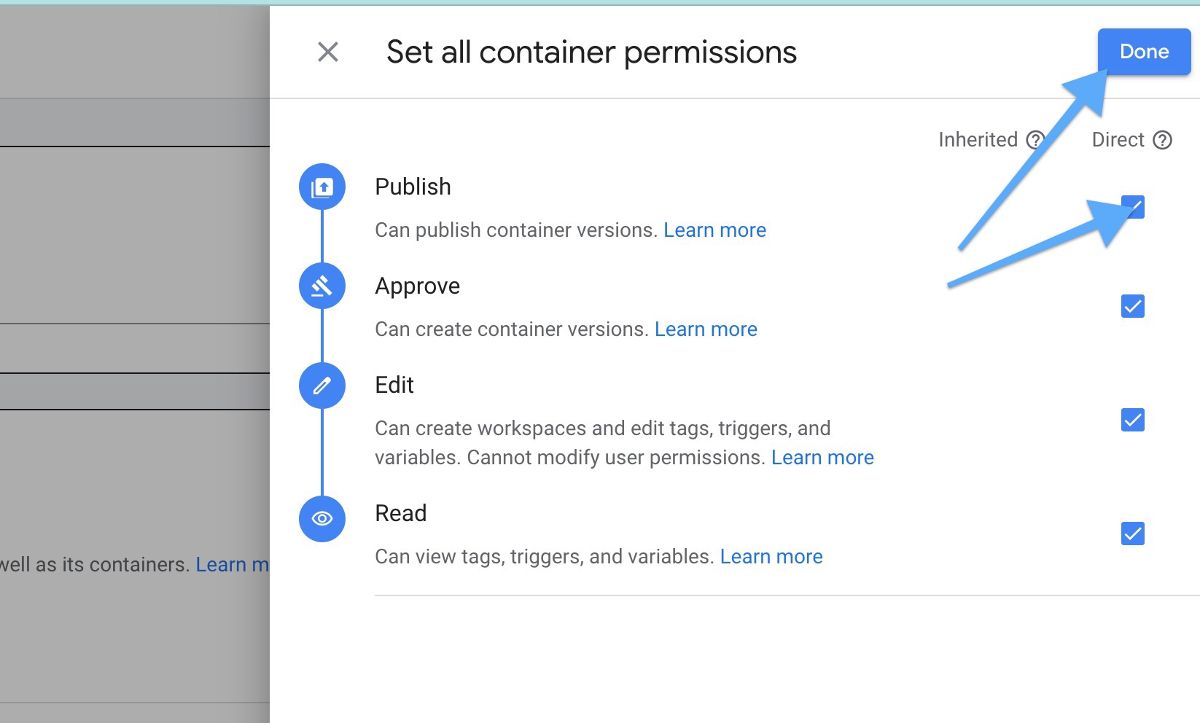
Choose Publish and click Done.
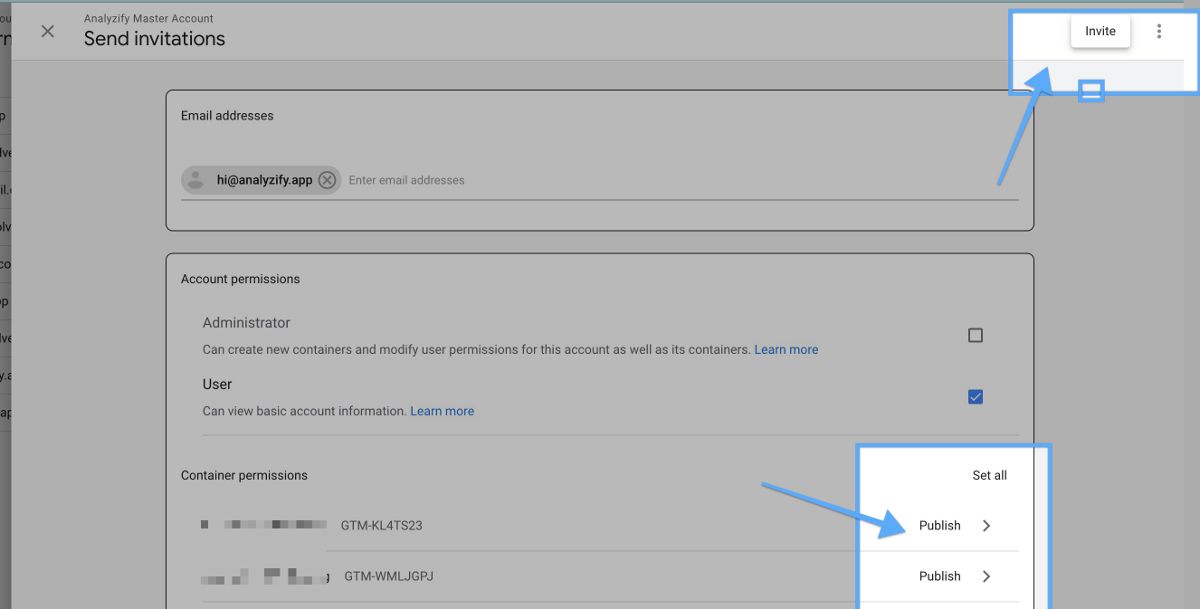
Make sure both server-side and client-side GTM properties have PUBLISH rights and then click INVITE.
Please let us know before proceeding to the next step. We will create the App Engine Instances to host your Server-Side Container for you
Section 3: Google Cloud Mapping Subdomain
Explore the process of mapping a subdomain on Google Cloud by following these steps:
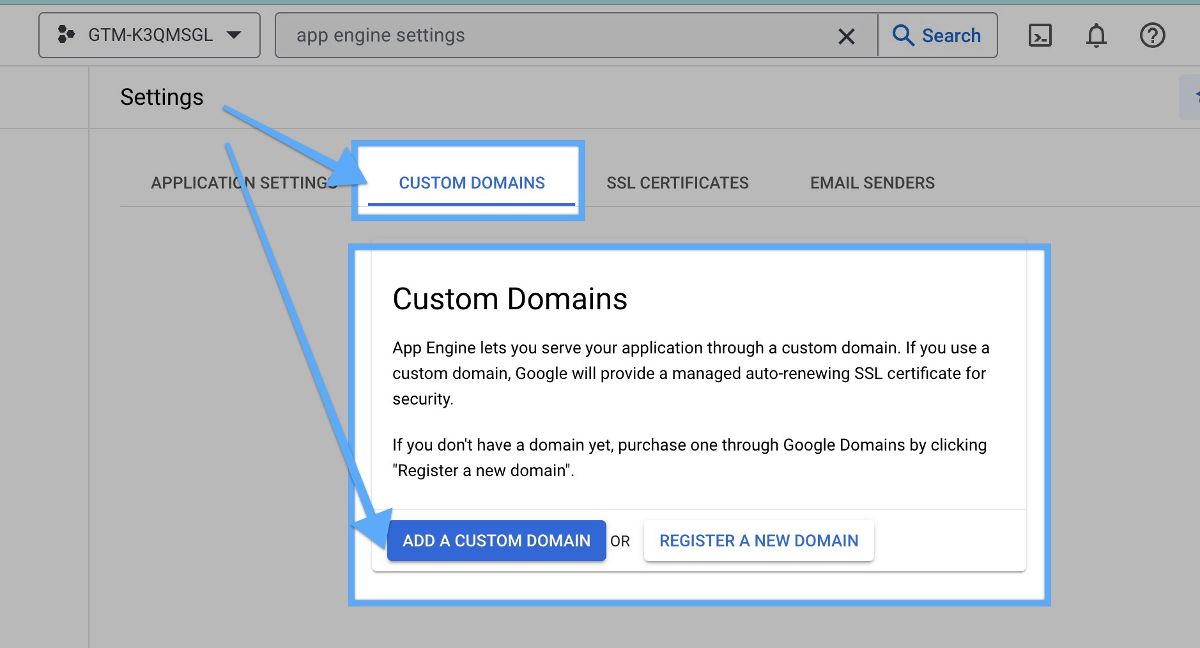
On Google Cloud, search “App Engine Settings” at the top search bar.

On “Custom Domains” Tab, click Add Custom Domain.”
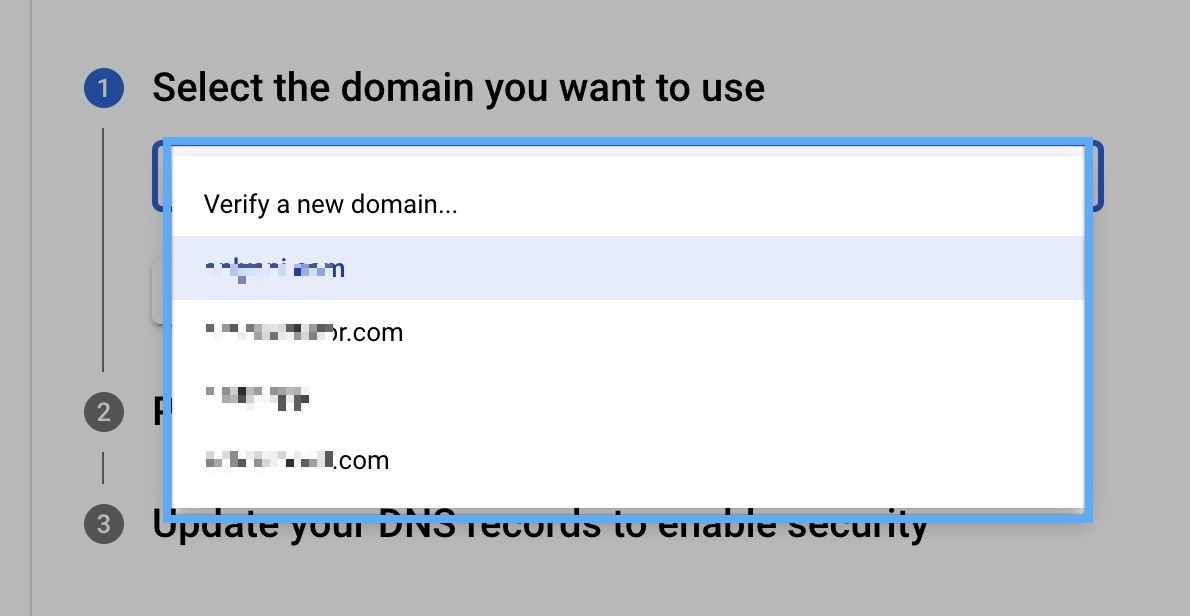
The verified domains (by Google Search Console) will be listed here. Choose your domain or click “Verify new domain” if your domain is not listed here. Verification process will happen within Google Search Console, you will click “Refresh Domains” button once the verification has been completed.
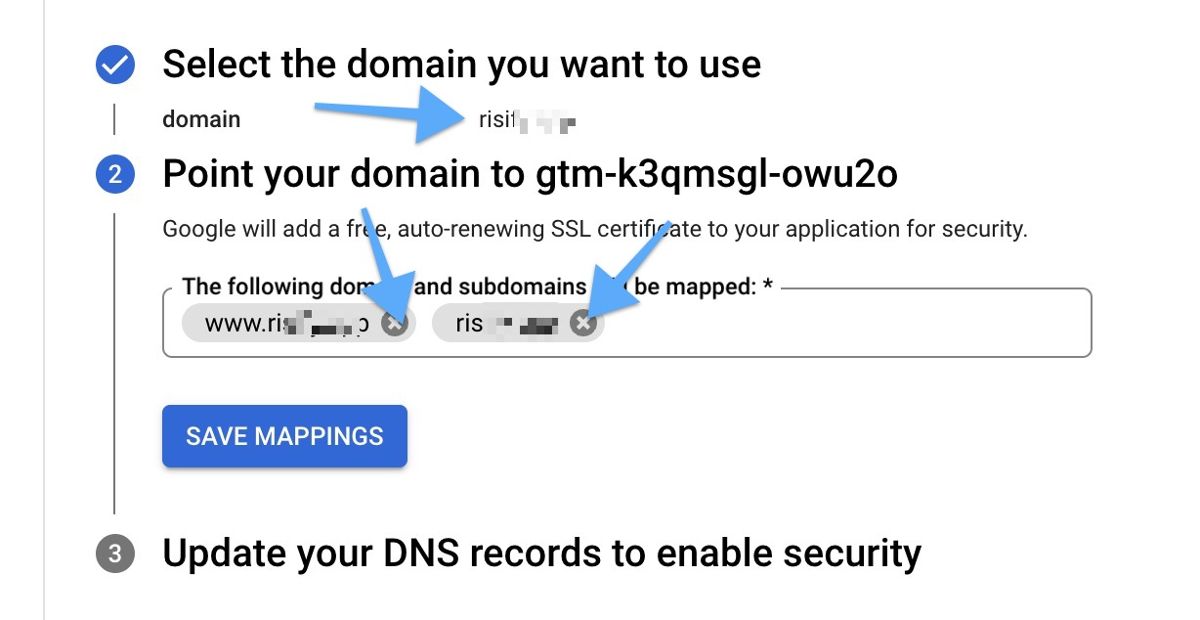
After choosing the domain, remove the pre-added options there. That section should be empty for now. Remove yourdomain.com and www.yourdomain.com
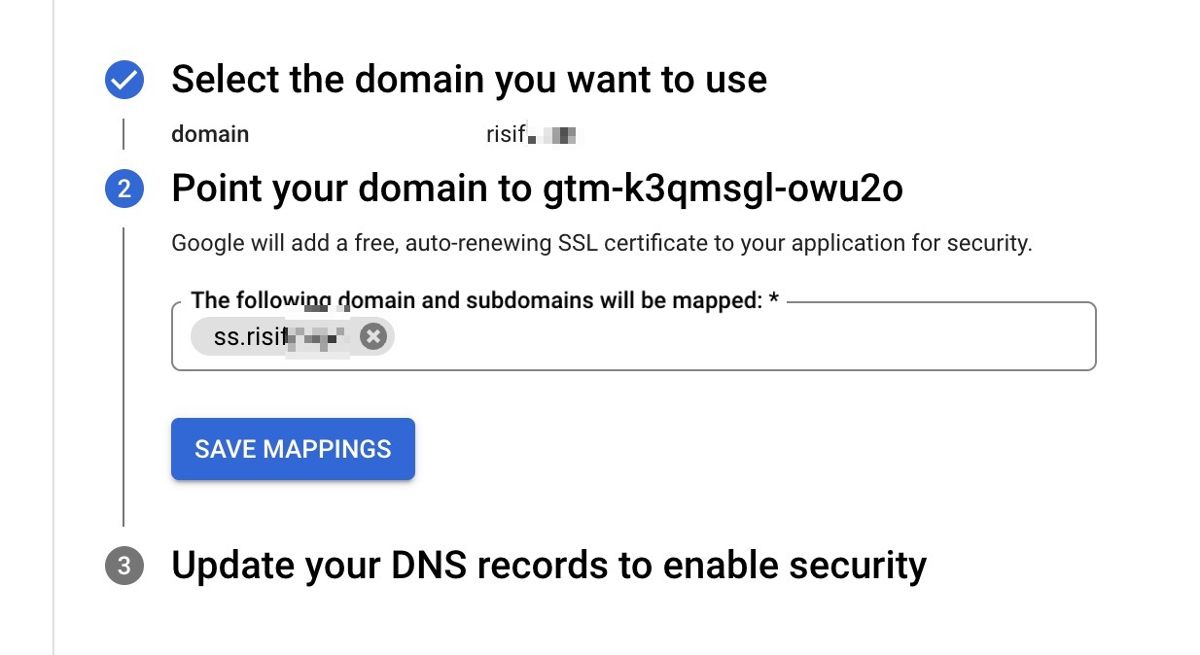
Now add ss.yourdomain.com there and click SAVE MAPPINGS.
Ensure you save these records for future access. Update both the A records and AAAA records. You can make these updates through your domain panel or Cloudflare if you are using it. Specifically, make sure to include "ss" in the definition sections of the A and AAAA records. You'll need to add a total of eight records (four A records and four AAAA records).
Please avoid adding the CNAME record.
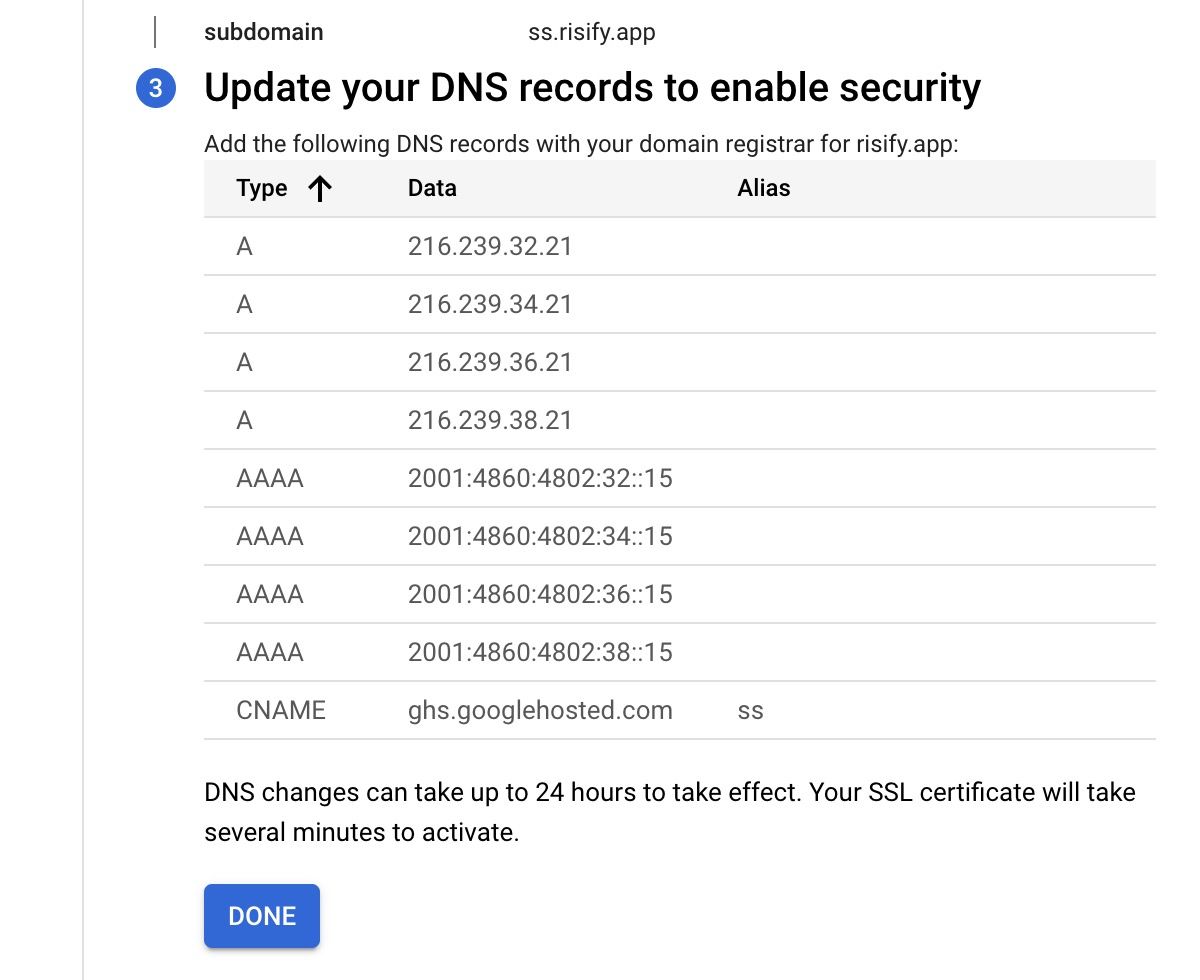
Once you do this, Google will automatically handle the SSL certificate and mapping.
Congratulations!🥳 Our team will take care of the rest!


