Automated access provides a streamlined connection process that requires minimal manual input. When you connect Google Analytics 4 through automated access, Analyzify handles most of the technical setup automatically. You'll simply need to sign in with your Google account and select the appropriate properties to connect.
Setting Up User Access
Before connecting your GA4 account with Analyzify, you'll need to grant the necessary permissions.
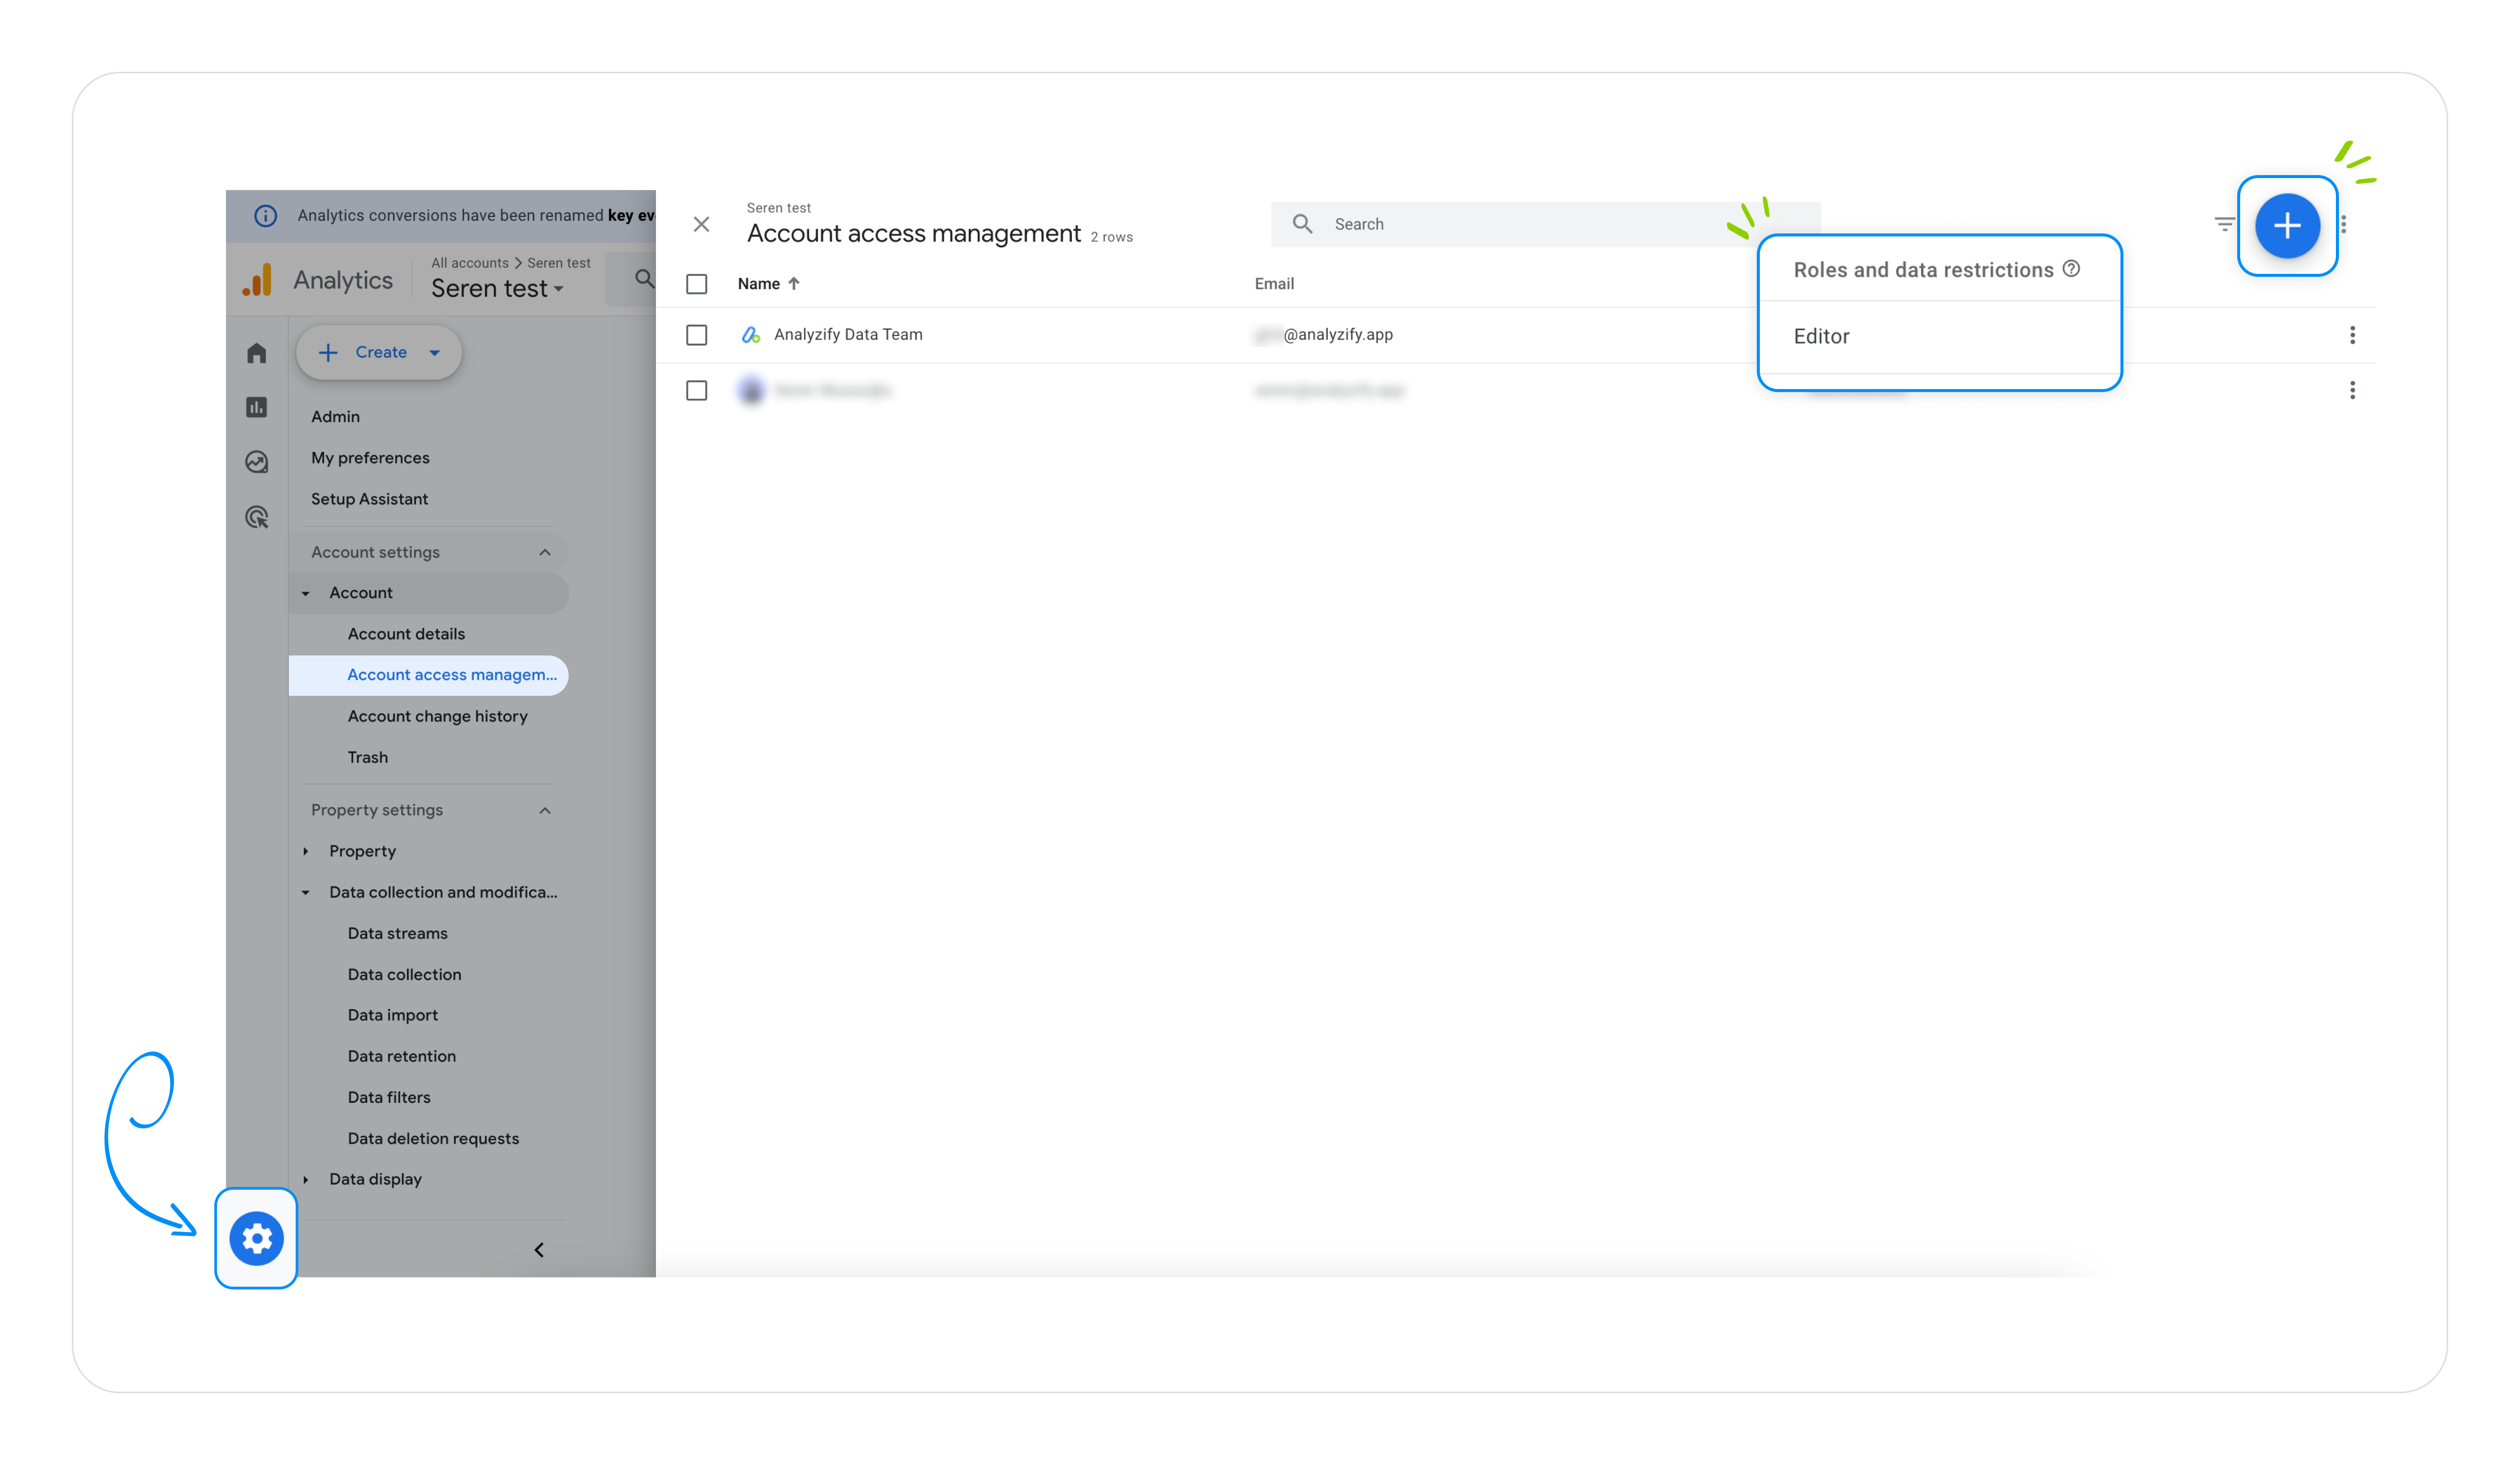
Follow these steps to provide editor access:
- Sign in to your Google Analytics 4 account
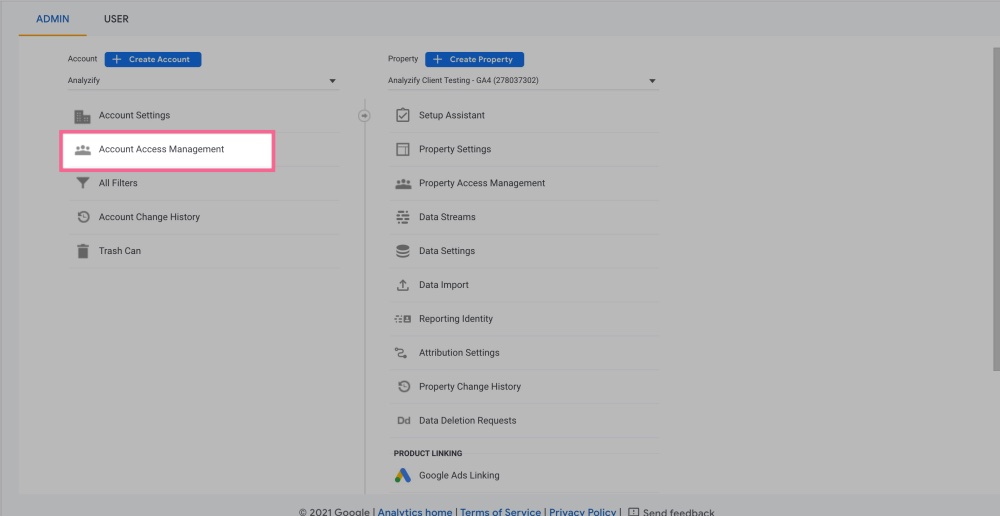
- Navigate to the Admin section
- Go to Account > Account Access Management
- Click the "+" button in the top-right corner
- Select "Add users"
- Enter gtm4@analyzify.app as the email address
- Assign the Editor role
- Click Add to confirm the changes
Finding Your Measurement ID
Your GA4 Measurement ID is required to complete the connection. The GA4 Measurement ID is a unique identifier used in Google Analytics 4 to track data for your property. It always starts with 'G-'. Here's how to locate it:
- While in your GA4 account, use the search bar at the top
- Type "ID" in the search bar
- Look for an ID that starts with "G-" (for example: G-PSW1MY7HB4)
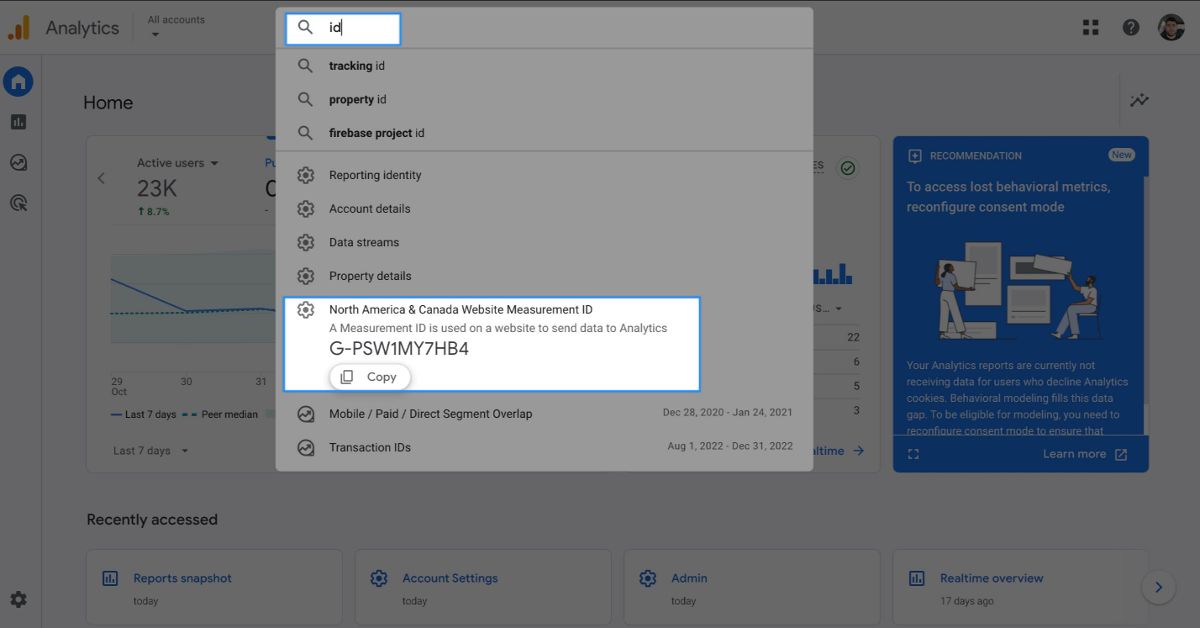
Completing the Connection
Once you have granted access and located your Measurement ID:
- Enter your GA4 Measurement ID in the provided box
- Check the confirmation box to verify you have shared access
- Click "Save & Send" to complete the setup
Important Notes
- The Measurement ID always starts with "G-" followed by a unique combination of letters and numbers
- Ensure you've granted Editor access before submitting the Measurement ID
- Double-check the email address when granting access to avoid connection issues
Google Analytics 4 Automated Connection
Initial Authorization
- Click the "Provide Access" button in Analyzify
- Sign in with your Google account that has access to GA4
- Select the email address associated with your GA4 account
Permission Settings
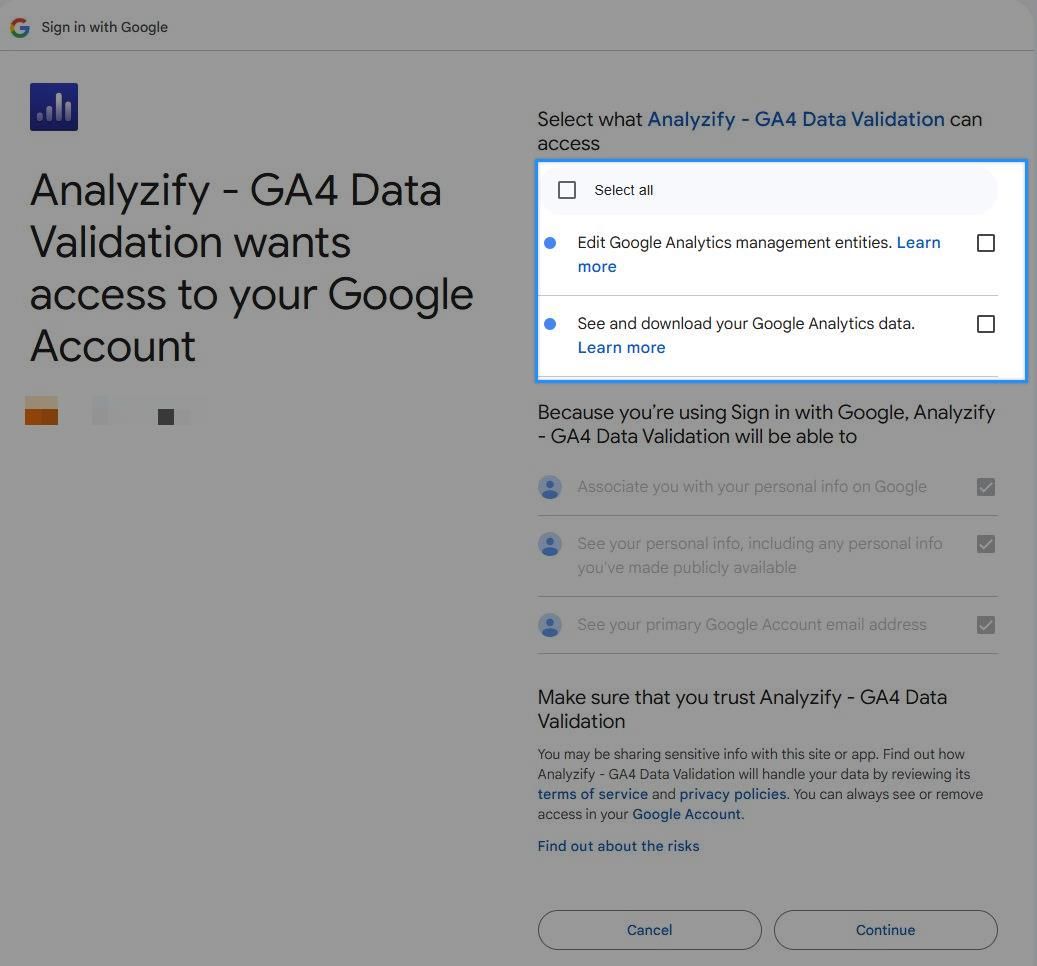
When the permissions window appears:
- Click "Select all" at the top of the window to enable all required permissions
- Ensure these specific permissions are enabled:
-
- Edit Google Analytics management entities
- See and download your Google Analytics data
- Click "Continue" to confirm permissions
Account Selection
After authorization is completed:
- Click the "Next Step" button when you see the "Authorization completed" message
- On the next screen, you will need to select:
-
- Your Analytics Account (e.g., Demo Account)
- Analytics Property (e.g., GA4 - Property)
- Measurement ID (automatically populated based on your selection)
- Click "Save" to complete the setup
Important Notes
- All selections must be made to complete the setup process
- You can use the "Re-authorize" button if you need to change the connected Google account
- The Measurement ID will automatically appear based on your property selection
- Make sure to complete all steps by clicking "Save" at the end
How to revoke your access?
This tutorial will show you how to remove a user from your Google Analytics account.
Click Admin, and navigate to the desired account.
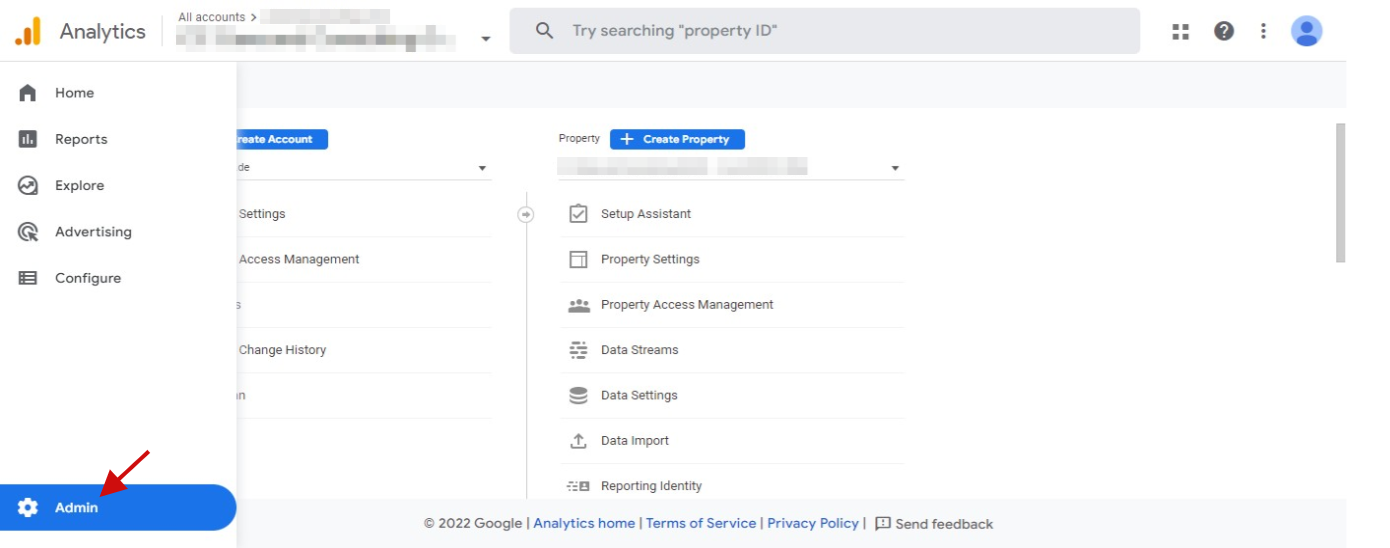
In the Account or Property column, click Access Management.
Use the search box at the top of the list to find the user you want. Select the check box for each user you want to delete, then click REMOVE.

