Our setup process is reasonably straightforward and guided by our in-depth tutorials, but we understand that you may still encounter challenges or have questions.
You can always ask our team's help if you get stuck or just want a second look at the fantastic work you've done! We offer ongoing support and are happy to provide Done-For-You setup services free of charge. Additionally, it's important to remember that you can always change your setup method if necessary.
Do-It-Yourself for Lightweight Method
By opting for the Analyzify Lightweight with Do-It-Yourself option, you gain the ability to seamlessly integrate your online store with GA4, Google Ads, and Bing. This integration is now simpler and quicker than ever, all without the requirement of using Google Tag Manager.
With our enhanced process, you can have Analyzify up and running within just 5 minutes through an automated installation method utilizing App Embeds, Shopify's Pixels API, as well as GA4 and Google Ads APIs.
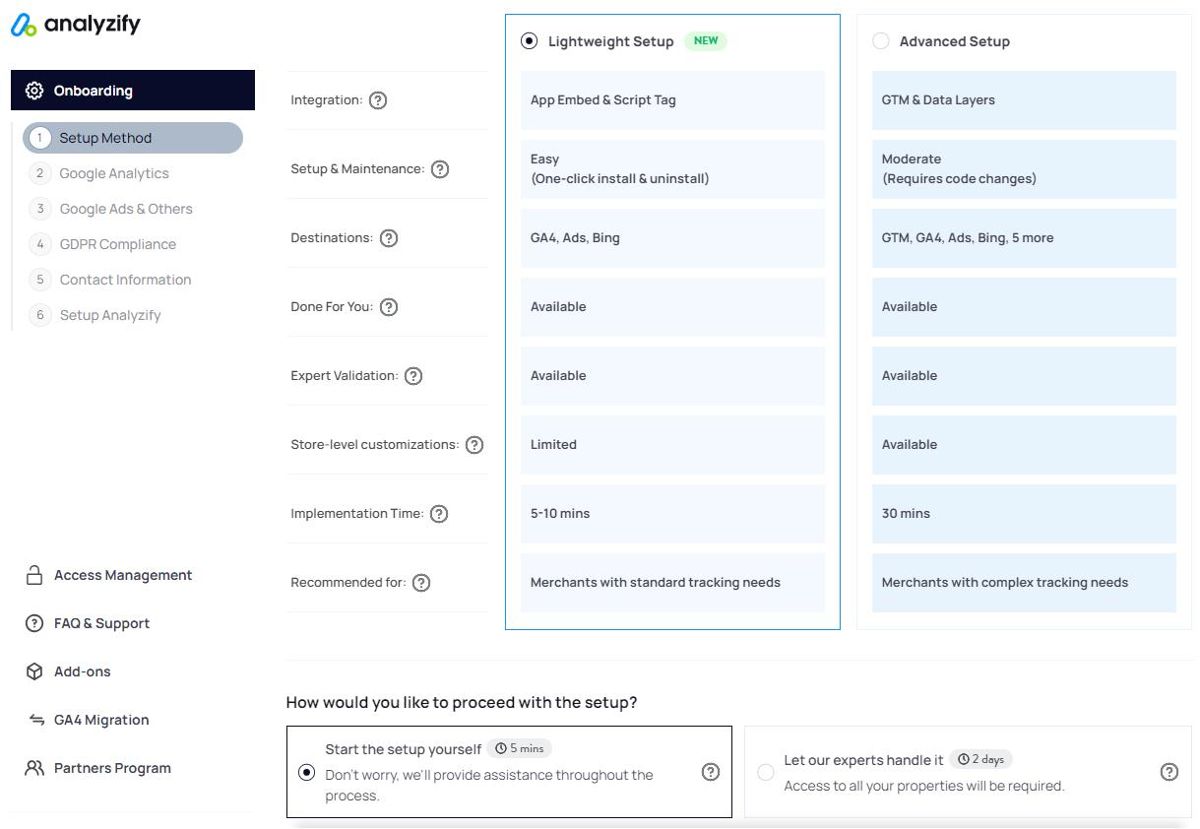
This new system eliminates the reliance on theme files and complicated integrations, meaning you no longer have to manually handle code injection into your theme files. Whether you're installing or uninstalling, the process is a single-click action that is straightforward and hassle-free, providing you with maximum flexibility.
Do-It-Yourself for Advanced Method
Once you choose the Analyzify Advanced with Do-It-Yourself, you get yourself a set of insightful onboarding guides so you can execute the setup easily by yourself. We provide detailed tutorials to help you understand all the crucial points and guide you through the process. Plus, you can get our experts’ support to help you during or after the process in case you need it.
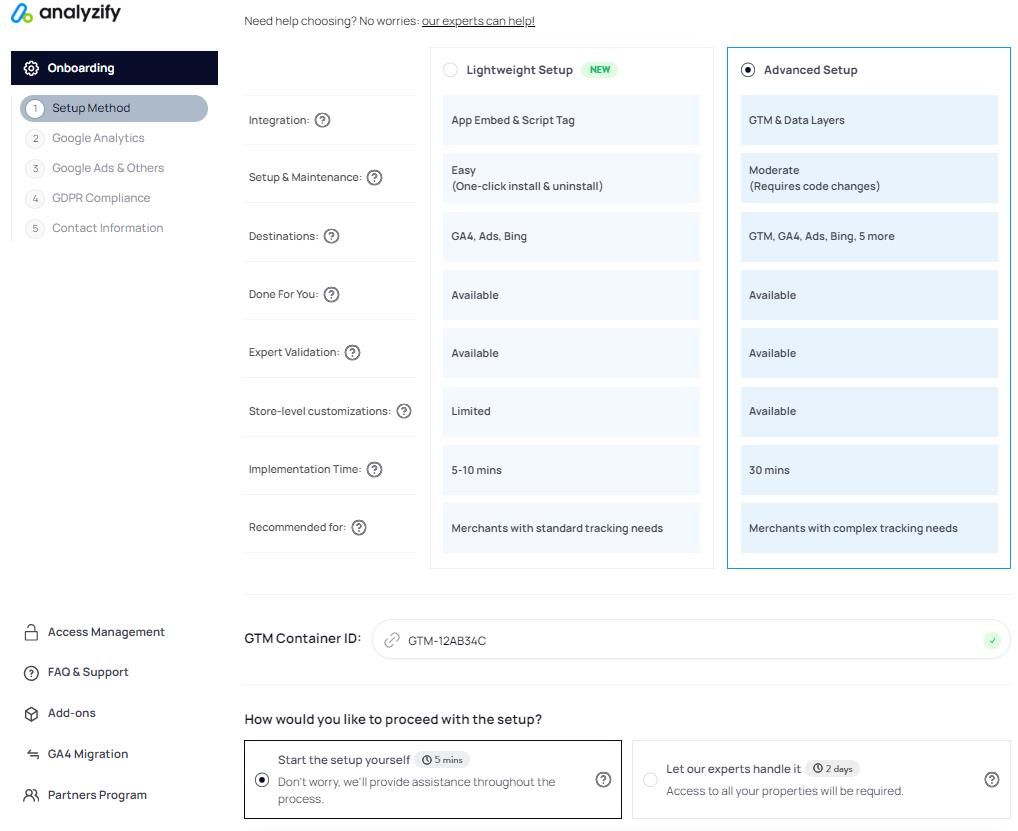
Analyzify’s setup consists of 3 significant steps.
1. Data Layers & Code Injections
Data layers are one of the most important aspects of data tracking & analytics. To help you make the most of your tracking experience, we have created a custom code block that will allow your Google Tag Manager to read & process your purchase and product page data on your Shopify store. We always keep our data layers up-to-date and inform you of the updates.
Analyzify injects these comprehensive data layers and GTM containers into your theme in two simple steps.
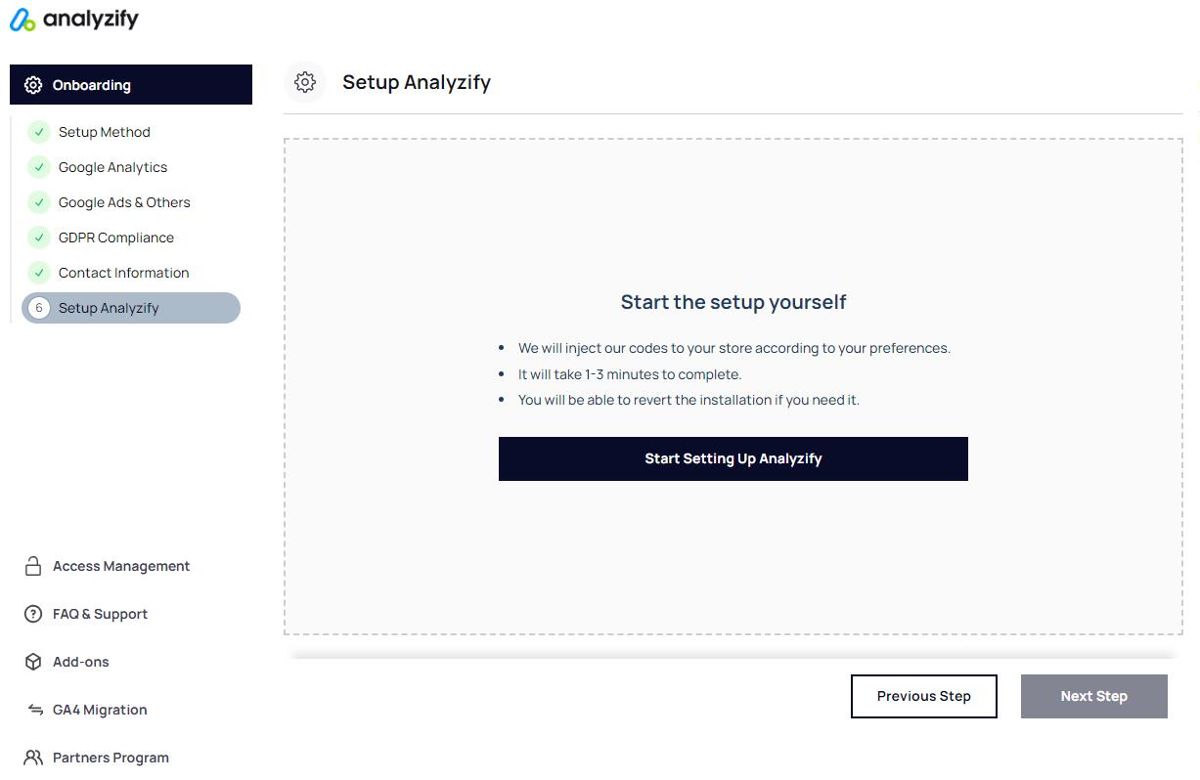
Step 1: Click "Start Setting Up Analyzify"
We will inject our codes into your store according to your preferences. It will take 1-3 minutes to complete and you will be able to revert the installation if you need it.
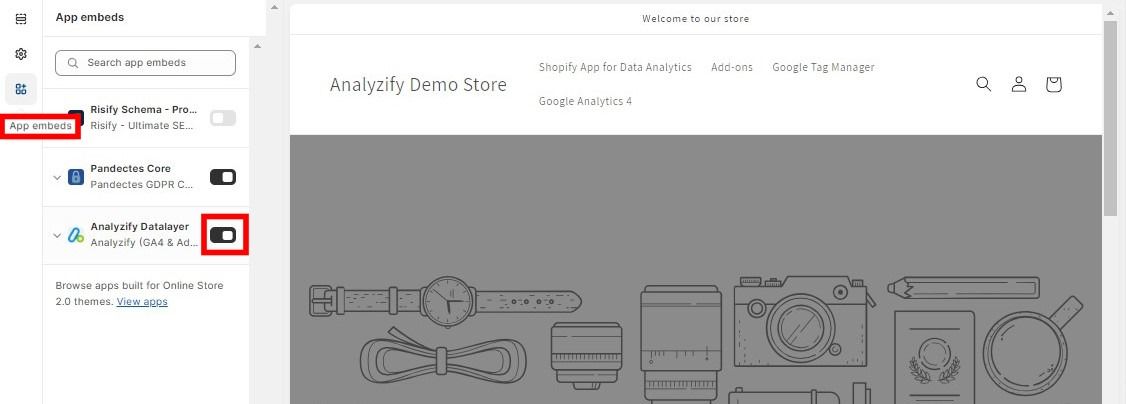
Step 2: Enable Analyzify on Your Theme
Visit Shopify Admin > Online Store > Themes . Choose the theme you want to integrate Analyzify with & click " Customize ". Go to " App Embeds ", enable Analyzify, and click SAVE .
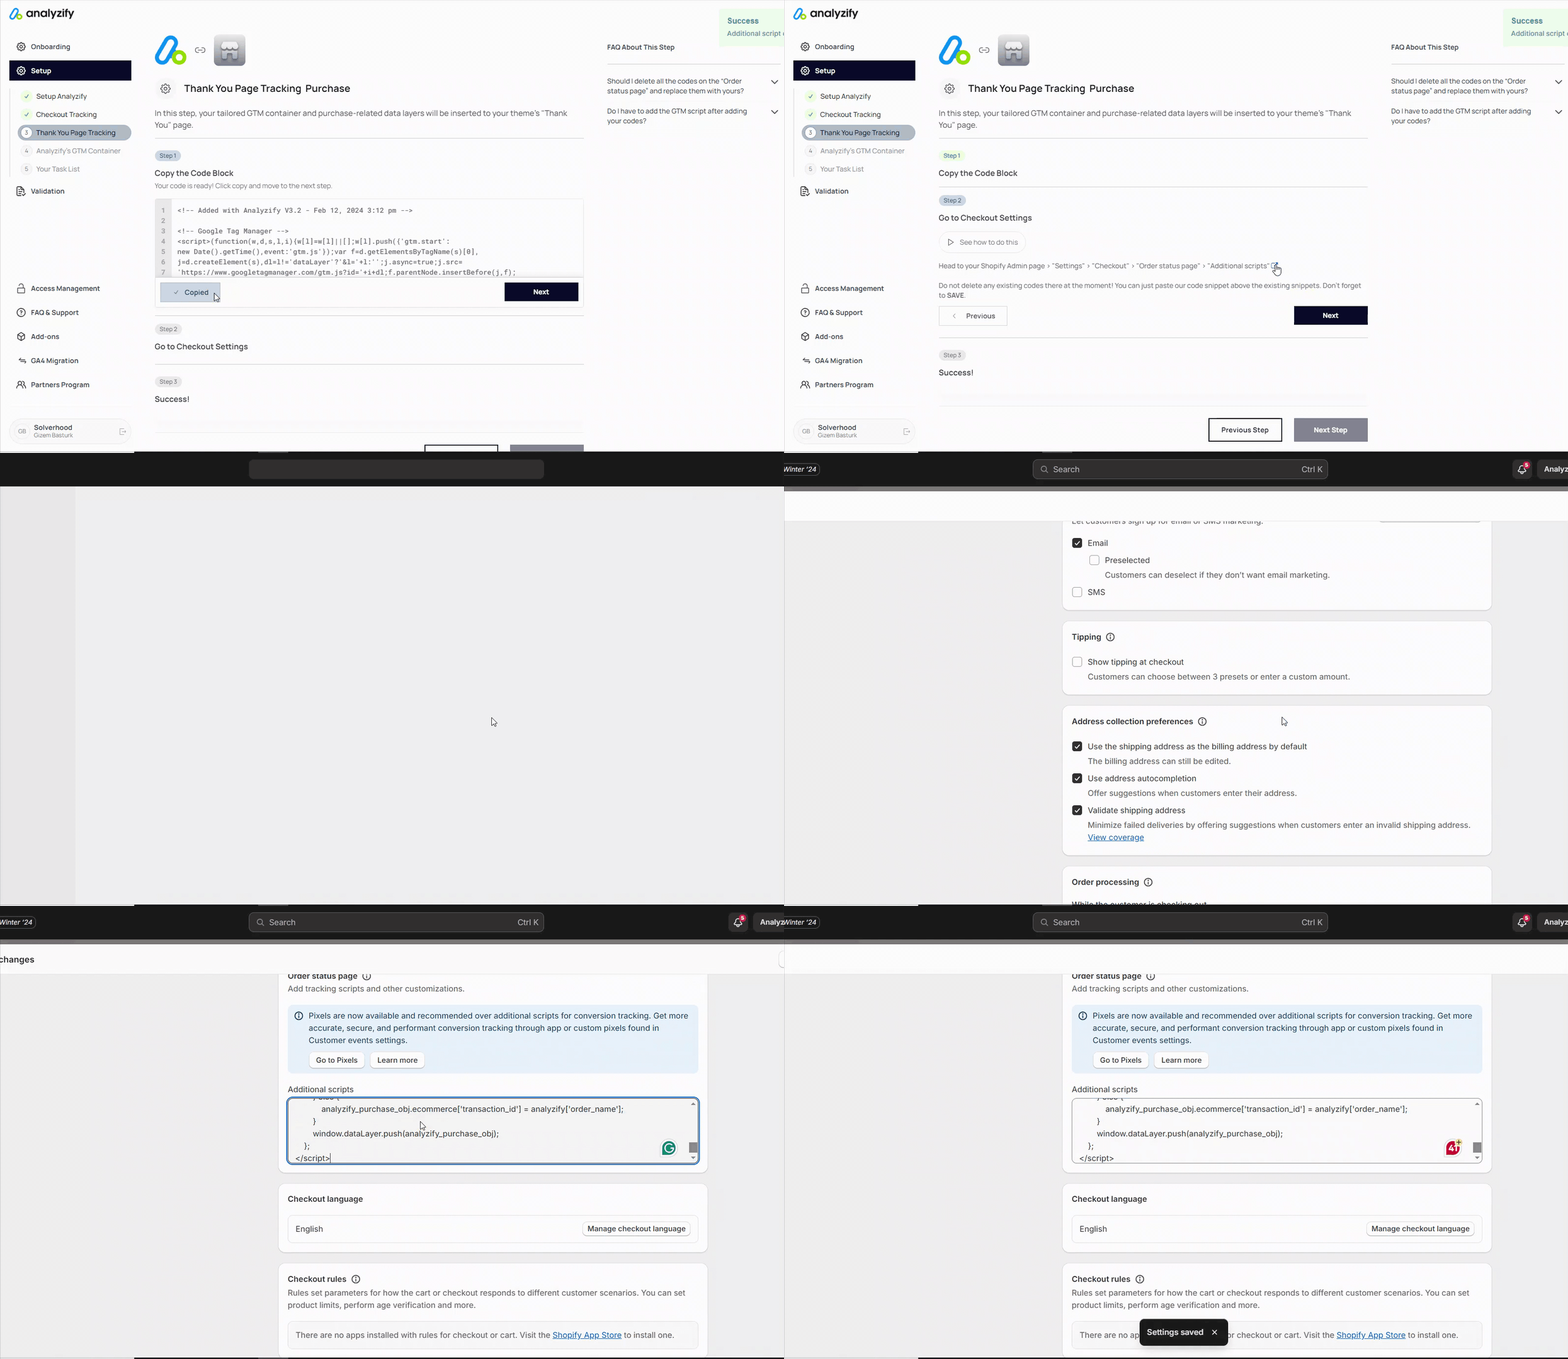
2. Checkout & Purchase Tracking Scripts
These very cool code blocks include purchase and product-level data. You can use Analyzify's check-out / purchase data layer for Shopify to track your conversions through Google Tag Manager.
You'll be injecting the relevant data layers into your Shopify store -and when we say inject, we mostly mean a simple copy & paste. Take a look at what you can do with these scripts.
Analyzify's Shopify Purchase data layer is used for:
-
-
E-commerce tracking in GA4,
-
Enhanced e-commerce funnels & goals in UA,
-
Conversion tracking in Google Ads,
-
Purchase event tracking in Facebook Pixel,
-
Purchase conversion tracking in Bing / Snapchat / Tiktok.
-
3. Google Tag Manager Container
We love GTM, and by the end of this process, we're pretty sure you will too. Whether you are a Shopify Plus client or not, you can get the most out of your data with a good GTM setup.
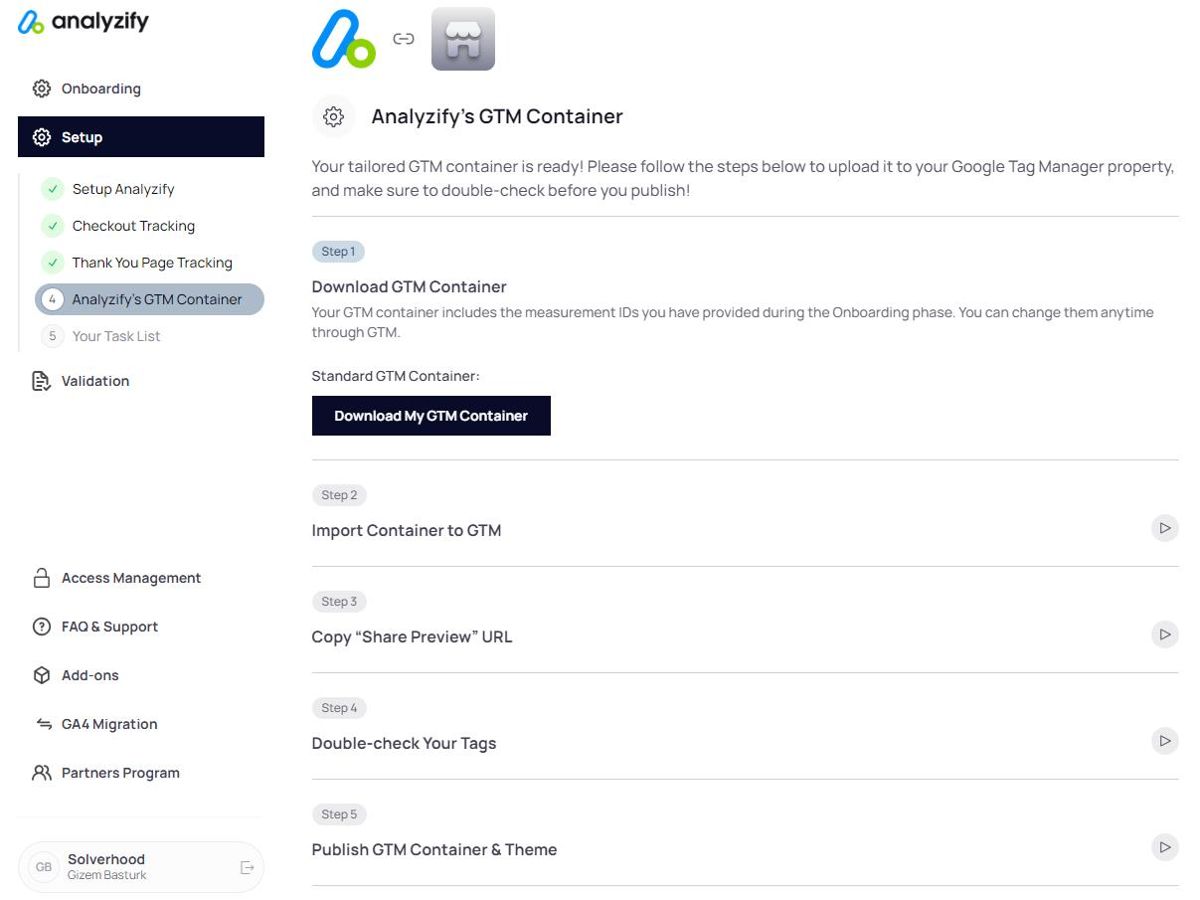
After you go through the initial steps of setting up the account, your most important move will be implementing the GTM container. Much like our data layers, we keep our container up-to-date and inform you of any changes.
The same logic applies: Once the container is imported, you'll need to implement its snippet code to various pages of your Shopify store. You are also free to keep certain tags paused for your convenience if you have any previous setups made. You can also validate your tags and make sure they work properly by using the debug mode.
Google Tag Manager is an incredible addition to your toolset, and we constantly discover new ways to utilize it for accurate data tracking.
