You need to have a GTM account , the product data layer on your Shopify store and a GTM container injected into your Shopify store before you start with this tutorial. You can follow our related tutorials if you have any of these items missing and come back to this tutorial once you are all set.
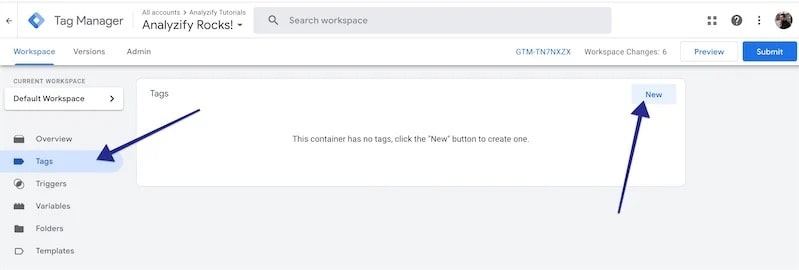
Visit your Google Tag Manager account, click on "Tags" on the left menu and choose "New".
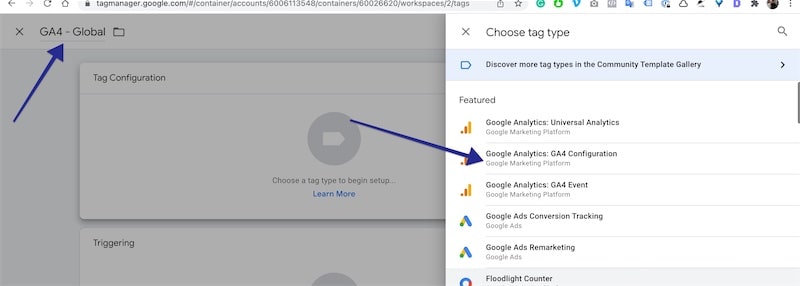
You can skip this step if you already have the GA4 tag up and running on your Shopify store. Name the tag as "GA4 - Global" and choose the "Google Analytics: GA4 Configuration" option.
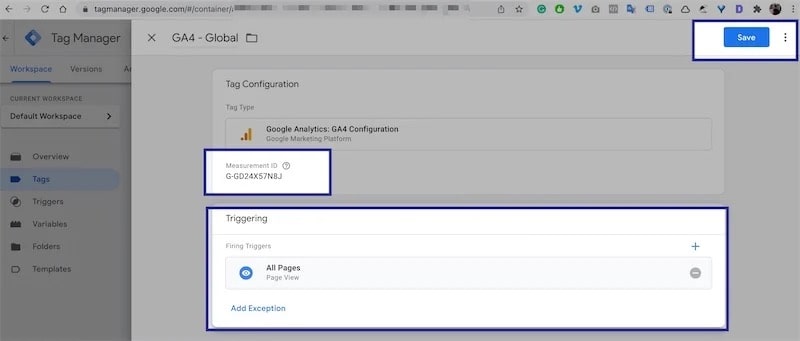
Now type your GA4 measurement ID in the "Measurement ID" section. You can use our related tutorial if you don't know your measurement ID. Choose "All Pages" as your trigger option and SAVE the tag. Now you have the Global GA4 tag all up and running!
Create a new tag on GTM - and name it "GA4 - ProductView" , then choose "Google Analytics: GA4 Event".
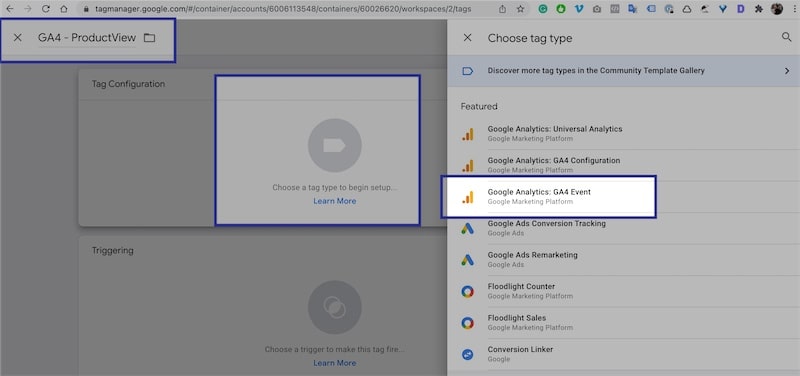
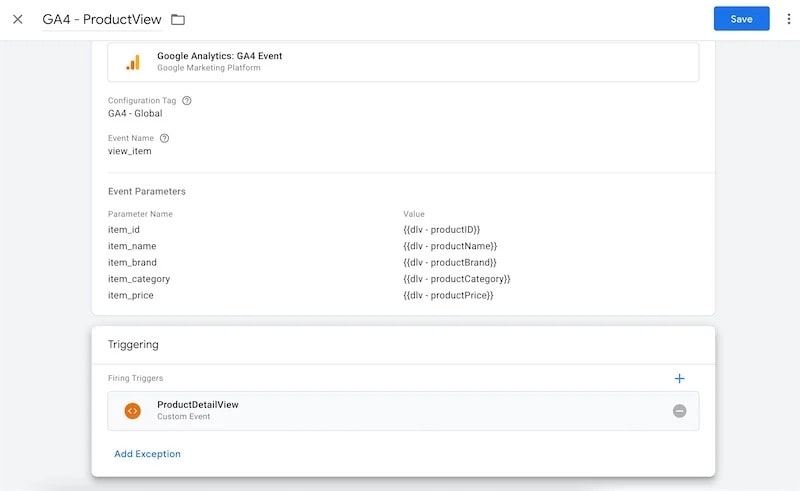
Choose the previous tag you created as "Configuration", name the event as "view_item" and click "Event Parameters".
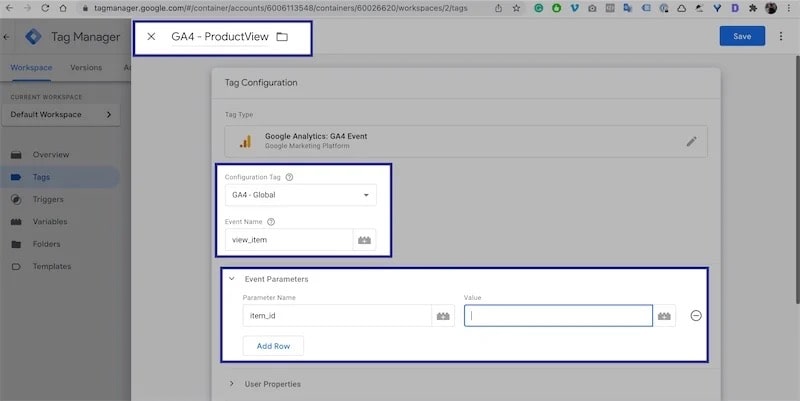
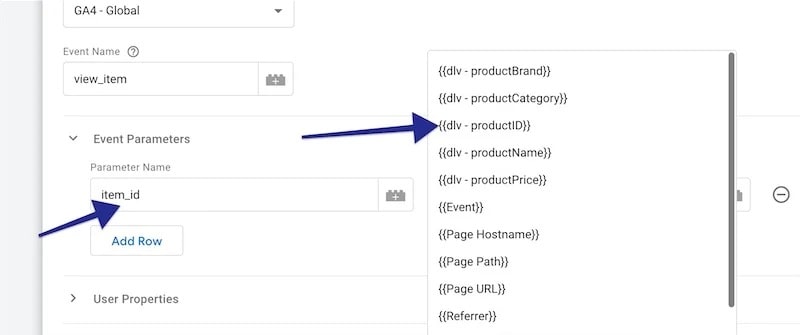
This part is quite sensitive. On the left, type the name of the parameter (item_id), and on the right, choose the data layer variable related to that parameter. When you type "{{", GTM will already suggest you the variables you have created earlier in our previous tutorial.
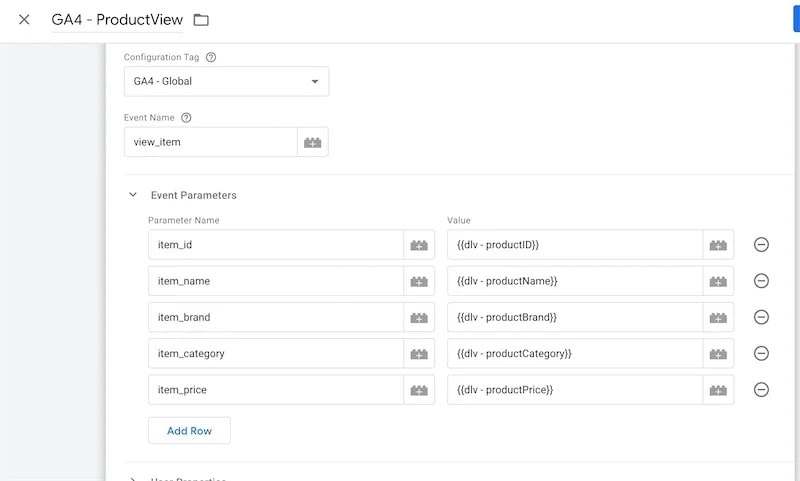
Make sure to add all of these parameters and match them with the related "dlv "variables: item_id , item_name , item_brand , item_category , and item_price . The final result should look like in the screenshot.
Click on "Choose a trigger", then click "ProductDetailView" that we have previously created as a trigger.
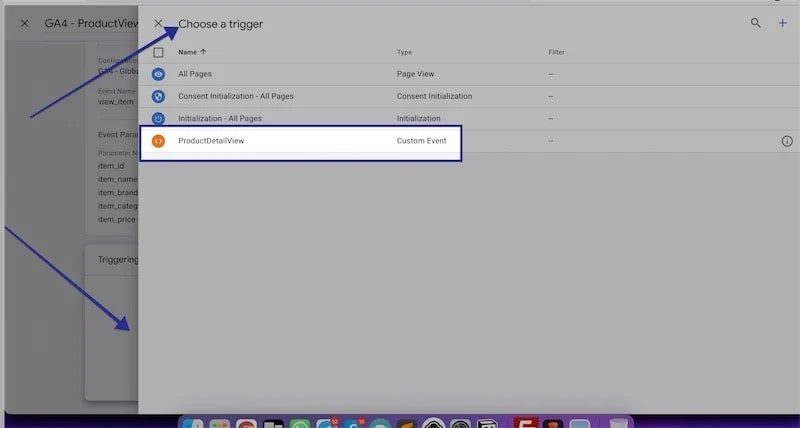
As a final result, your GA4 product view tag should look like in the screenshot. If it does, SAVE and move on to debugging!
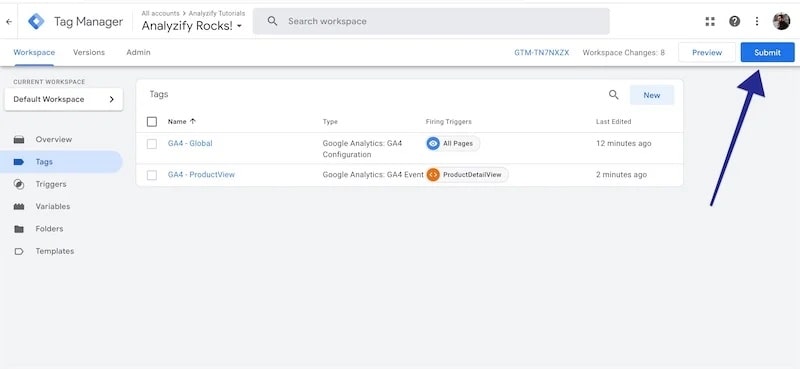
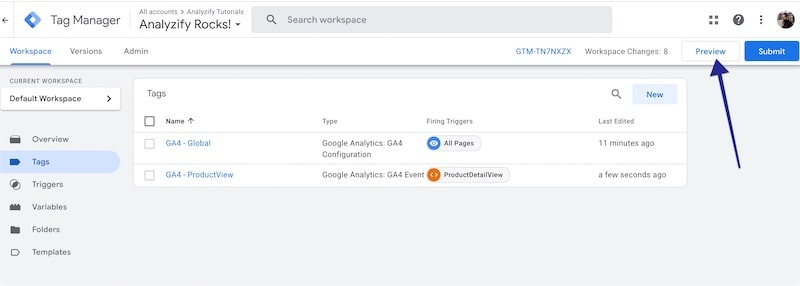
The GTM tags we've created should look like in the screenshot (It's obviously more than ok if you have more tags on your GTM account 🙂 ). Click "Preview" and let's test the result!
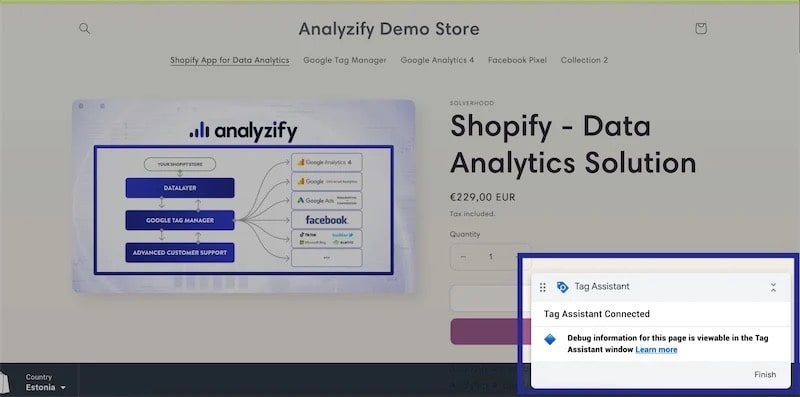
Type your product page URL in the debug window and it should show "Tag Assistant Connnected" at the bottom-right corner. GTM's preview mode can be buggy sometimes - so kindly try again if it doesn't work. Make sure to disable any ad blockers if you have them.
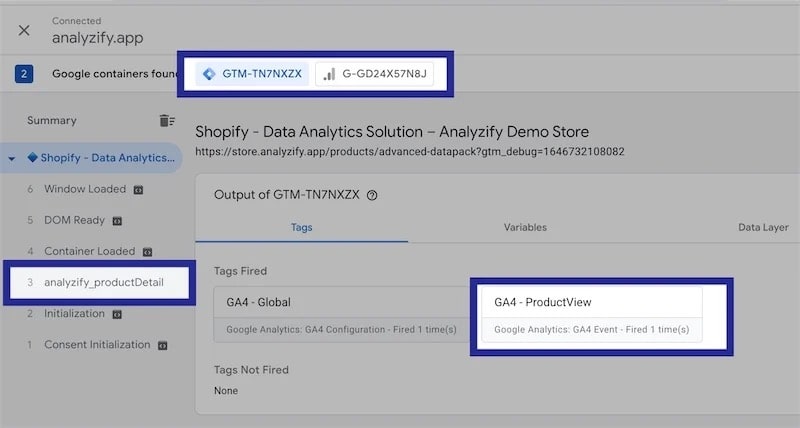
You should be seeing the events on the left bar and tags in the middle of the screen. Click the "analyzify_ProductDetail" event from the left menu. After that, click the "GA4 Product View" event under the "Tags Fired" section.
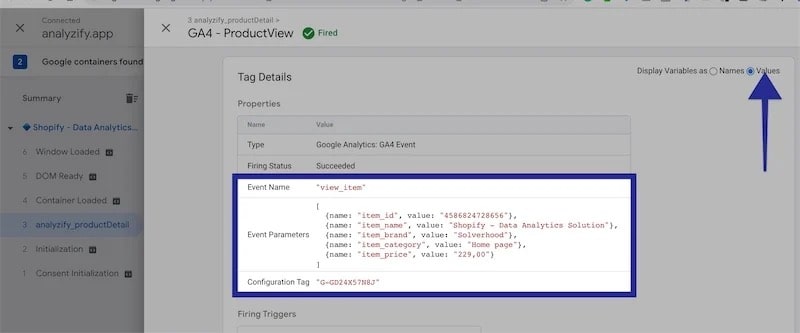
Click "Values" from the top-right corner. You should be seeing all the product-level values that are being passed to GA4 through GTM. That's a success!
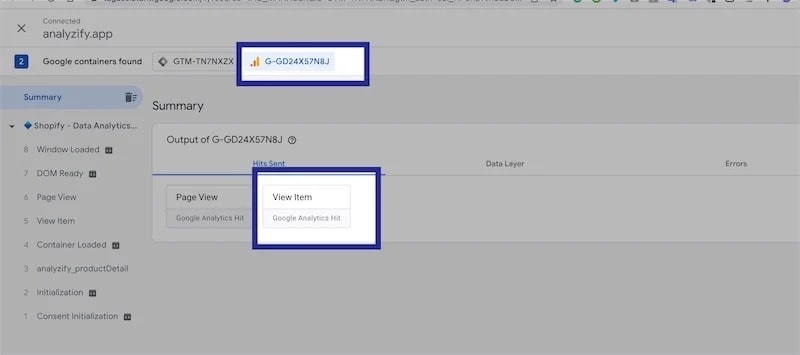
Now click the GA4 measurement ID you see at the top of the preview debug mode. After this, click on the "View Item" event, and let's debug it together.
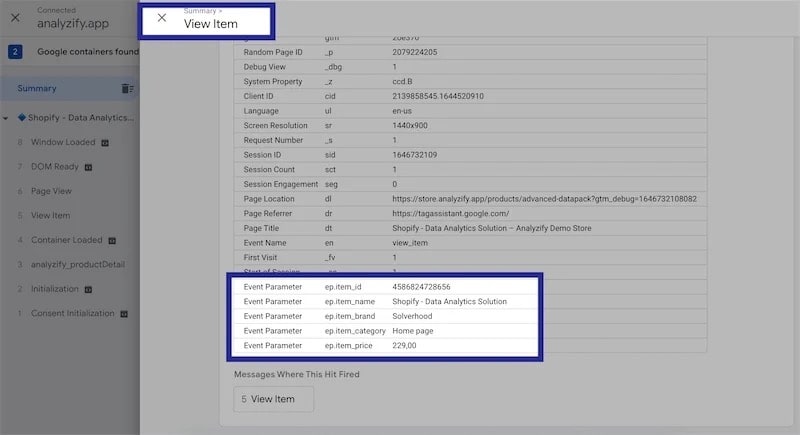
Once you scroll down, you can see the data being passed to GA4 through all these events / variables / triggers that we have set. It looks quite cool, ha 😎?!
If you love debugging, we can also show you around on GA4's debug mode. Visit your GA4 property, click the left menu, and then "DebugView". You might see some data here already because you were running the "Tag Assistant" in the previous steps. We should warn you that it doesn't work properly sometimes - so you might want to download the Google Chrome Debug Extension .
Keep in mind that you should refresh the page after you click the record button, and then you can see the google tags that exist on your website. ( Note: You cannot record Server-Side Tags with the extension.)
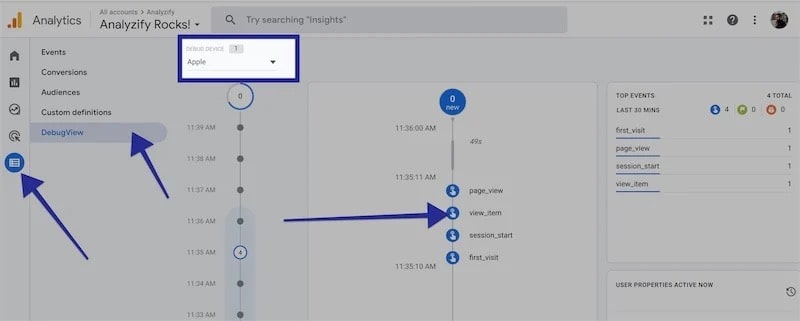
You can click the "view_item event" to see more details and the data going in.
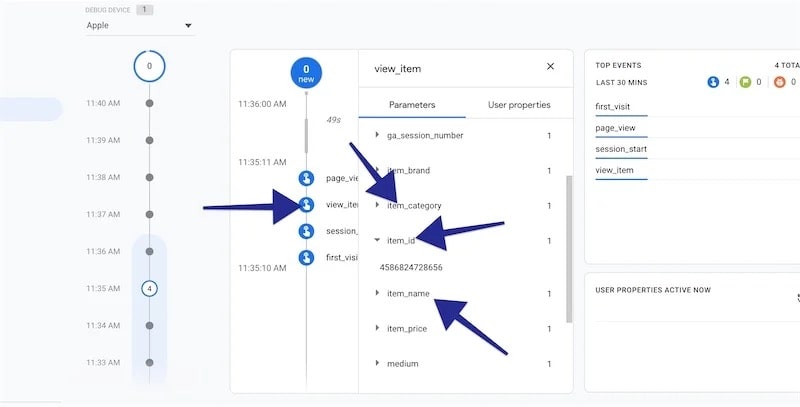
If you have come this far, congrats once again! Don't forget to submit your GTM container. Otherwise, the changes won't be published and will only stay on your browser.
