You do not need to follow this tutorial if you are already an Analyzify client ! It is created solely as an open-source material for merchants who follow Analyzify's free GTM course and tutorials.
Get the most recent Shopify product data layer from our website or our Github Shopify data layer page .
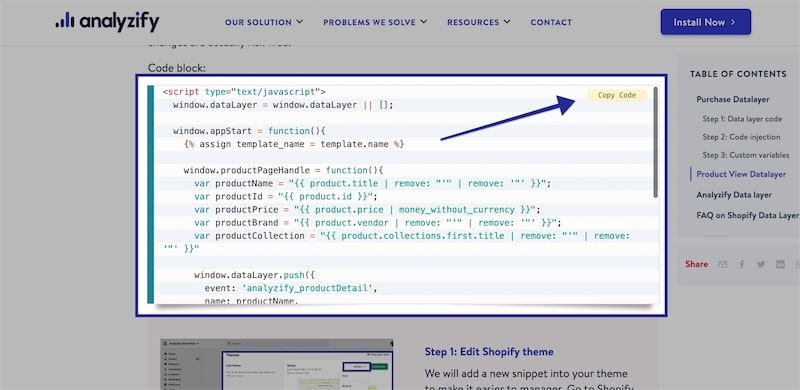
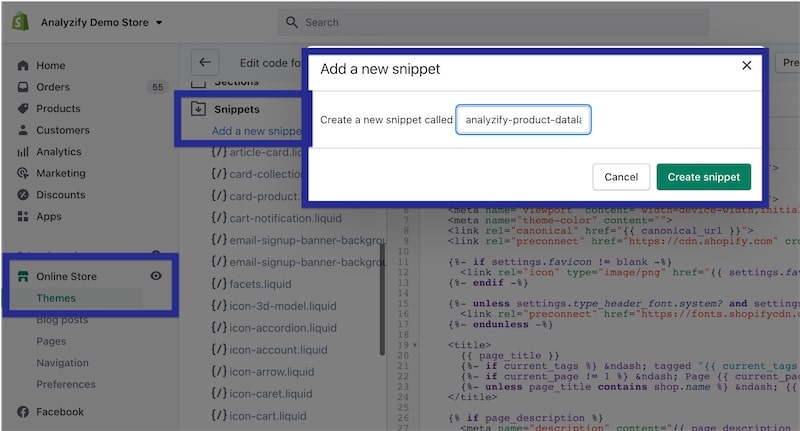
We will create a new snippet on your active Shopify theme and insert the data layer there. Head to your Shopify Admin > "Online Store" > "Themes" > "Choose Your Theme" > "Edit Code", and then scroll down in theme files and click "Add Snippet". Name the snippet as: "analyzify-product-datalayer"
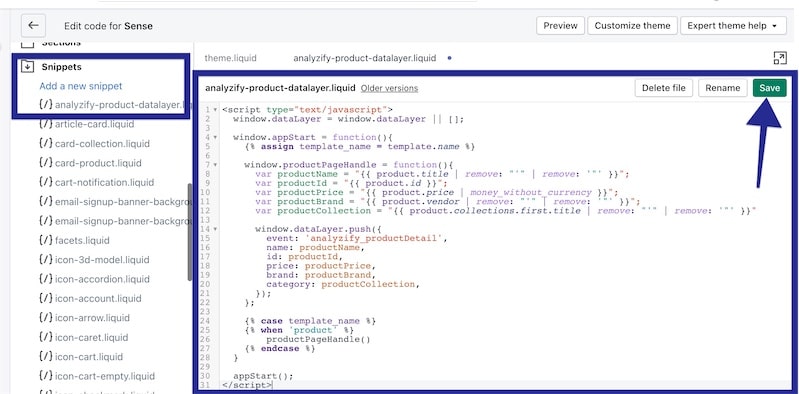
Paste the code that you copied on Step 1 and click "Save".
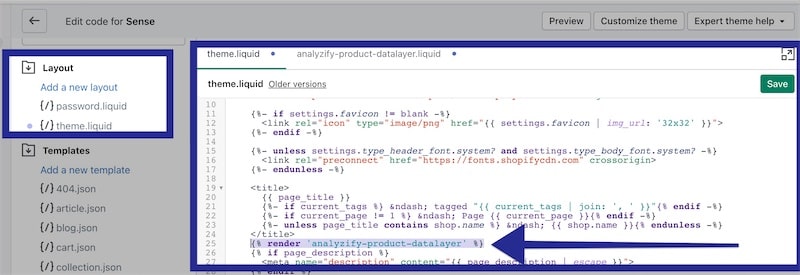
Now go to your "theme.liquid" file and paste the following code right below the closing title tag: {% render 'analyzify-product-datalayer' %} . This will render your product data layer on the product pages.
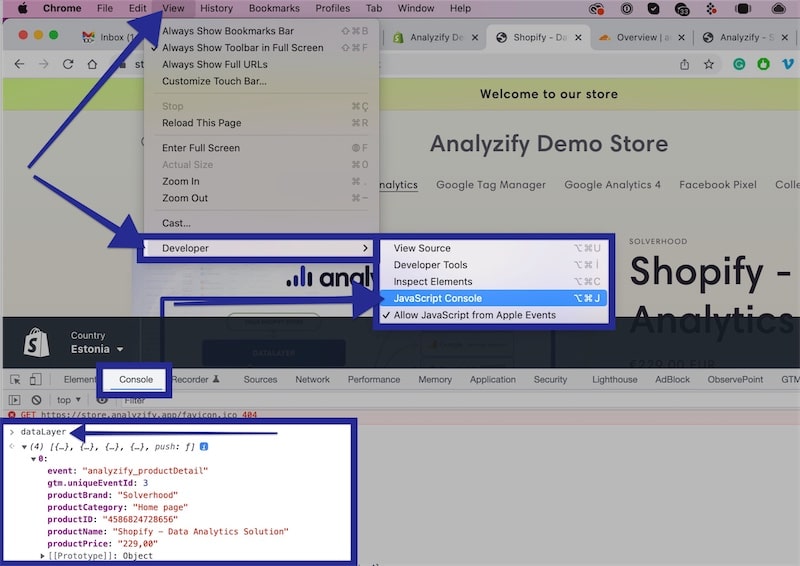
Your product data layer should already be on your Shopify store, running perfectly. Now it's time to debug! Visit your product page on Google Chrome, click "View" at the top menu, then "Developer" > "Javascript Console". Type "datalayer" in the console and hit enter. Then click the little arrow as shown in the screenshot to see the values returned for your search.
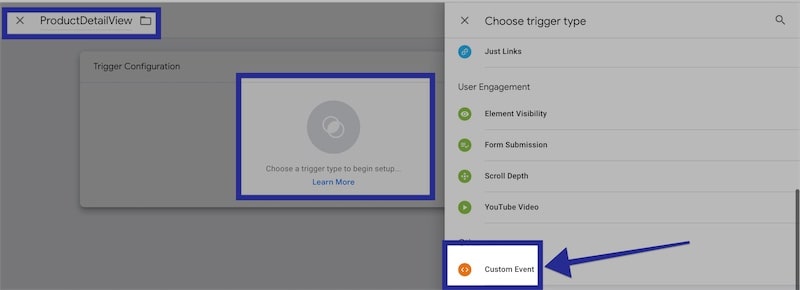
If you have seen the values shown in the previous step, you can now start working on Google Tag Manager. Log in to GTM, click "Triggers" on the left menu, and click "Add New". Name it as "ProductDetailView" (on the top-left corner) and then choose "Custom Event".
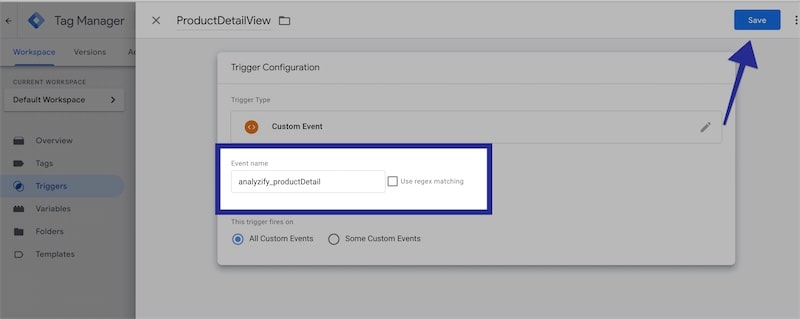
Now add "analyzify_productDetail" in the custom event name field. This name matches with your data layer event name, so don't change it! Click "Save".
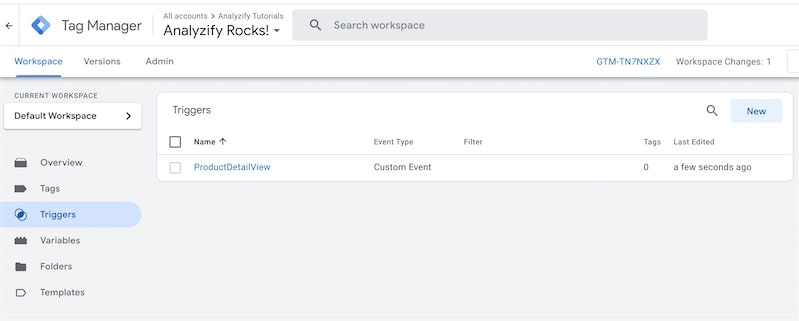
The "Triggers" screen on GTM should look like the screenshot now. Make sure to have the proper data layer name on the custom event.
Now, it is time to add variables. Click "Variables" on the left menu and then click "Add New" located in the "User-Defined Variables" section (2nd section).
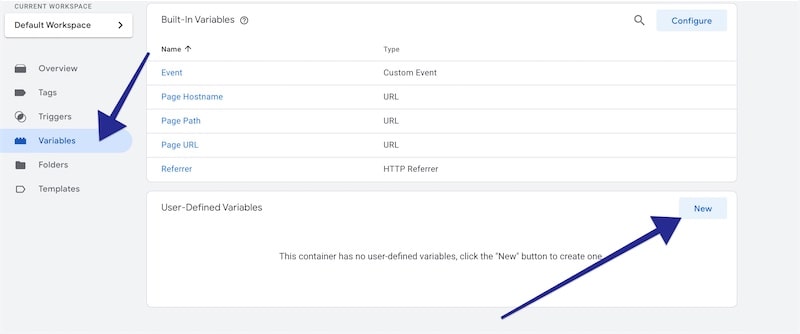
Naming is so important here, so be sure you use the same format! Name your variables in the following form: "dlv - productName" at top-left corner of the screen. As we will keep using the same format, it is important for it to be consistent. Click "Add New" on the center of the screen, and then choose "Data Layer Variables" ("dlv" refers to data layer variables).
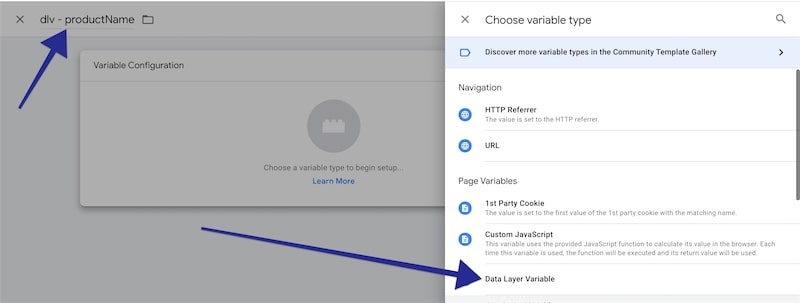
The "dlv - " is just the name in GTM - but the second name means a lot. It should match with our data layers. Use the same format as we did: productName
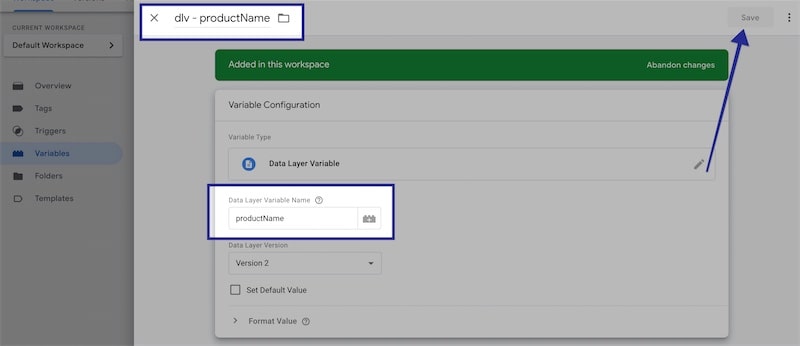
Now, you should create rest of the variables. Here is the formatting: "dlv - productBrand" - "productBrand" / "dlv - productCategory" - "productCategory" / "dlv - productID" - "productID" / "dlv - productPrice" - "productPrice" . Once you add all the variables one by one, the final "Triggers" screen should look like in the screenshot.
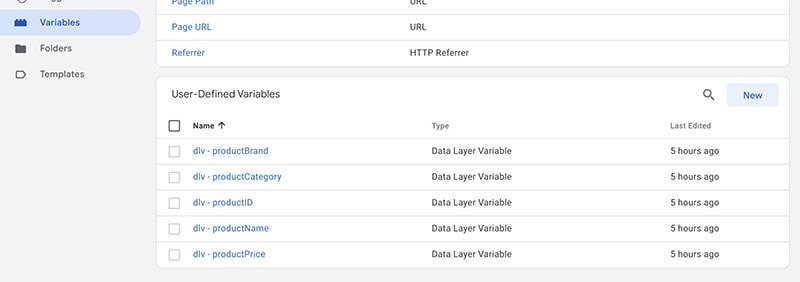
Congratulations: Your Shopify product data layer, Google Tag Manager event, and variables are all ready to use! You can move on to our next tutorial if you want to learn more about how to use the data layer variables, events on GTM, and have GA4 e-commerce reports up and running!
