You can download Pandectes GDPR Compliance from the Shopify App Store and change your app settings through Shopify Admin > “ Apps ” (left-side tab).
Account Actions
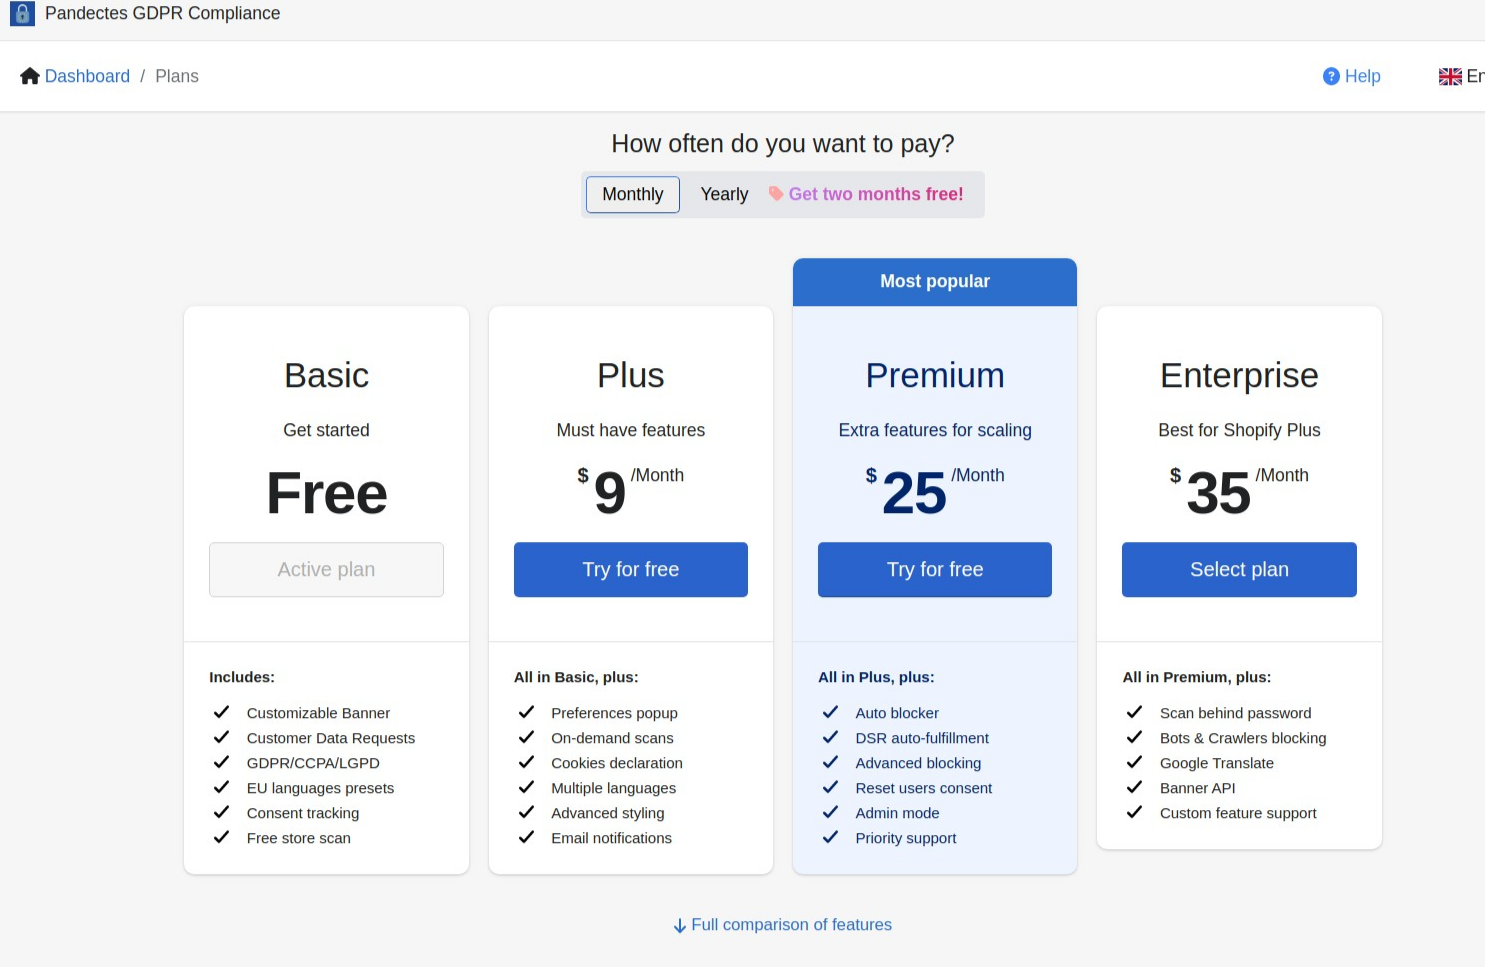
Download the “Pandectes GDPR Compliance” app by Pandectes from Shopify’s App Store and activate it. Make sure you choose a plan above Basic (Plus, Premium, or Enterprise).
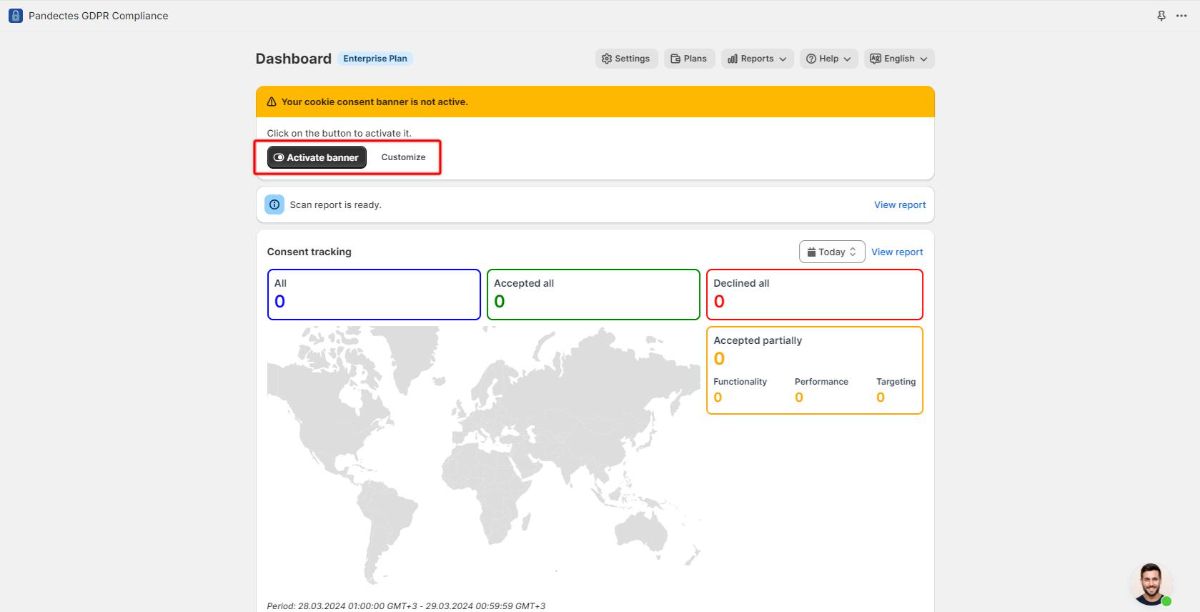
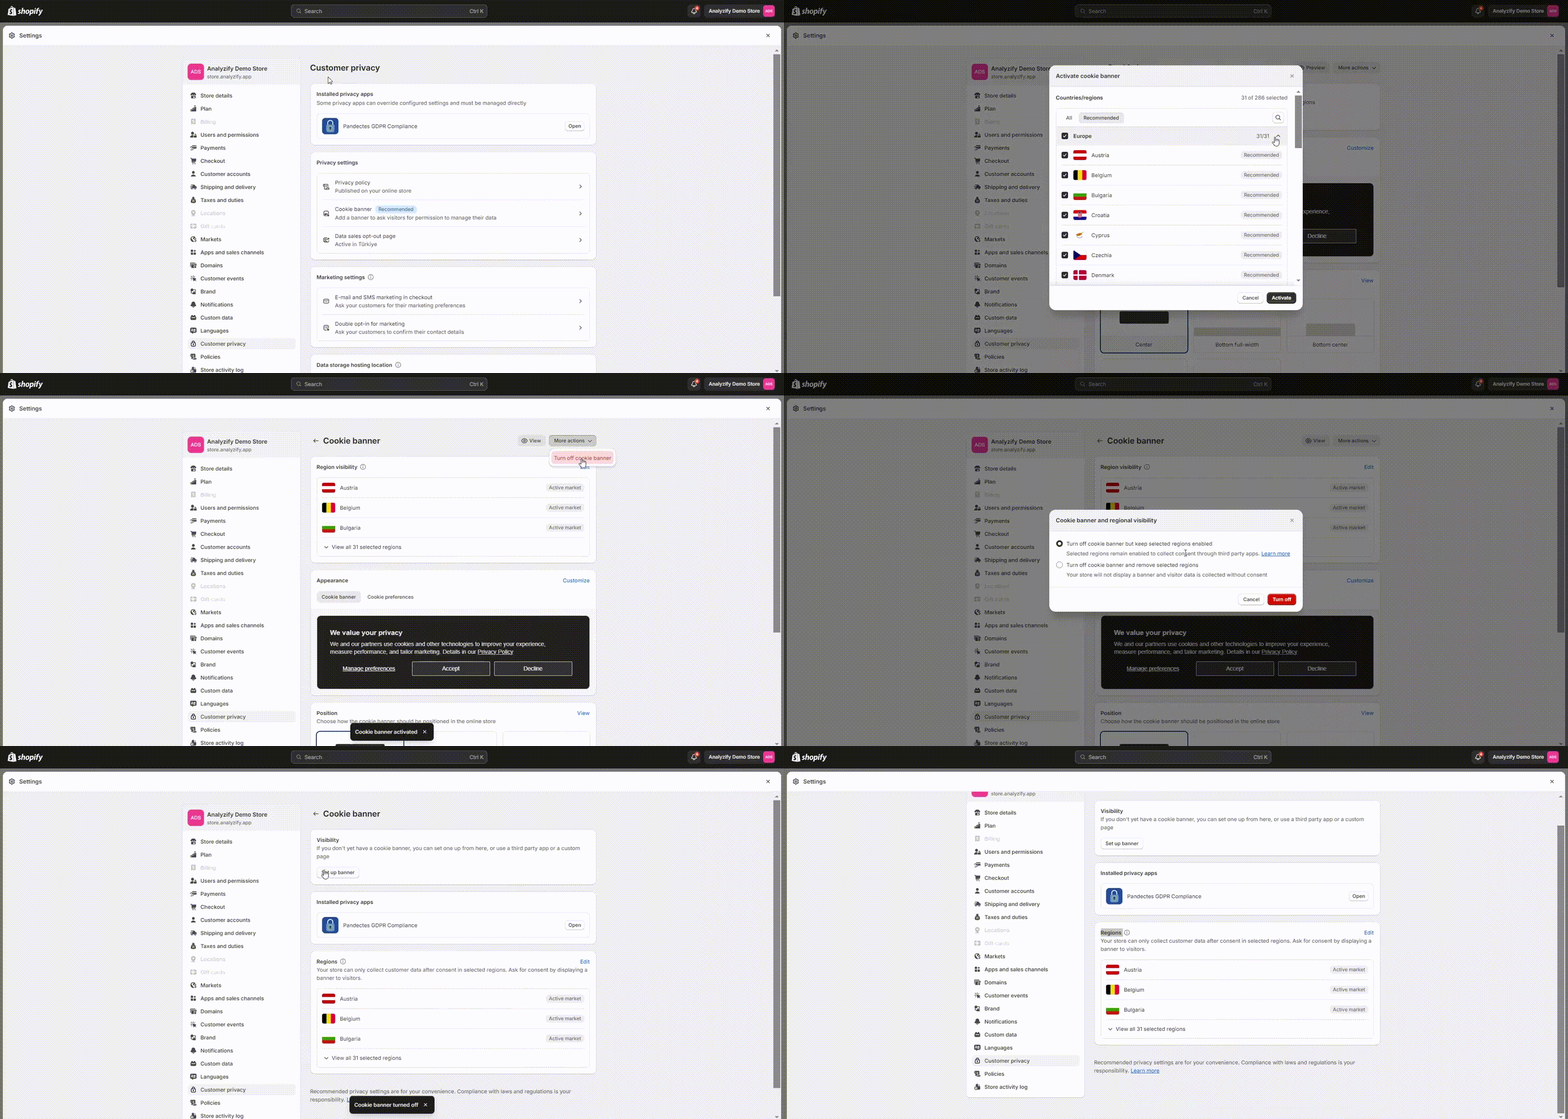
Activate cookie consent banner.
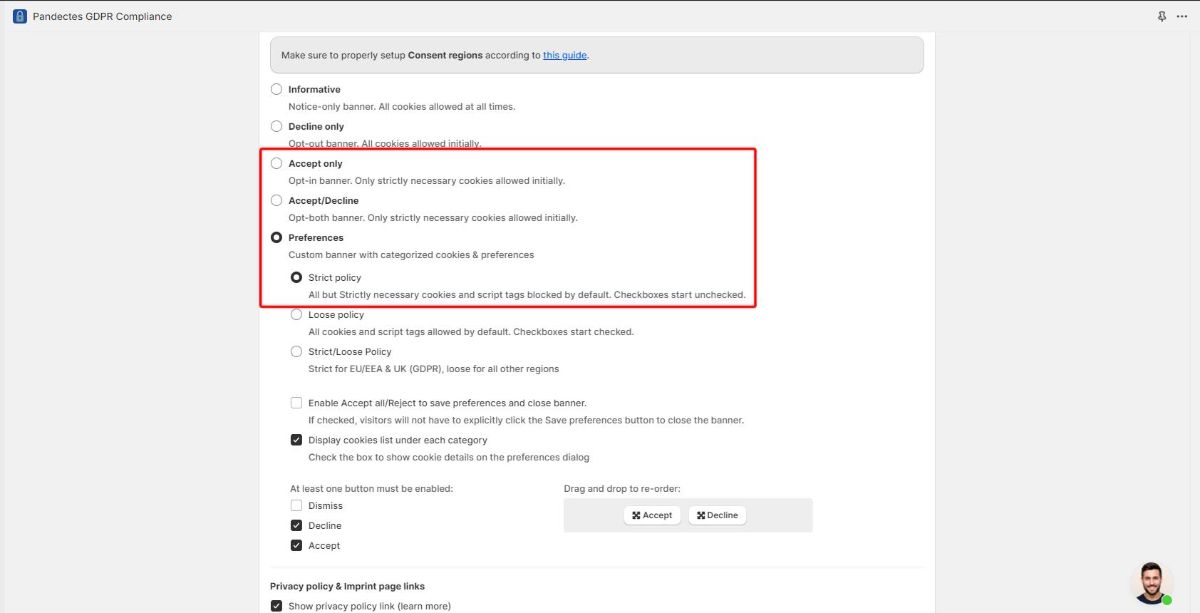
Only select strict options to be GDPR compliant.
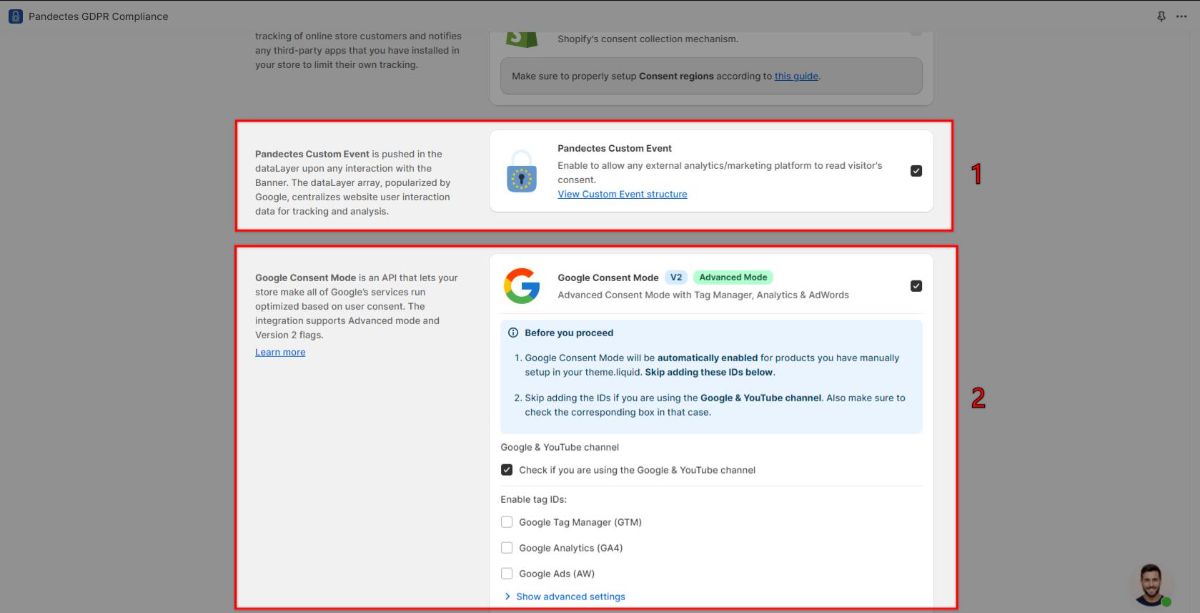
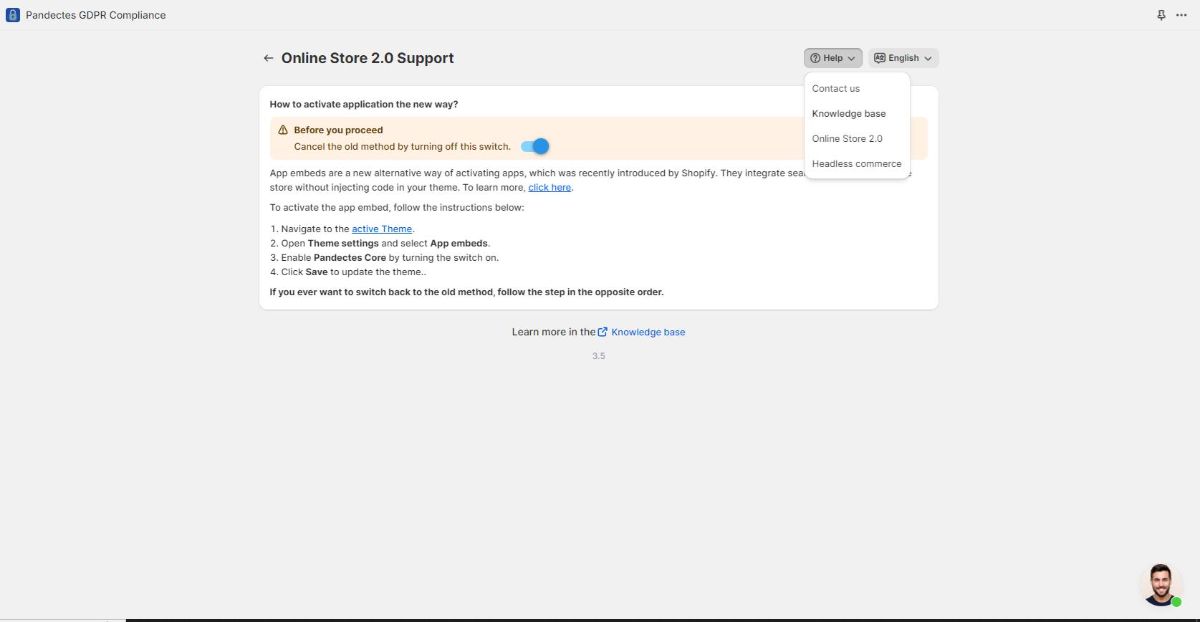
Lastly, head back to the app's dashboard, and click "Online Store 2.0 support" > "View Instructions". Here, make sure that the switch is turned ON.
Warning: There are two types of setups in Pandectes,
- Old version: Pre-Online Store 2.0
- New version: Post-Online 2.0
Although the two versions are basically the same, the only difference is that Online 2.0 doesn't support the Google Consent Mode feature. Thus, Analyzify needs Google Consent Mode to work in compliance with GDPR. That's why we need to have an old version of Pandectes (Pre-Online 2.0).
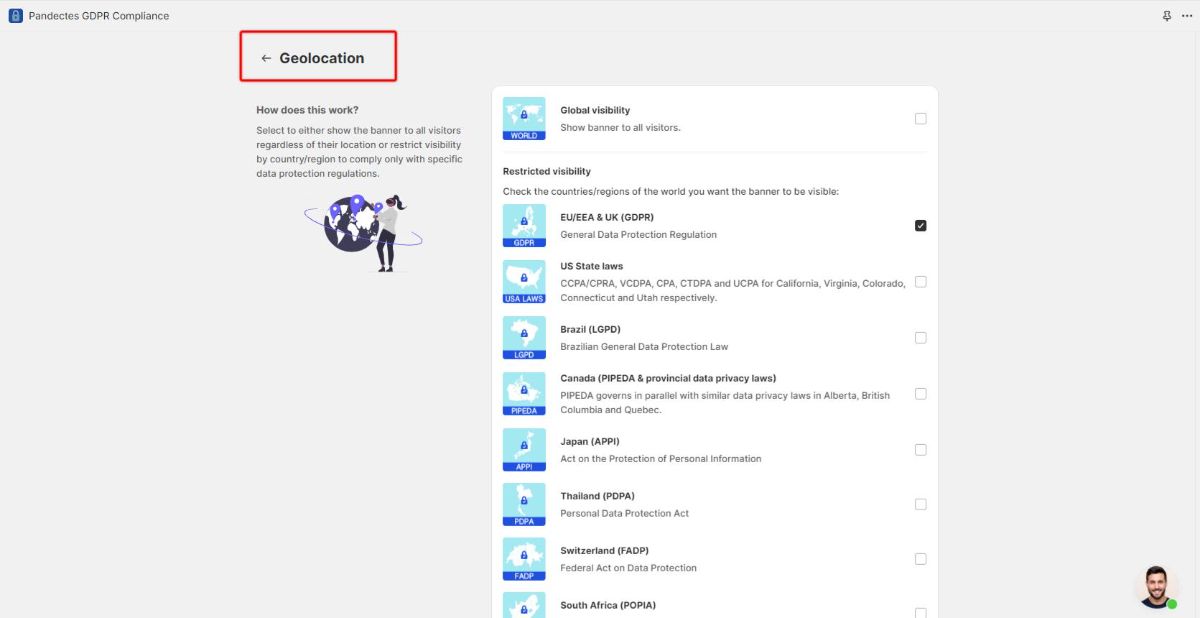
You can select the location where the banner will be shown under the Geolocation.
Theme Actions
If you have set up the Analyzify app before, you need to do some changes to some of the existing codes first. Let’s go over them together.
Head to your Shopify Admin page > “Online Store” > “Themes”. Then, click “Actions” on your current theme, and “Edit code”.
Make sure the “{% include "pandectes-rules" %}” line is in the theme.liquid

For Shopify Plus stores , this action also needs to be done in the “checkout.liquid” file. (If you can’t see the checkout files, then this means they are not activated. Activate them first, then check the code.)

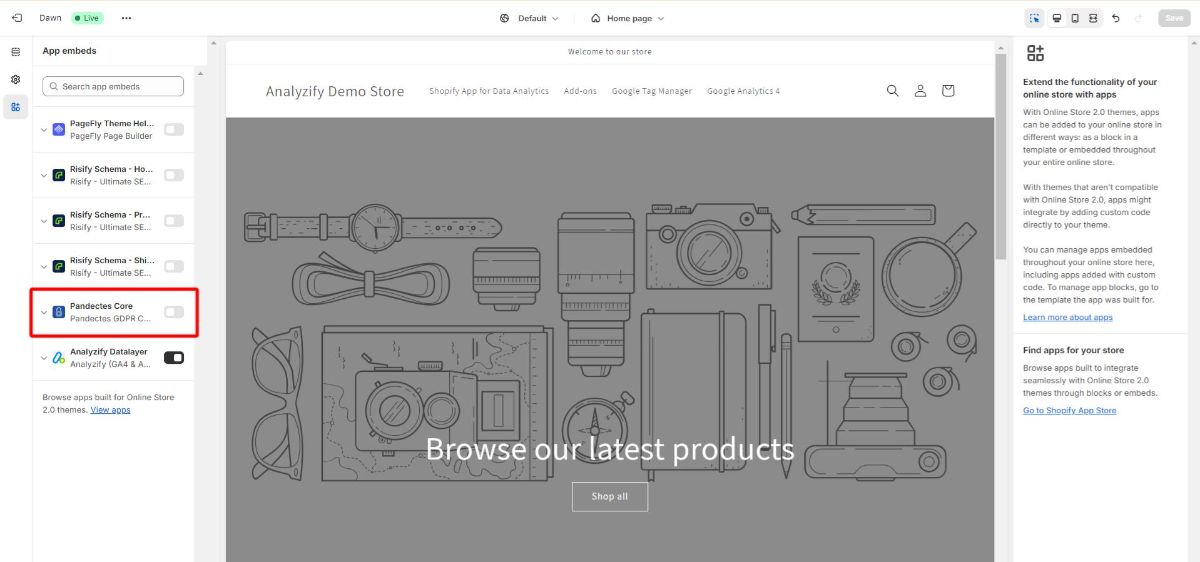
After you are done, head to "Online Store" > "Customize", and click "App Embeds" to make sure that the "Pandectes Core" switch is turned OFF .
Warning: There are two types of setups in Pandectes,
- Old version: Pre-Online Store 2.0
- New version: Post-Online 2.0
Although the two versions are basically the same, the only difference is that Online 2.0 doesn't support the Google Consent Mode feature. Thus, Analyzify needs Google Consent Mode to work in compliance with GDPR. That's why we need to have an old version of Pandectes (Pre-Online 2.0).
Analyzify App Actions
This tutorial provides step-by-step instructions for integrating Pandectes with Analyzify and aligning your website with GDPR requirements.
Open the Analyzify app in Shopify's "Apps" section.

Navigate to the “Settings” menu within the app and choose Consent Mode.
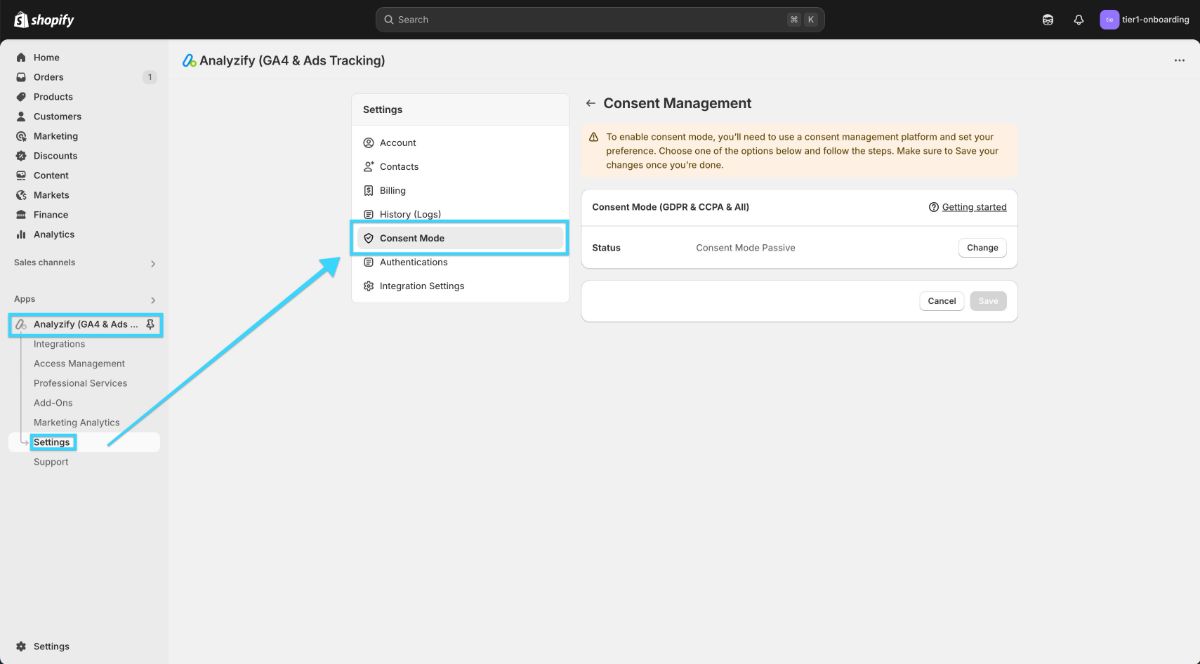
Then, switch the Consent Mode setting from “Passive” to “Active.”
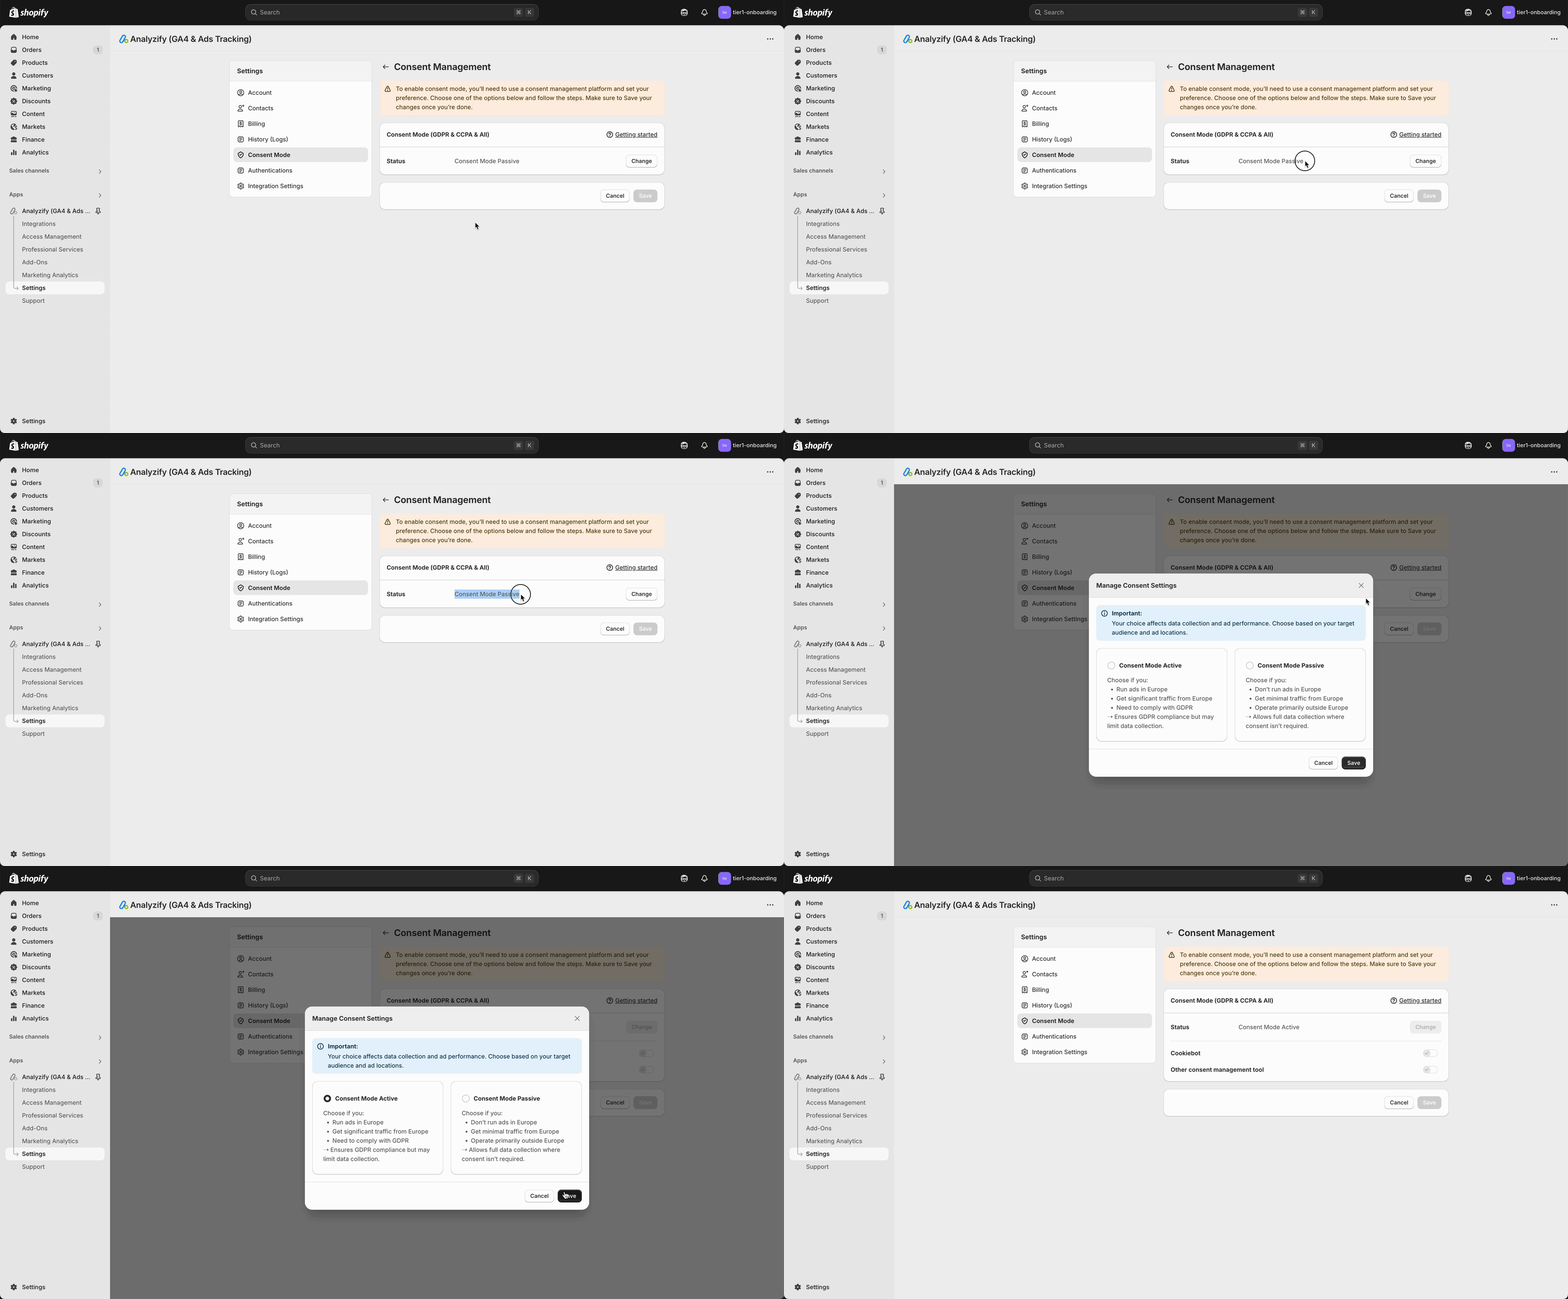
After switching the Consent Mode status:
- Select “Other consent management tool” from the menu.
- Scroll down and choose “Working Properly” to confirm that Google Consent Mode and Shopify Customer Privacy API are functioning correctly with Pandectes.
- Select Pandectes from the dropdown menu and save your changes.
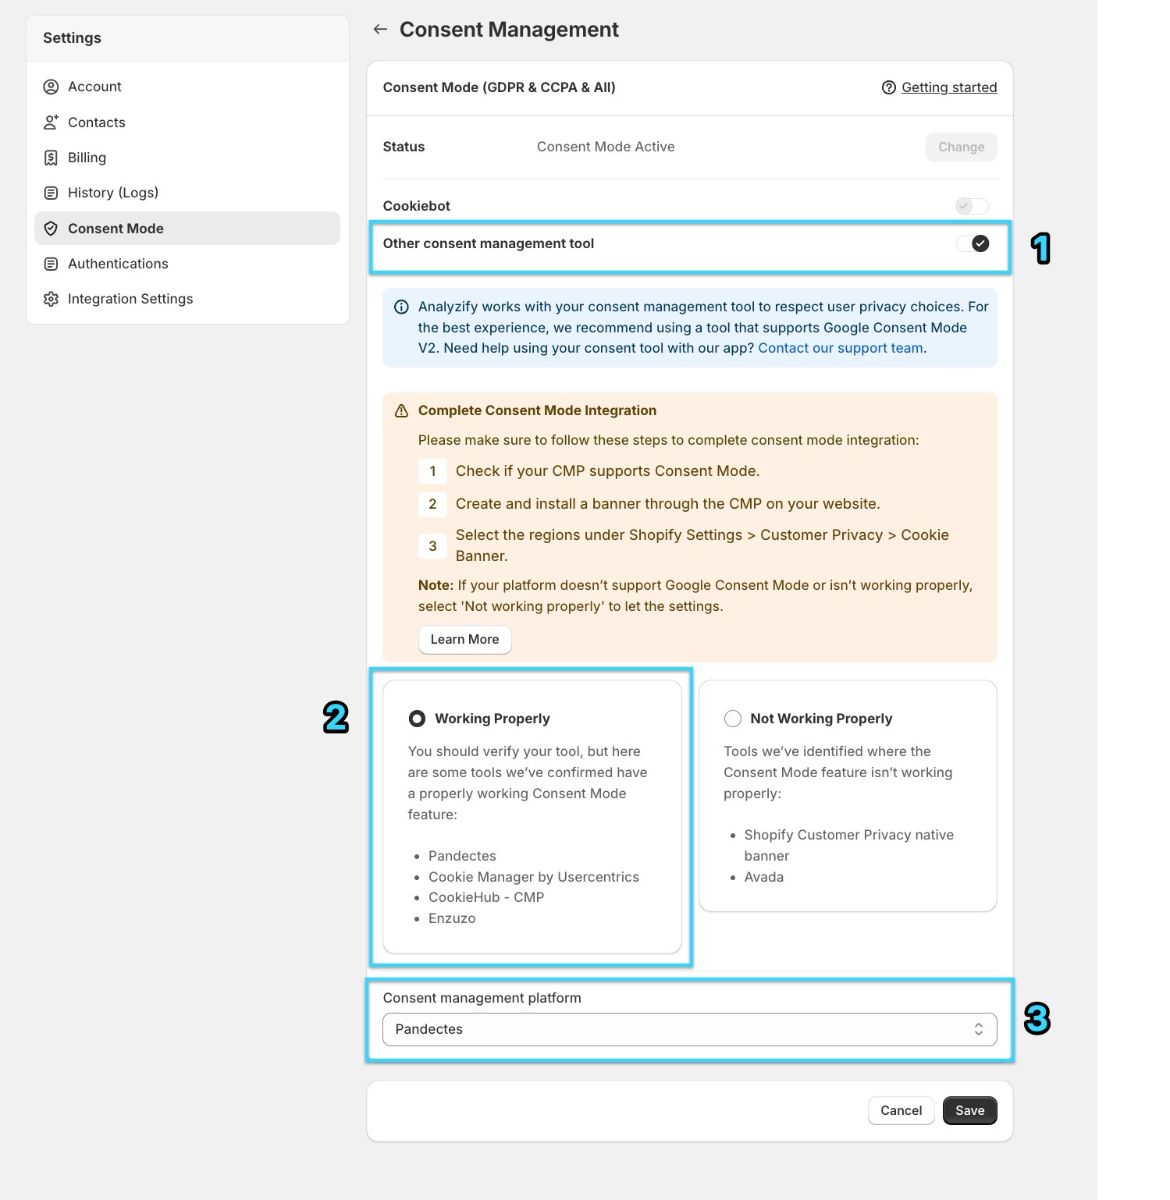
And you're all set! After selecting your Consent Mode settings, simply connect or update your destinations—no further action is needed.
If you're using the Customized (GTM) Integration method, make sure to download the GTM container with Consent Mode (Strict) enabled.
GTM Container Actions
If you are using the Analyzify Customized (GTM) Integration , follow these steps to ensure your Google Tag Manager (GTM) container is set up correctly and GDPR-compliant:
- Download the GDPR-Enabled (Strict) Container
-
- Access the Analyzify app and download the GDPR-enabled container specifically designed for strict compliance.
- Import the GTM Container
-
- Import the downloaded container into your GTM workspace.
- Enable Consent Overview
-
- After importing the container:
-
- Navigate to your GTM workspace and click “Admin” in the menu.
- Select “Container Settings” .
- Scroll to the bottom of the page to the “Additional Settings” section.
- Find and click on “Enable consent overview” .
- Don’t forget to SAVE your changes!
By completing these steps, your GTM container will align with GDPR requirements while functioning seamlessly with Analyzify's advanced data integration.
