Some marketing platforms ask to collect logged-in users’ email data with no hashing (encryption). If that’s the case for you, follow the two-step guide below to learn how you can send unencrypted email data from Analyzify to GTM.
1. Update the Analyzify Liquid File
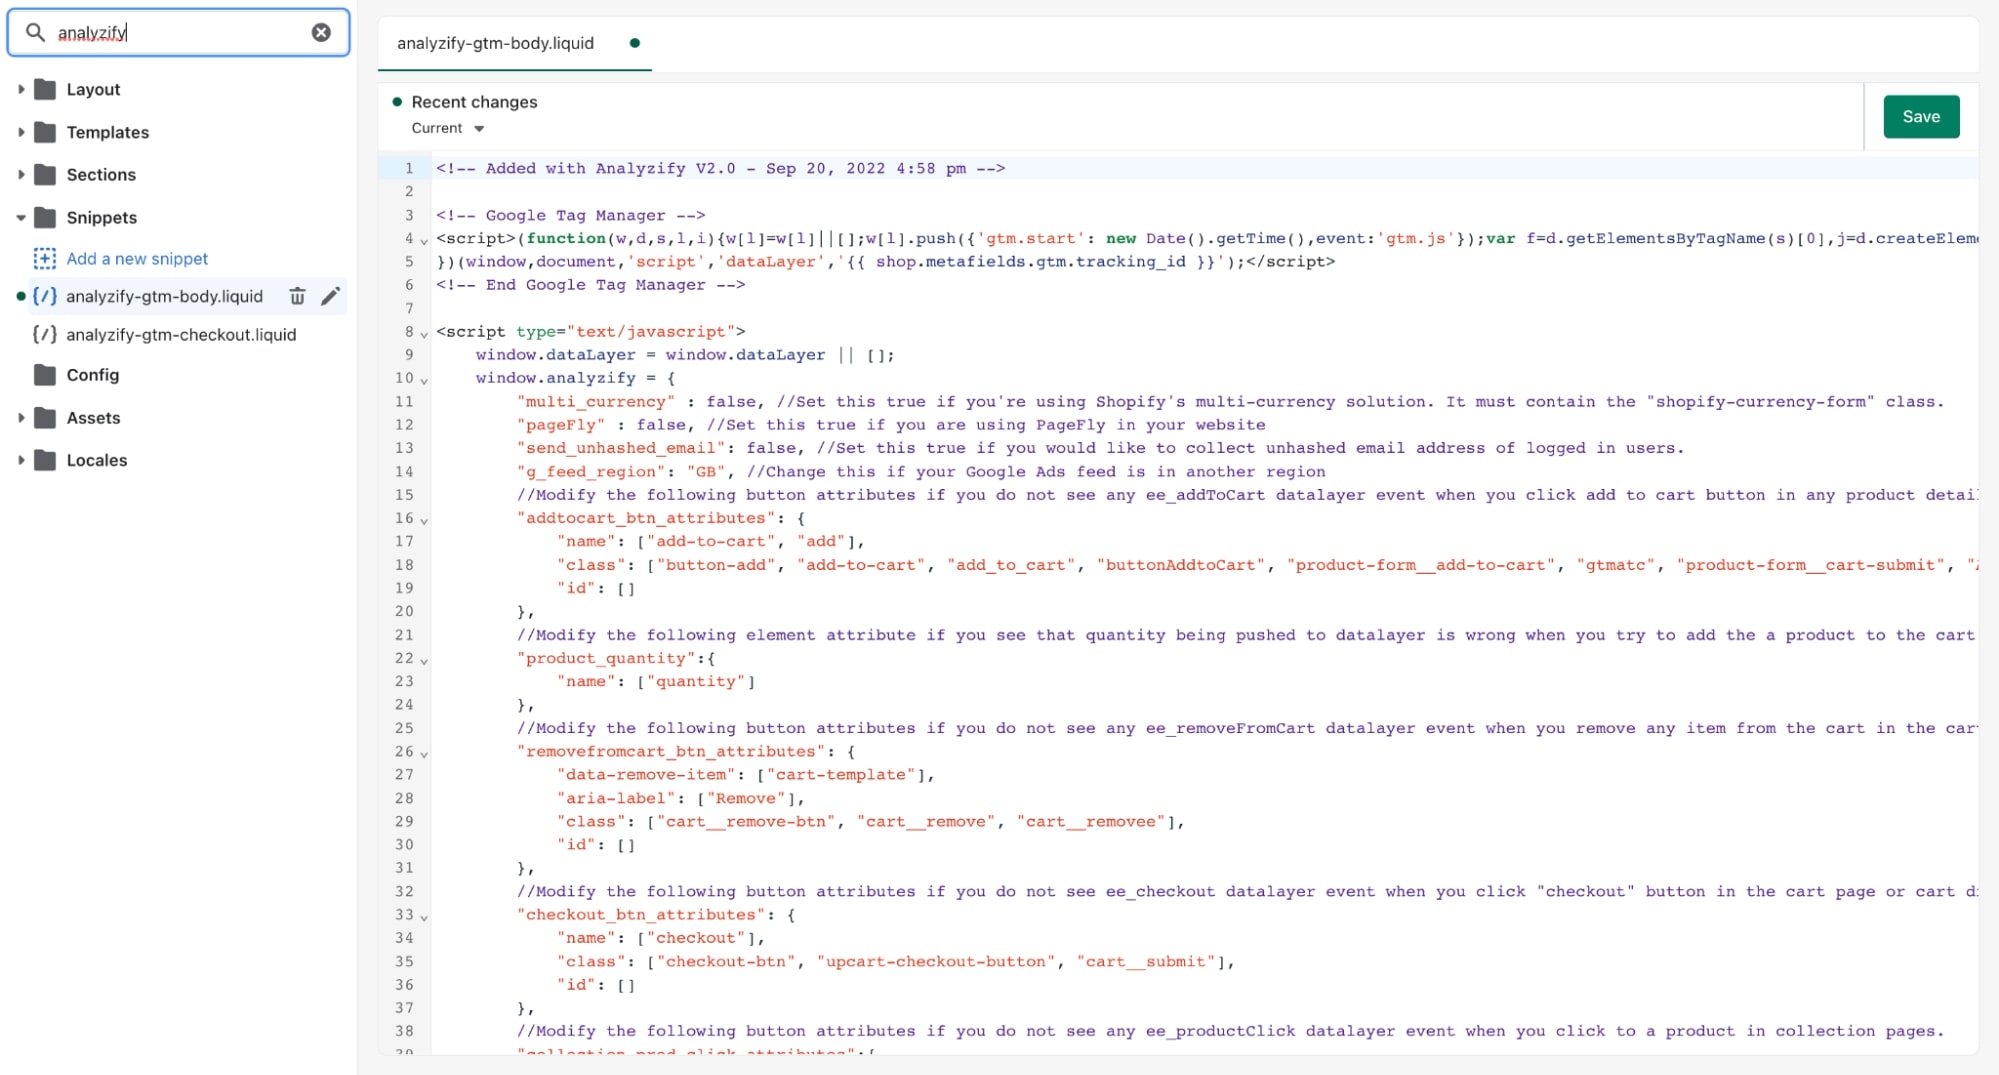
Firstly, log in to your Shopify Admin panel, and navigate to "Online Store" > "Themes". Then, go to the theme in which Analyzify is installed, and open the file " analyzify-gtm-body.liquid" under the “ Snippets ” folder.
Here is a quick snapshot of how it should look like:

If you can't find the file mentioned above, it might mean that Analyzify was not installed in the theme you selected. You can either find the theme you injected Analyzify on or install Analyzify on a new theme you selected.
If you found the file but can’t see the code block, it might mean that you are using an older version of Analyzify. In this case, please have a look at this article to update it.
Search for “ send_unhashed_email ” in the code block.
Once you find it, you will notice that there is either a true or false value right next to it.
The default setting here is false, which means when users log in, the email data is only sent as encrypted (hashed) to analytics and marketing tools.
If you wish to send a logged-in user’s email data to any tool through Google Tag Manager with no encryption, you should change that value to true .
Important: You should not use quotation marks when applying this setting. It should look like the following:
"send_unhashed_email": true, //Set this true if you would like to collect unhashed email address of logged in users.
Click “Save” on the upper right after completing the change.
2. Update the "Order status page"
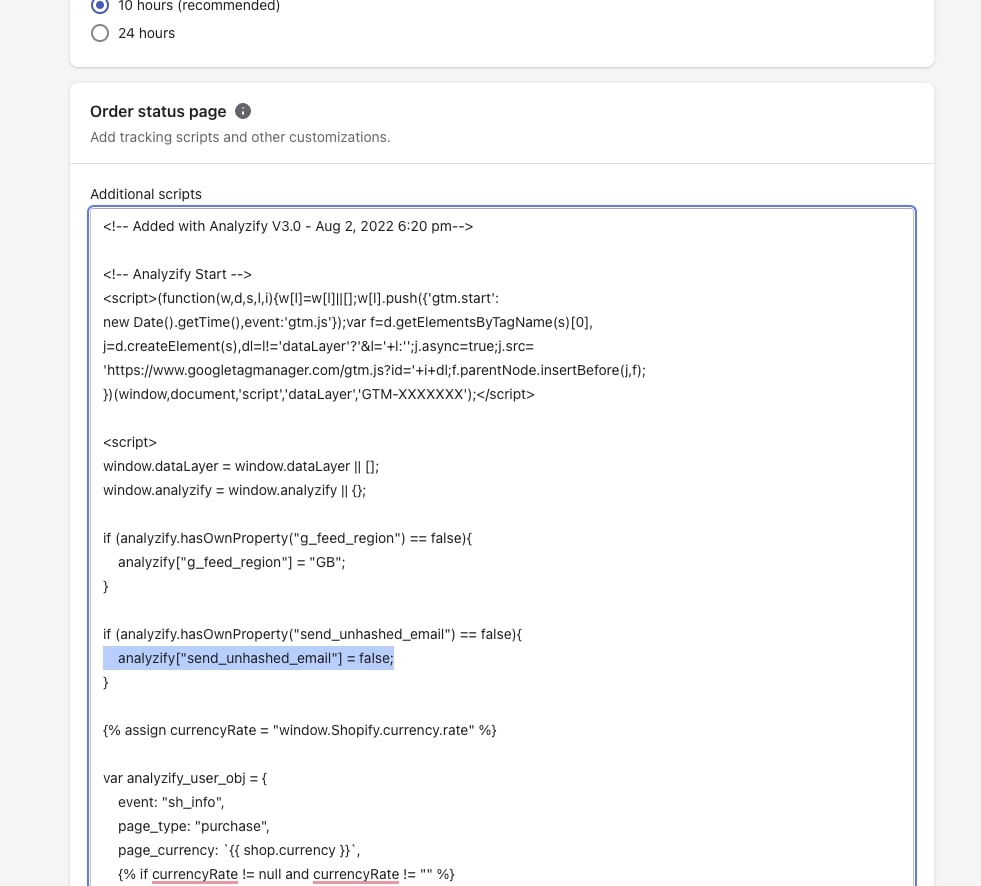
In your Shopify Admin panel, head to "Settings" > "Checkout and accounts" > “Order status page” > "Additional scripts".
Search for “ send_unhashed_email ” in the Analyzify code here, and set it as true .

Important: Again, do not use any quotation marks when entering the values as true or false. Below is the correct format:
analyzify["send_unhashed_email"] = true;
Click “Save” once again on the upper right after completing the change, and you're done! Enjoy your unencrypted email data :)
